
Полная версия
Miss Masala
The Indian Spice Shop was as much a part of my teenage years as George Michael and Clearasil. Our family summer holidays in Europe always ended with a few weeks in London, by which time the words schnitzel, strudel and steak frites sent a chill down my spine. I happily played bag carrier to Mother as she stocked up on masalas, pickle and ready-made chappatis for our short-let central London apartment.
But I was alone now. I went round this monument to the art of subcontinental cooking with a rusty basket. Shelves were stacked high with spices, flour, basmati rice, pickles and lentils. I had a list, but it seemed pointless. Where do I start? Where is Mother when I need her?
The owner came to my rescue. To this guy, a first-time masala buyer sticks out like an unaccompanied man in the M&S lingerie department. He advised me to buy the smallest quantities, as you always use less than you think and the flavour of the spices quickly fades.
With that tiny titbit, I started building my collection. The dried spices needed for Indian cooking come in two types – whole and powdered – and are known as masalas. The same word applies to a mix of spices. And it can, confusingly, also refer to a paste of dried spices with fresh ingredients, such as onions, garlic and ginger. First I bought the very basics – the ingredients used in many of the recipes I had bookmarked to try.
WHOLE SPICES
SIZZLED IN HOT OIL AT THE BEGINNING OF COOKING TO RELEASE SUBTLE AROMAS
Bay leaves (TEJ PATTA) – Woody leaves of the laurel plant.
Black peppercorns (KALI MIRCH) – Pungent whole peppercorns.
Cloves (LAVANG) – Strong and minty flower buds.
Green cardamoms (ELAICHI) – Fragrant seedpods.
Cinnamon (DALCHINI) sticks – Sharp and sweet bark of a tree.
Cumin (JEERA) – Warm and earthy seeds.
Red chillies (LAL MIRCH) – Long fiery red chillies.
POWDERED SPICES
ADDED LATER TO INJECT THE DISH WITH INTENSE FLAVOURS
Coriander (DHANIYA) – Warm and lemony powdered seeds.
Cumin (JEERA) – Earthy powdered seeds.
Turmeric (HALDI) – Bitter and luminous-yellow powdered root.
Chilli (LAL MIRCH) – Powdered fiery chillies.
Garam masala – A blend of the whole spices (see above), roasted and powdered.
The initial stash was going to keep me going for some time, according to Masala Man. So next I stocked up on the fresh ingredients, used in between adding the whole and powdered spices. These perishable ingredients would clearly need to be purchased more frequently, at my local supermarket for convenience.
FRESH INGREDIENTS
Root ginger / Garlic / Green finger chillies
Bunch of coriander leaves / Bag of curry leaves
Onions / Greek yoghurt
MISS MASALA HAD ARRIVED. And Keema Mattar was my first recipe of choice. Highly satisfying with some pitta bread, this also appealed because it needed no more skill than a deft hand to jab mince with a wooden spoon. The long list of ingredients had all been duly acquired.
Gripped with feverish excitement, I set the oil to heat and quickly chucked in the whole spices. Next, I threw in the onions, ginger and garlic and stirred gently, waiting for them to brown. They didn’t for ages. So I lost patience and added everything else. The result was a crunchy onion and mince concoction that was as far away from India as I was from opening my own restaurant.
I had followed every instruction (almost) to the letter. So I couldn’t have been very far from the real thing. Down but not out, I tried the recipe again the following week. And this time, it came out just the way I remembered from our weekday dinners at home.
It seemed that the most basic ingredient for Indian cooking was patience. Creating the perfect kebab was never going to be as straightforward as opening a bag of ready-prepared salad. Or as quick. In fact, the word ‘quick’, when applied to Indian cooking, is truly relative. Considering some recipes take up to a day of soaking, chopping and stirring, half an hour to make a mixed vegetable curry is essentially fast food.
The secret of cooking the food just right lies in timing. Indian cookbooks are full of vague instructions like ‘when the onions are cooked’ or ‘when the masalas are ready’. Knowing when the moment is right is essential, because ingredients are added in stages. A group of spices is added only when the previous lot has changed hue, aroma or texture. But I had to work out for myself when the dish was ready for the next addition, because no one ever explains it.
I learnt with the keema that I should have waited until the oil was hot before starting to cook. Next, added any whole spices like cloves, cinnamon and bay leaves. As they started sizzling, I should have tossed in the chopped onions and fried them until golden brown. It was my job to watch the lot. Which sounds exhausting, but actually is easy to get the hang of. After a few goes, I was on autopilot.
Keema Mattar
Minced meat with peas and fresh coriander

My favourite Pakistani restaurant has the dubious strap line ‘probably the best tandoori restaurant in London’. I once asked the waiter about the ingredients in their Keema Mattar. Beef mince, he replied, helpfully.
Beef isn’t eaten by Hindus in India. Only the really bad ones like me. After years of blood, sweat and tears (I do like a bit of drama), I finally came up with a recipe that uses more than just mince and less than a page of ingredients. It’s as simple to make as spaghetti Bolognese and chilli con carne but a happy respite from both. You could just as easily use lamb mince for this moist but curry-free dish.
Feeds 4
1 large onion
2.5cm (1in) root ginger
2 garlic cloves
1 tbsp oil
whole spices
2 bay leaves
8 cloves
8 cardamoms
5cm (2in) cinnamon stick
10 whole black peppercorns
1 tsp coriander powder
1 tsp cumin powder
1/2 tsp turmeric powder
1/2 tsp chilli powder
4 tbsp tomato purée
2 fresh green finger chillies
4 tbsp natural Greek yoghurt
500g (1lb 2oz) lean minced beef or lamb
1 mug of frozen peas
1/2 tsp garam masala
25g (1oz) fresh coriander, roughly chopped
salt
1. Peel and finely chop the onion, ginger and garlic. Pour the oil into a medium pan set over a high heat. When the oil is hot, add the whole spices. Within seconds they will start spluttering, and you’ll be able to smell their heady aromas.
2. Now add the onion and fry for 5 minutes until it starts to go a pale gold. Stir in the ginger and garlic, and fry for a further 5 minutes until the masala mixture caramelises, turning a golden brown.
3. Next add all the powdered spices bar the garam masala. Fry them for about 5 minutes, stirring constantly with a wooden spoon. If the spices get stuck to the bottom of the pan, add a tablespoon of hot water to release them while stirring and scraping the base of the pan with the spoon.
4. Then stir in the tomato purée and fry for a further minute. Lower the heat and simmer for 5–10 minutes until you can see the oil beginning to rise to the surface of the mixture. Meanwhile, roughly chop the green finger chillies.
5. Turn the heat up high once again, and add the yoghurt, chillies and mince. Stir like a maniac so that the meat browns evenly and there are no large lumps in it. Then add half a mug of hot water and leave to simmer, uncovered, for 15 minutes.
6. Finally, add the peas and simmer for about 5 minutes until they’re cooked. Add salt to taste, and stir in the garam masala and chopped coriander to finish.
7. Keema is divine served with toasted pitta bread or hot rotis, along with some mango pickle and a dollop of creamy, natural Greek yoghurt.
WITH ALL INDIAN RECIPES THERE ARE SOME OBVIOUS SIGNS FOR WHEN TO MOVE ON TO THE NEXT STAGE OF COOKING:


AN IMPORTANT TRICK, I LEARNT, is to whack the heat up high and stir like a maniac to prevent the spices from getting stuck to the bottom of the pan and burning. As I explained to my uninitiated sister: don’t make love to it, fuck it! If the spices do get stuck on the bottom of the pan, just add a couple of tablespoons of hot water from the kettle and scrape them off.
Initially this meant giving each pan of food my undivided attention, a boring task that is broadly comparable to watching cheap nail colour dry. It’s not difficult, but until you get the hang of it you have to pay attention and avoid getting distracted. With this revelation I embraced my next Indian cooking attempt – the Mattar Paneer. The stakes were getting higher. This is a classic north Indian dish made with Indian cheese and peas. To destroy this recipe would be tantamount to committing curry hara-kiri.
True to form, I dived straight into the recipe. But midway through the frying-onions stage, extreme boredom set in. I wandered off to pour myself a glass of wine. Then fired off an impassioned e-mail to a friend on the idiocy of men. By which time, the onions had started to burn, bringing the attempt to an untimely and tragic conclusion.
Of course, there is no shame in burnt curry. As with many things in life, like perms and financial journalism, it is better to have tried and failed to cook Indian food than to have never tried at all.
Mattar Paneer
Curried Indian cheese with tomatoes and peas
Paneer is Indian cheese – a firm favourite with vegetarian Indians and yours truly. Cooked paneer has the texture of tofu and the moreishness of good-quality buffalo mozzarella. Stone cold, however, it has all the allure of cubed polystyrene.
Luckily, paneer is only served steaming hot as chunks of loveliness nestled amidst a melange of spiced ingredients. I tried making it from scratch once, with disappointing results. Buy it ready-made from the hard cheese section of your local supermarket and focus your efforts on the recipe instead.
Feeds 4 Vegetarian
1 large onion
4cm (11/2in) root ginger
4 garlic cloves
3 medium tomatoes
250g (9oz) paneer
2 tbsp oil
1 tsp kasoori methi (optional)
2 tsp coriander powder
1 tsp cumin powder
1/2 tsp turmeric powder
1/2 tsp chilli powder
3 tbsp natural Greek yoghurt
1 mug of frozen peas
1/2 tsp garam masala
salt
1. Peel and finely chop the onion, ginger, garlic and tomatoes and cut the paneer into bite-sized pieces. The best way to do this is to first halve and then quarter the block of cheese lengthways, then cut through the width at even intervals.
2. Pour 1 tablespoon of the oil into a large frying pan set over a high heat. When the oil is hot, fry the paneer cubes until golden for 1 minute on one side and a further minute on the opposite side. This will prevent the cheese from crumbling later. Remove the pieces with a slotted spoon and set aside.
3. Leave the kasoori methi (if using) to soak in 2 tablespoons of hot water. Next pour the remaining oil into the same frying pan. When the oil is hot, stir in the onion, ginger and garlic and fry for about 10 minutes until pale golden. Now stir in all the powdered spices apart from the garam masala, add the tomatoes and fry for another 5 minutes, jabbing the masala mixture with your wooden spoon to help it disintegrate and form a thick paste. You may need to add a little hot water to prevent the mixture from sticking to the bottom of the pan.
4. Lower the heat to a simmer, add the yoghurt and stir it in well. Now wait for the oil to ooze through little pores in the masala mixture, stirring from time to time until this happens. When it does, after about 2 minutes, mix in the peas and half a mug of hot water. Cook for another 3 minutes, then season with salt to taste and chuck in the garam masala, paneer chunks and the kasoori methi (if using) along with its water.
5. Add another half mug of hot water to cook the whole lot for 5 minutes. Once oil floats to the top, serve the Mattar Paneer hot with some warm ready-made naans and creamy natural Greek yoghurt.

INTRODUCING KASOORI METHI
Kasoori methi, dried bitter fenugreek leaves, works miracles to balance the sweetness of curried dishes. It’s sold alongside other dried spices and is at its finest first soaked in a tablespoon of hot water and then added along with the liquid to the dish towards the end of cooking.
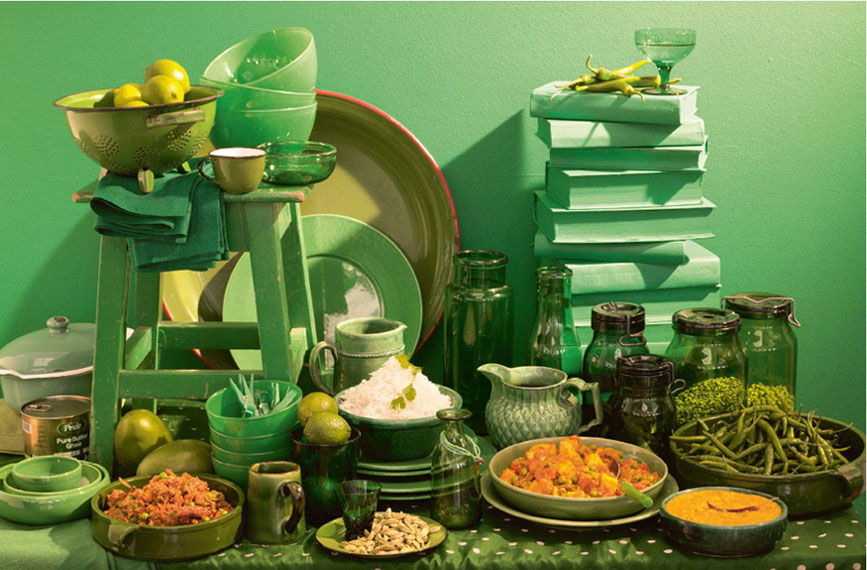
Keema Mattar
Perfectly Fluffy Basmati
Mattar Paneer
Berry Dal
MY SECOND ATTEMPT AT MATTAR PANEER was a triumph – a culinary phoenix that rose, quite literally, from the ashes. Bright-eyed and optimistic, I carried on valiantly. Climbing at work to the heady heights of PR manager and moving to a modern apartment block, albeit in grim Elephant and Castle. And gaining enough confidence to add more spices to my collection. Mustard seeds, dried mango powder, asafoetida and tamarind paste made it to my bulging ‘Indian’ kitchen shelf. Familiar dishes from my childhood were tried from the NIAW Cookbook, with mixed results.
But I felt empowered. Emboldened. Excited. I sealed my fate by having a go at the age-old dal recipe passed down the generations of my maternal grandmother’s Berry (pronounced ‘Bay-ree’) family.
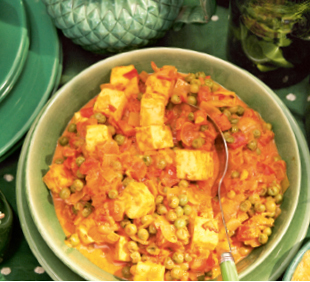
Berry Dal
Simple buttery lentils – a family favourite
Some of the best holidays I had as a child were in Delhi, India’s capital city. Mother used to pack us off to her family home with Nani, her strong-willed mum. And we spent the days rolling around being spoilt by various uncles and aunties, nourished on a diet of Berry Dal, fresh chappatis, sabzi and homemade pickles.
This dal uses tadka (pronounced ‘tur-ka’) – a magical mix of spices sizzled in hot oil – to infuse the dish with flavour. I remember dal being served thick, a consistency created by adding a little hot water at a time and only when the lentils dry up and start spluttering on to the kitchen tiles.
Feeds 4 Vegetarian
125g (41/2oz) huskless moong (split yellow) lentils
1/4 tsp turmeric powder
1 tsp ghee
1 pinch of asafoetida
1 tsp cumin seeds
1 dried long red chilli
1/4 tsp chilli powder
salt
1. Place the lentils in a sieve and rinse thoroughly under a cold tap until the water runs clear. Then put them in a medium pan and cover with twice as much cold water as lentils. Add the turmeric and boil gently on a medium heat, keeping alert for the first couple of minutes to make sure the pan doesn’t boil over.
2. As it boils, the dal will produce scum, which you need to skim off the surface. Every time the lentils begin to dry out, add a little bit more hot water. The consistency of this dal should be thick, like soup from a carton.
3. When the lentils start integrating with the water in the pan, which will take about 20 minutes, you can make the tadka. Heat the ghee in a small frying pan. When it begins to bubble, add the asafoetida. This stuff smells disgusting – you have been warned – but tastes amazing! Then add the cumin seeds, the chilli pepper and the chilli powder. Let it all sizzle for a few seconds and then pour the tadka over the dal.
4. Heat the dal for another minute as you mix in the tadka. Add salt to taste, and voilà, the Berry Dal is ready. This is best eaten with rotis dunked in it.
LOVING LENTILS
Forget the horrors of boiled pulses. Dal is a piping-hot bowl of delicately spiced lentil curry. A must with every Indian meal. Soft and buttery, each dal has its own special cooking time and addition of spices known as tadka (also called baghar or chaunk).
My first lentil shopping trip was totally overwhelming. Lentils come in green, brown, yellow and red, some with husks and others skinless. The variety is quite bewildering, as is how to cook each type. I used my tried-and-tested, scientific method to master cooking them: buy one small bagful and perfect it after several failed attempts. The trick is to buy 500g (1lb 2oz) of a variety at a time and never, ever replace the lentils in one dal recipe for another. These are the types of lentil typically used in Indian dishes:
MASOOR – SPLIT RED LENTILS.
Widely available and super quick to cook.
A real winner in my books.
TOOR – SPLIT YELLOW LENTILS.
Also known as Arhar or Tuvar. These are shaped like flat discs, sometimes sold with an oil coating that you can just wash off. Popularly used in south Indian dals.
CHANNA – A SMALLER RELATIVE OF THE CHICKPEA.
It’s split in half to create a yellow lentil. It has a sweet, nutty flavour and is often cooked with sweet vegetables or sugar.
MOONG – A GREEN PULSE THAT CAN BE SPLIT AND DE-HUSKED TO GIVE AN OVAL-SHAPED YELLOW LENTIL.
The green stuff is a great stodgy winter choice, while the yellow version gives a lighter perennial option.
THERE. I HAD IT. The finest homemade dal, Mattar Paneer and Keema Mattar. The three ideal basics for my first ever, complete Indian meal. All I still needed was to master the art of fluffy basmati rice.
This was easier than I thought. My father arrived in London for his annual summer holiday. I invited him over for some of my newly perfected, quick Indian home cooking. He brought along a brand new, Iranian Pars Khazar rice cooker. Handing me the large box, he declared that every girl’s new home needs a rice cooker. For the first time since I was two, I agreed with him instantly.
For good measure, he also handed over his fail-safe recipe for perfect basmati rice.
Perfectly Fluffy Basmati
Steaming hot rice for every Indian meal
I never cook anything but white basmati rice when eating Indian food. I’ve read all about how it’s lower in fat than other long-grain rice. But honestly, it’s the light, fluffy texture and nutty fragrance that does it for me.
For a brief, seriously healthy spell I tried making brown basmati instead. This is packed full of fibre and even healthier that the white variety. But it takes a bit of getting used to with a curry. So I use it only to serve with other, non-Indian meals.
Feeds 4 Vegetarian
350g (12oz) basmati rice
1. Having weighed the rice in the kitchen scales, measure it out again in a mug – taking note of the number of mugfuls – and place in a medium pan. Fill the pan with cold water. With one hand, stir the rice for a minute to release the dust from the rice into the water.
2. Next drain the rice and, using the same mug, add one-and-a-half times as much hot water as rice into the same pan. By measuring the water in this way, you are adding only as much as the rice needs to absorb while cooking. No need for draining or second-guessing!
3. Bring the pan to a boil, then lower the heat to a simmer, cover with a lid and cook for 10–15 minutes until the water is all absorbed and the rice is cooked through. Never stir the rice while cooking because that releases starch and makes it all gloopy. If you desperately want to prod the rice to check it, use a fork instead of a spoon. Once the rice is ready, keep the lid on the pan for 2 minutes to let the steam release any grains stuck to the bottom. Then scoop on to a plate and attack.
JALDI JALDI
QUICK TRICKS FOR THE GODDESS IN YOU
Getting to grips with the recipes was one thing. Retrofitting them into my life was quite another.
In the early days, I made grand plans to further my cooking prowess. Never mind deadlines. I was going to powder my own garam masala. Marinate meat overnight. Cook raw chickpeas for hours as recommended by the latest cookery magazine. All the while, maintaining the karmic calm of a stoned Himalayan sadhu.
I soon realised that the truly inspirational cookery programme was presented by a celebrity with a crack team of experts. Invisible to the outside world, like Santa’s elves, they ran around her, shopping, chopping, cleaning and washing up, while others did her hair and mopped her brow.
I, on the other hand, had no one but my meagre self and a long list of urgent priorities. Work paid the bills. Friends were essential for fun. Men were high maintenance. Painting nails and updating my wardrobe were critical. Fashioning shortcrust dough into triangular-shaped samosas was not.
I decided that spending unnecessarily long toiling in the kitchen ranked close to ironing jeans and drinking Liebfraumilch. Daily slaving over a steaming pot simply wasn’t for me. The goddess in me needed shortcuts. Anything to make my life easier. This, believe it or not, was how Dada and my aunties operated too. I didn’t actually know anyone who made his or her own garam masala back home.


