
Полная версия
The Modern Cook’s Year
How long to brew?
After it’s been brewing for about a week I start to taste mine every day (remembering to use a non-metal spoon). If you like a sweeter drink you may want to bottle yours now, if you like things more tart perhaps wait a full 14 days.
Once your kombucha tastes good to you, you can bottle it. Lift the scoby into a bowl or rimmed plate (remembering to keep any metal away). Divide your kombucha between the 1-litre bottles (a funnel is useful here), saving 500ml for your next batch. Once the kombucha is bottled you can start from the beginning on your next batch.
Once bottled you have a few options:
— Store it in the fridge and drink it as it is (it keeps for several months).
— Flavour your kombucha. I find the best way to do this is using freshly-squeezed or juiced fruits (I’ve found sweeter ones, such as strawberry, mango, peach, plum, pear, guava and watermelon, work best). You’ll need about 600ml so about 150ml per bottle, but you can adjust this to your own taste based on the sweetness of the fruit. Sometimes I add spices too: for each bottle I add a teaspoon of grated fresh turmeric or ginger, some bashed cardamom seeds, a few rose petals, or even fennel seeds. Now you can either put this straight into the fridge or do a second fermentation.
— Ferment it a second time in the bottle to make it bubbly. I always do this as I love the Champagne-like bubbles. Seal the bottles and keep them on the work surface. It’s really important to open the bottles every day to let the air out so the tops don’t pop off (this is called burping). At the same time I taste for fizziness and when it’s nicely bubbly (usually 2–3 days) I put the lot into the fridge to store.
Taking time off
You might want to take a break from brewing. To pause the process, take the scoby out of the jar, separate the new scoby (the baby) from the original one (the mother) and put them into separate glass jars with enough of your brewed kombucha to cover. Place in the fridge and seal, remembering that nothing can come into contact with metal. They will keep like this in the fridge for a few months at least. When you are ready to brew again bring the scoby to room temperature and start the process above, adding all the liquid you stored the scoby in too. If you are organised you can plan your second fermentation to finish on the day you go away.
Basic dos and don’ts
— Ideally use filtered but at the very least boiled water to brew.
— Avoid using any metal during the brewing process; take any rings off when you handle the scoby.
— Use real sugar. Honey and other natural sweeteners don’t work as well; I’ve tried.
— Use green or black tea; I use loose-leaf organic. Flavoured and herbal teas don’t work.
— Wash your hands before handling the scoby, being sure to wash off any soap residues.
— I wash my equipment every couple of brews using hot water and vinegar (not soap).
— Make sure the brew is covered at all times, to prevent flies getting in.
— If you see mould or anything unsavoury on the scoby, discard everything and start again.
— While I brew with green tea the most, every 5 brews or so I use black tea as it helps the scoby stay healthy; I don’t understand why but it works.
— If I have a bad batch I brew the next batch a little sweeter and use black tea; it usually solves the problem.
— As you brew each batch a new scoby will form on the top of your kombucha; this means it’s a good healthy brew and it’s a good sign. When you go to make another batch you can separate the old scoby (the mother) and the new one (the baby) and make an additional batch. Give the old scoby away or keep it in the fridge; I tend to separate my scobys every few batches. If you have too many to find a use for they can be composted.
Resources
There are some amazing expert resources online; you can get very specific answers to any kombucha problem in great detail. My favourite is culturesforhealth.com.
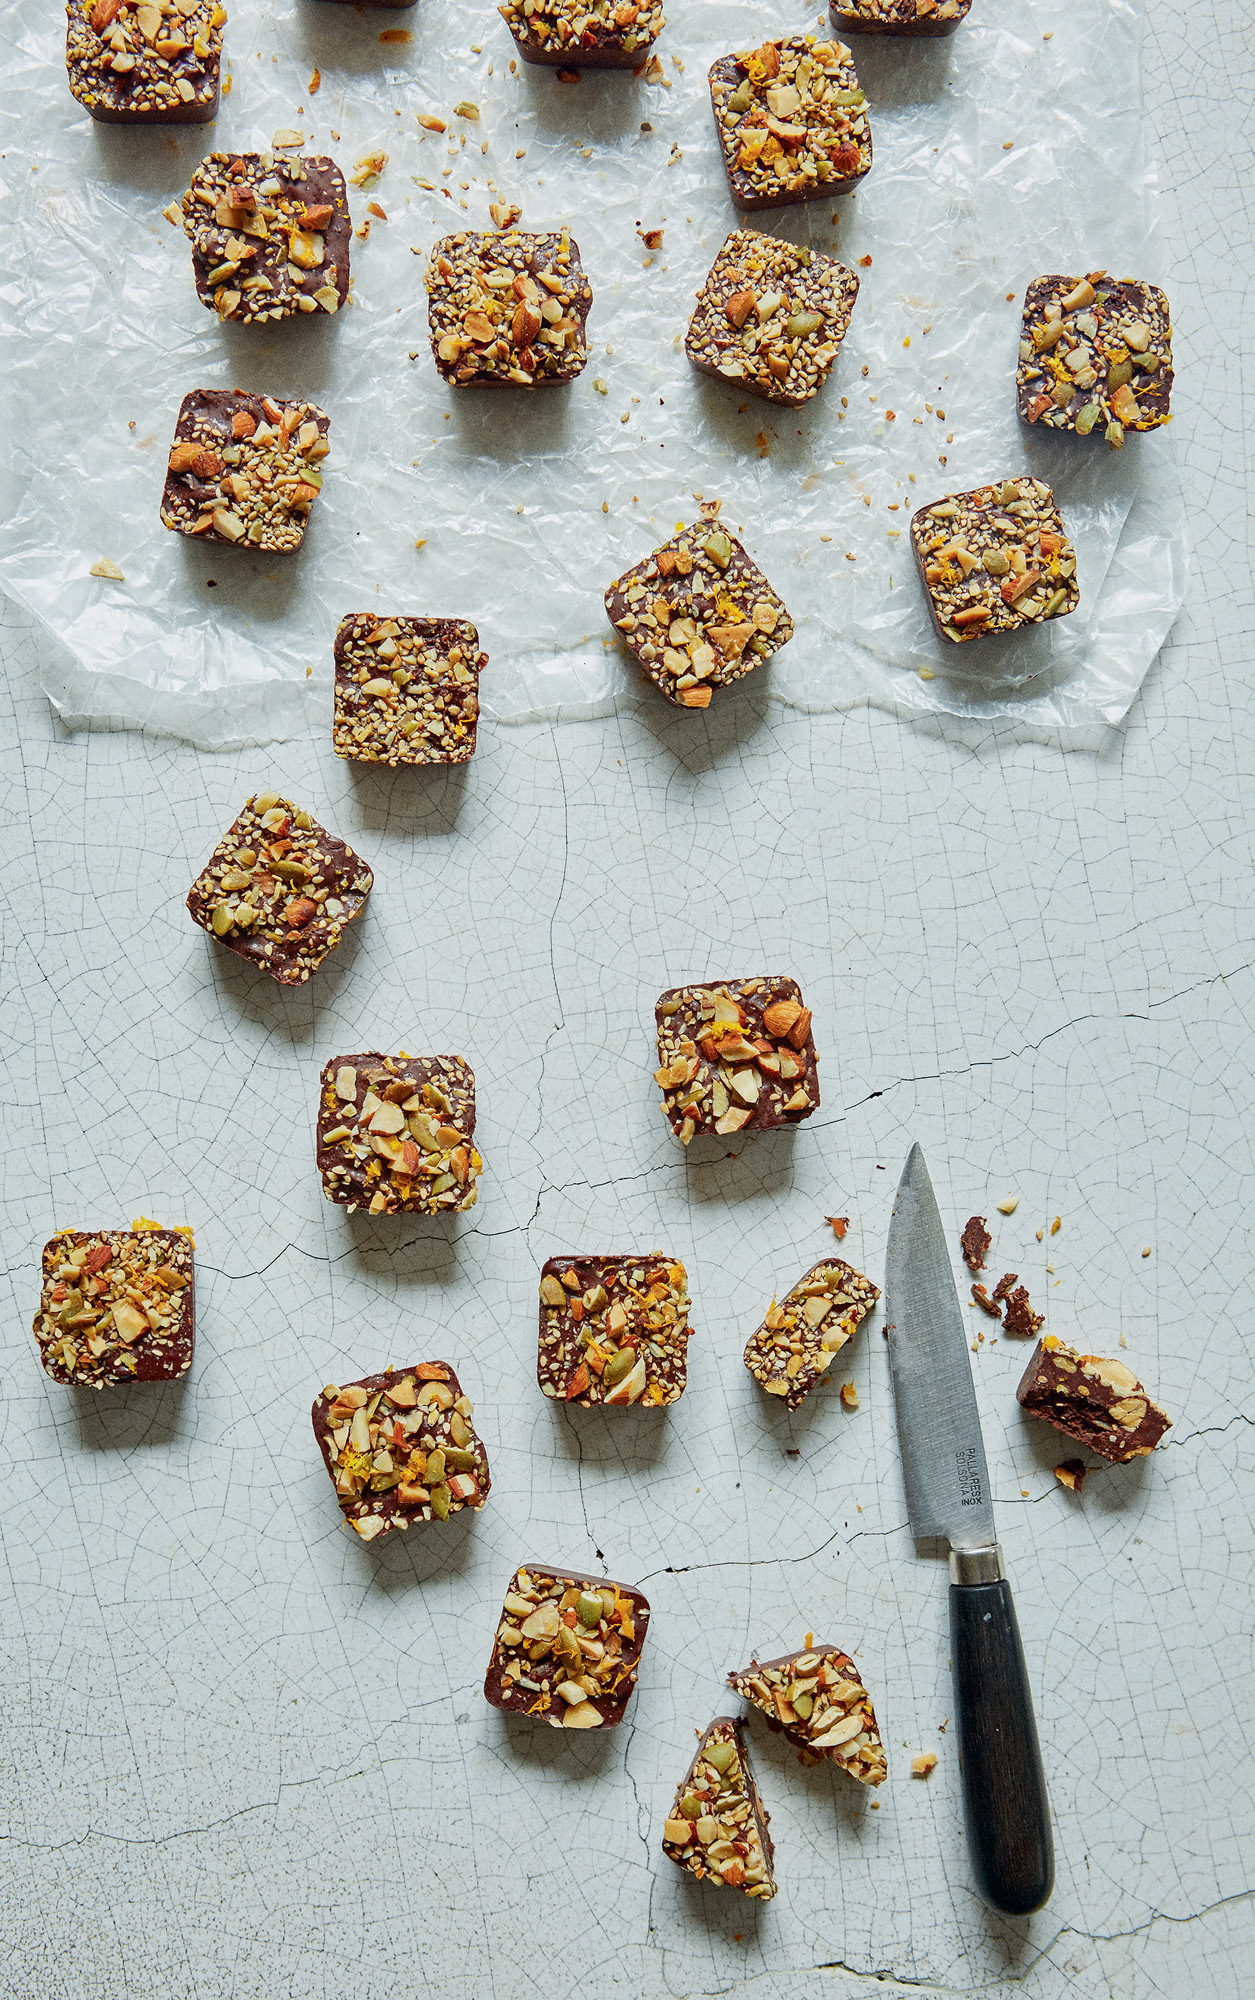
Super chocolate tiffin bites
These little chocolate bites were born of two childhood obsessions: Terry’s Chocolate Orange bars and chocolate tiffin. I love both but the super-sweet versions I lapped up as a kid now make me a bit crazy, so I came up with these. I make them in batches and keep them on hand for that time of day when I need something sweet. Sure, they have a bit of sugar, but I find the nuts and seeds balance out the hit of sweetness. They are spiked with orange zest, salt and vanilla. I’m always a bit happier after one of these.
You can mix up the nuts and fruit you use here. I imagine any citrus zest, sweet spice or even a hit of chilli would work well. I use little silicone moulds which double up for freezing curry pastes, pestos and even baby food. You could also make this mixture into a bark if you prefer by just pouring the chocolate into a tray lined with baking paper and sprinkling over the toppings.
MAKES ABOUT 20
400g dark chocolate (at least 70% cocoa solids)
100g almonds, skin on
75g pumpkin seeds
2 tablespoons sesame seeds
1 tablespoon coconut oil
1 teaspoon vanilla paste
the zest of 2 unwaxed oranges
a good pinch of flaky sea salt
75g raisins
Preheat your oven to 200ºC/180ºC fan/gas 6.
Break your chocolate into small pieces (this will help it melt evenly) and put into a small heatproof bowl that fits neatly over a saucepan. Put a couple of centimetres of boiling water in the pan, put your chocolate on top and leave to melt.
Roughly chop your almonds and put on a tray with the pumpkin and sesame seeds. Toast in the hot oven for about 4 minutes – you want the almonds to be just toasted but still a little white and buttery within – then remove from the oven and tip into a bowl.
Once the chocolate is melted, add the coconut oil and stir until this has melted and is incorporated, then add the vanilla, orange zest and salt and mix gently. If you don’t have moulds and are making the tiffin in a tray, pour it into a baking tray lined with baking paper, then scatter over the toasted nuts and seeds and the raisins. If using moulds, add the toasted nuts and seeds and raisins to the mixture and gently stir again. Pour into moulds and leave to set.
Once set, turn the tiffin bites out of the moulds. Store in a tin or Tupperware box, where they will keep for up to 2 weeks.
Brownie energy bites with maple pumpkin praline
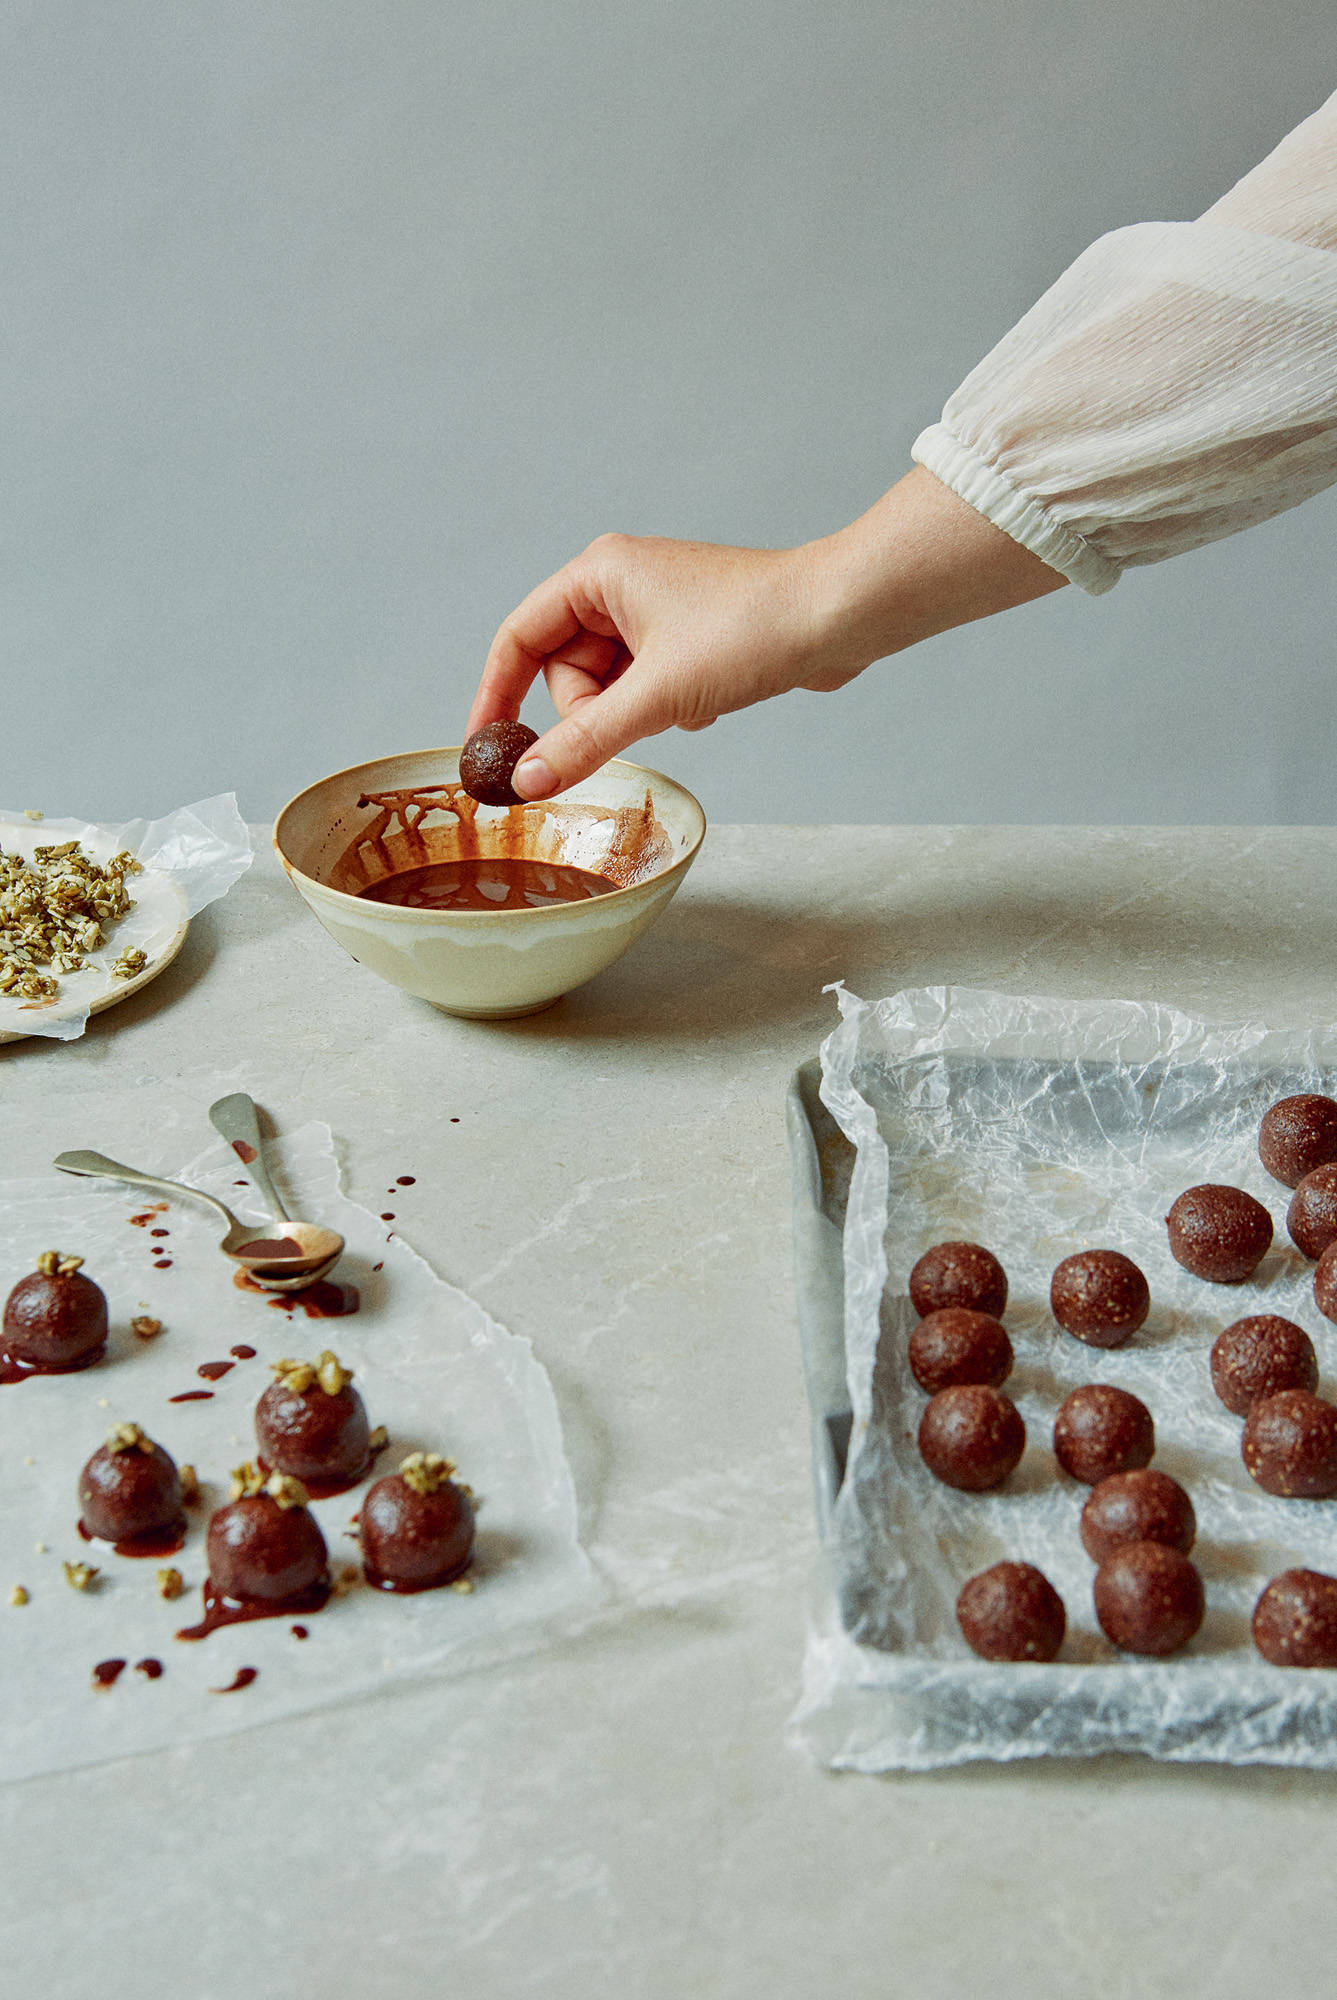
I am something of a snacker. I marvel at people who stop at three meals a day. Since becoming a mum, I have had less time to cook than ever before, but it has been really important that I feed myself well. In the kitchen, this has put the spotlight on traybake dinners prepared during Dylan’s nap, meals that can be cooked with one hand, and ready-to-go bites of energy that perk me up when dinner seems a long way away.
Half truffle and half brownie, of all the things I have tried these have been the quickest to leave the jar. Covering these little bites in chocolate takes a little longer and can be skipped, but I welcome any opportunity to pretend I am in a chocolate factory. I use raw cacao powder here as I prefer its deep pure chocolate flavour (its health benefits are well reported too). If you’re using standard dates, soak them in boiling water for 10 minutes first.
MAKES ABOUT 30
200g pecans
100g cashew nuts
4 tablespoons raw cacao or cocoa powder
1 teaspoon vanilla paste
½ teaspoon fine sea salt
½ teaspoon ground cinnamon
175g pitted Medjool dates
1 tablespoon coconut oil
FOR THE PUMPKIN AND MAPLE PRALINE
50g pumpkin seeds
a pinch of flaky sea salt
1 tablespoon maple syrup
FOR THE CHOCOLATE COATING
3 tablespoons coconut oil
2 tablespoons raw cacao or cocoa powder
1 teaspoon maple syrup
In the bowl of a food processor, pulse the pecans and cashews until you have a rough powder. Add the cacao, vanilla, sea salt and cinnamon. Pulse to mix evenly. Add the dates and coconut oil and blitz, scraping down the sides of the bowl here and there. The mixture should ball up, appear glossy and come together in your fingers; if it’s still a little powdery, add a teaspoon of water and blitz again until it comes together, but is not too sticky and wet.
Scoop out the mixture in heaped teaspoon-sized bites and roughly roll into balls. Put on a tray lined with baking paper and chill in the fridge for at least 20 minutes. Make the praline by toasting the seeds in a frying pan until they start to pop, then add the salt and maple syrup and toss well. Allow to cook for 1 minute, then tip on to a plate. Once cool, roughly chop.
Make the chocolate coating. In a small saucepan, combine all the ingredients and whisk over a low heat until it thickens slightly, taking care it doesn’t catch on the bottom. Set aside to cool. Dip the bites into the coating, turning with two forks to cover. Put on a baking tray, top with a little praline and leave to set. Store in the fridge until you’re ready to eat them – they will keep for a week or so.
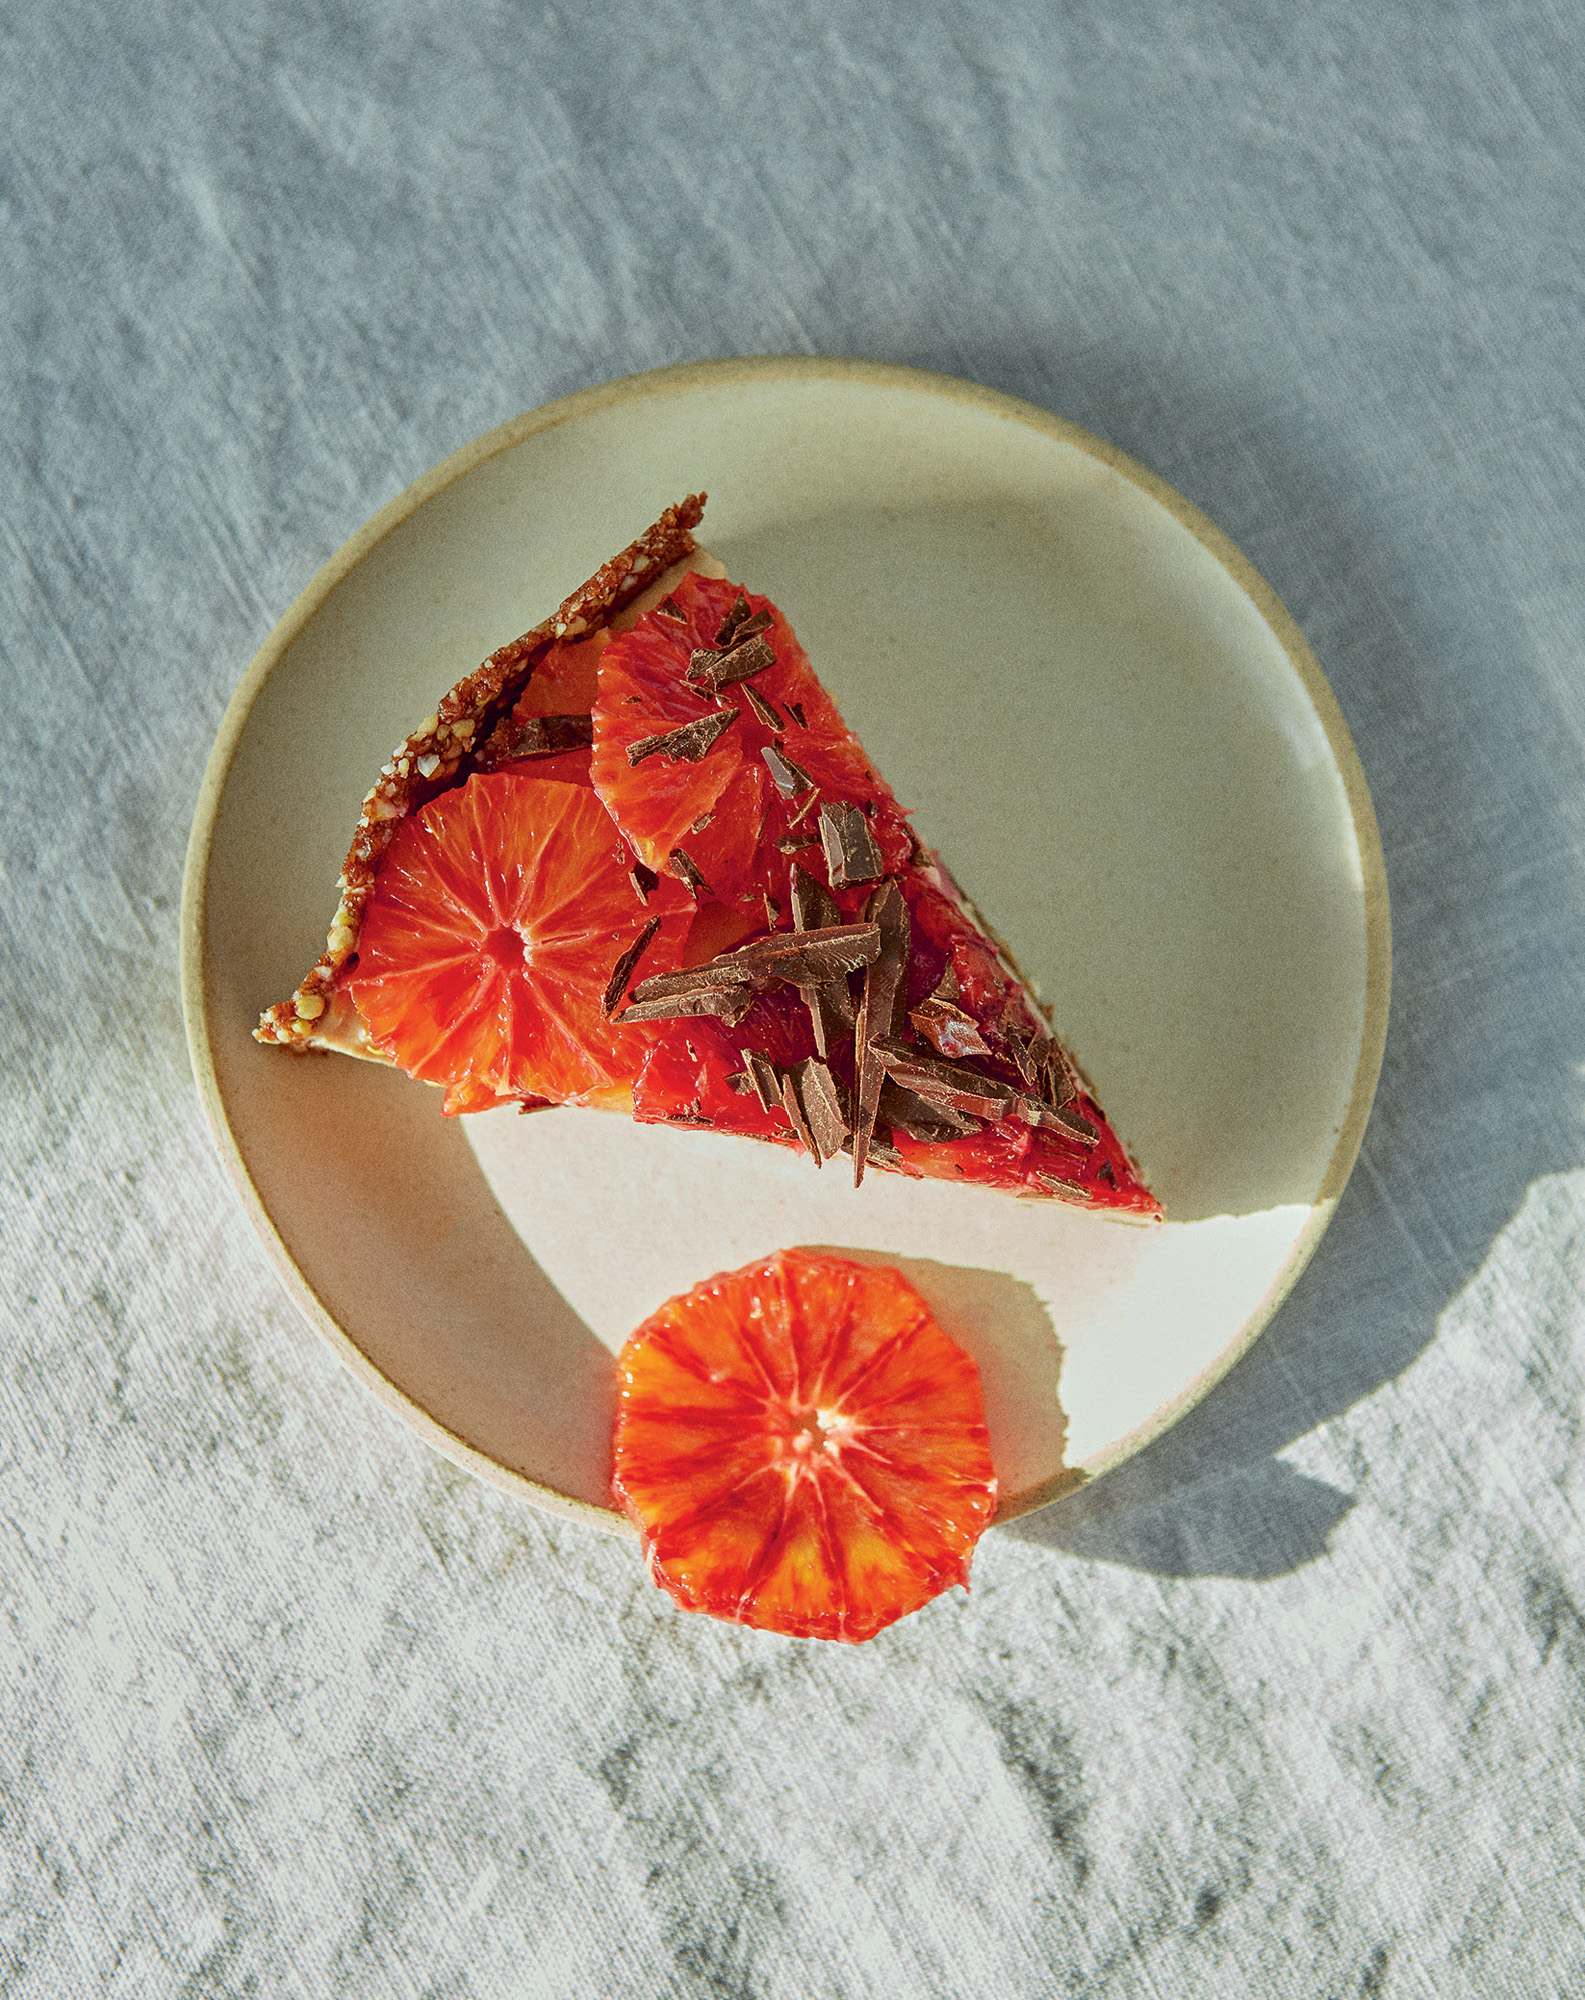
Chocolate and blood orange freezer cake
This is a no-cook cake, raw in fact if you are into that kind of thing; I use the freezer to set the cake instead of the oven. These cakes are sometimes called ice-box cakes, which I think sounds quite magical. It’s the kind of dessert I like to eat in January.
I use a raw cashew butter here, which I buy from the supermarket, though if I have time I make it at home, as the flavour is gentler than the toasted nut butters you can buy and it has notes of white chocolate. Any more subtly flavoured nut butter would work here.
SERVES 6–8
FOR THE CRUST
25g cashew nuts
coconut oil, for greasing
120g pitted Medjool dates
1 teaspoon vanilla extract
1 tablespoon raw cacao or cocoa powder
a generous pinch of flaky sea salt
120g nut butter (I use a raw cashew butter, see note above)
125g whole buckwheat
FOR THE FILLING
70g cashew nuts
50g pitted Medjool dates
a good pinch of salt
450g ripe peeled bananas
the seeds from 1 vanilla pod or 1 teaspoon vanilla paste
70g coconut oil, melted
the zest and juice of 1 unwaxed blood orange
3 passion fruits, cut in half
TO FINISH
3 blood oranges
40g dark chocolate (70% cocoa solids)
First, soak both the cashews for the filling and for the crust in separate bowls of cold water for 3–4 hours if you have time, if not then soak them in warm water for 30 minutes. Grease the bottom of a 22cm loose-bottomed tart tin with coconut oil and put to one side.
Next make the crust. In a food processor, blitz the 25g of soaked, drained cashews and the dates until they have broken down into tiny pieces and start to come together in a ball. Add the vanilla, cacao, salt and nut butter and blitz until combined. Then add the buckwheat and blitz until the buckwheat has broken down a bit and the crust dough comes together in your fingers when pinched. Put the crust mixture into the middle of the greased tin and use your fingers to push it out to the edges and up the sides of the tin, then put it into the freezer to set for at least 3 hours.
Next make the filling. Put the soaked, drained cashews into a jug blender with the dates, salt, bananas and vanilla and blitz until completely smooth. Pour in the melted coconut oil, then add the orange zest and blitz again. Pour two-thirds into the chilled crust.
Scrape the seeds from the passion fruits into a sieve resting over a bowl. Use the back of a spoon to push the juice through, add this to the remaining banana mixture in the blender and add the juice of the blood orange, then pour this layer over the banana one. Smooth everything over with a spatula and put the crust back in the freezer for 30 minutes to firm up, though it can happily sit there for much longer.
To finish, take the tart out of the freezer about an hour before you want to eat. Cut the peel off the blood oranges and slice the flesh into thin rounds. Break the chocolate into shards.
Once the cake is thawed enough that the filling is beginning to soften, arrange the blood oranges and chocolate on top prettily and pat yourself on the back. Any leftovers can be stored in the freezer for up to 2 weeks.
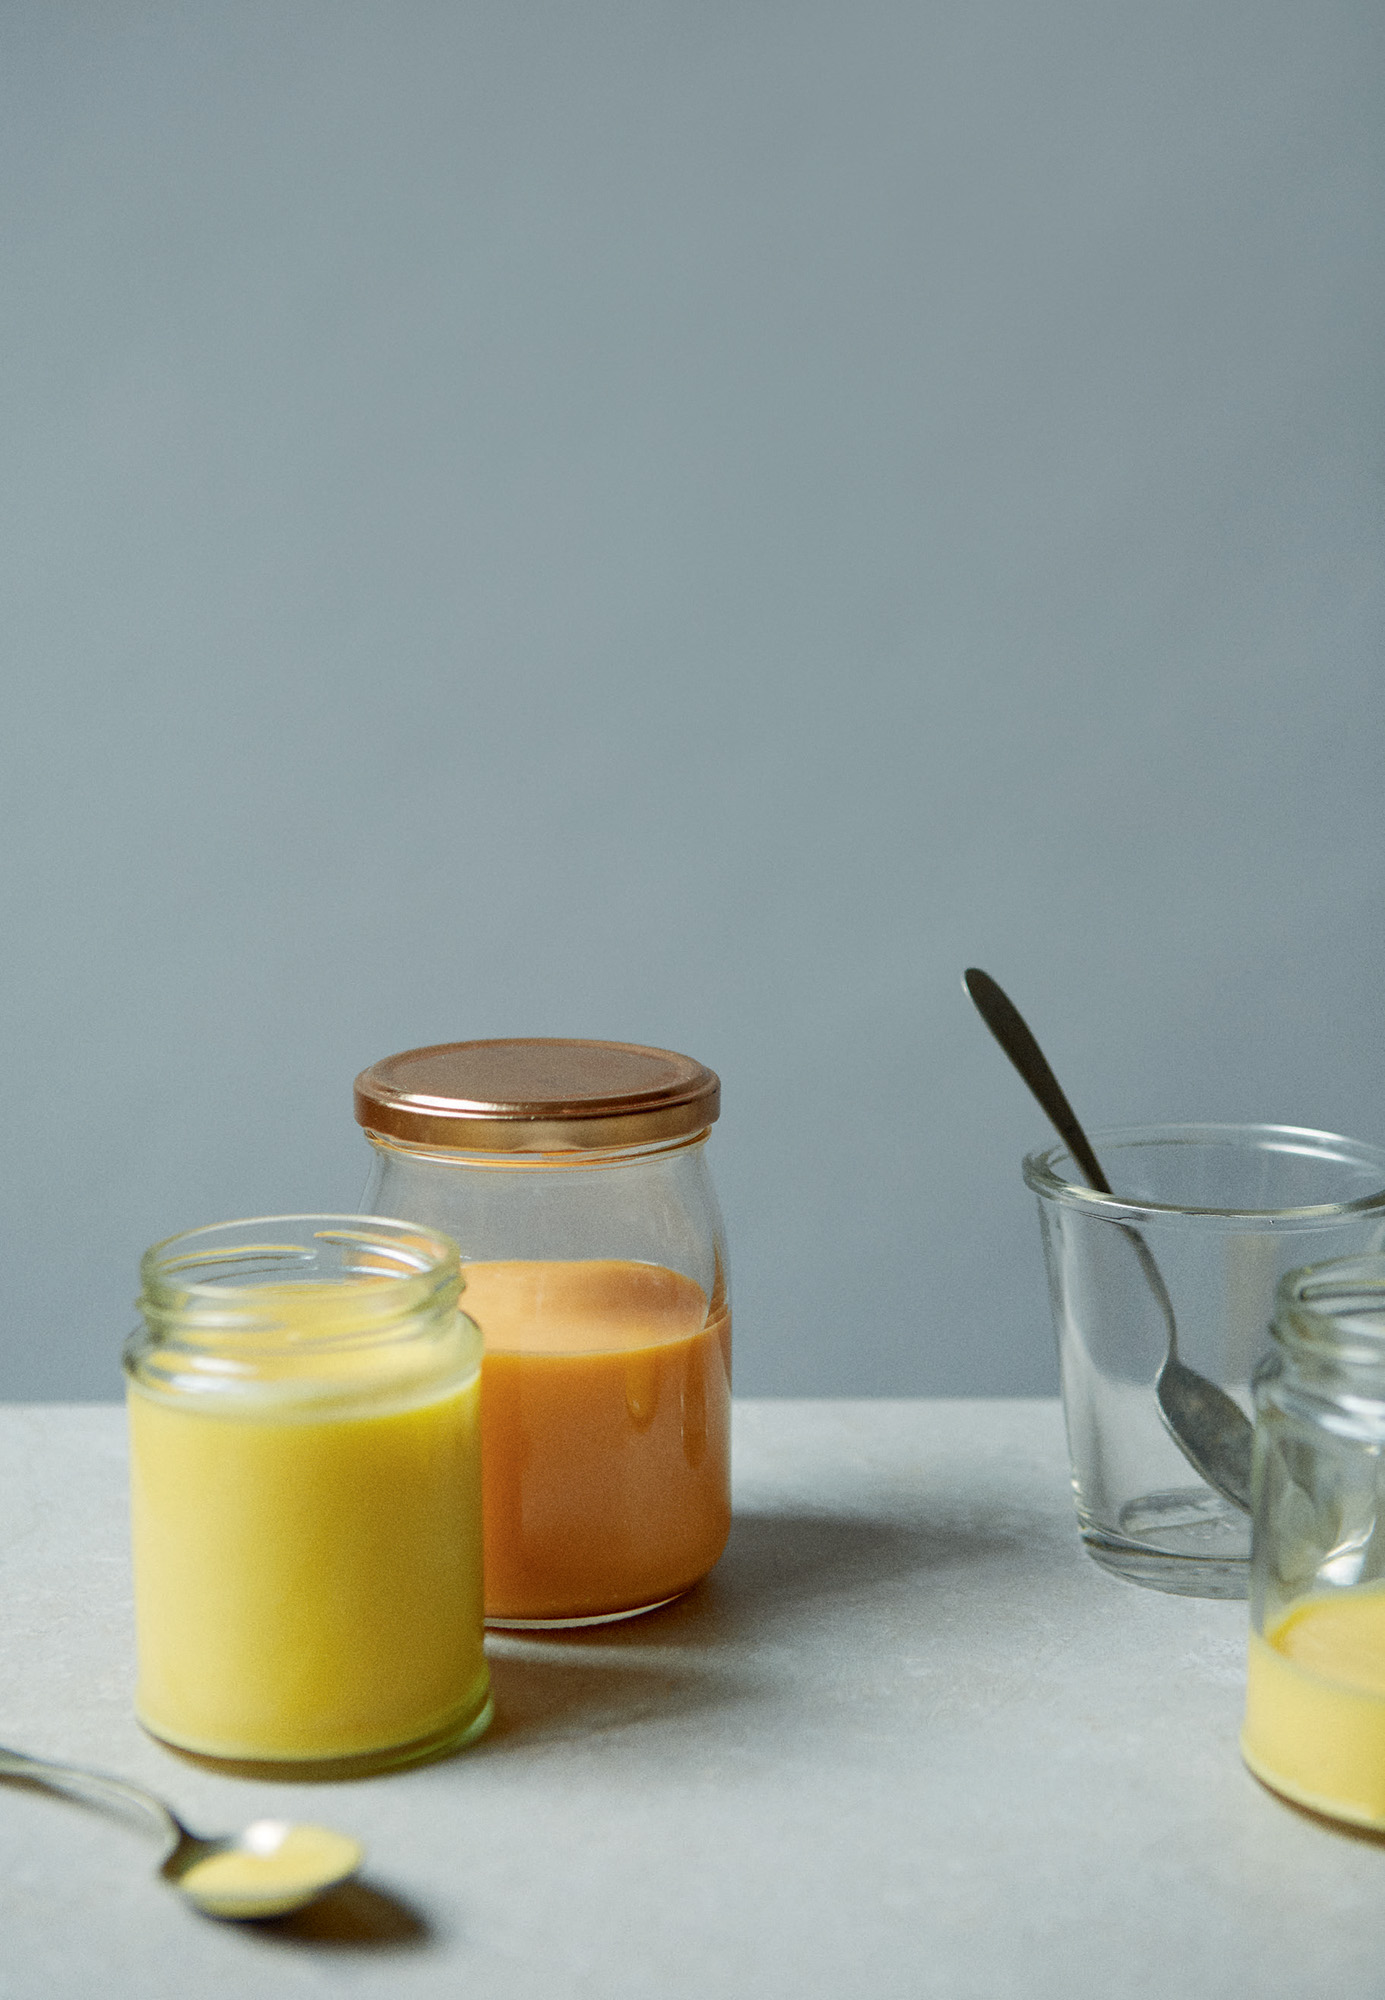
Grapefruit and honey curd
I feel sorry for grapefruit. I think it’s been pushed to the sidelines in favour of more its more approachable (clementines) or glamorous (blood orange) cousins. I love it – not just the pink ones, I love the straight-up yellow ones I ate as a kid. You could use either here. This curd is exactly what I want to spread on a piece of toast or to top a bowl of yoghurt year round, but, especially when it’s still dark, it sings of the sunshine where these sunny fruits were grown, and the ginger and honey add even more cheer.
Making curd is not for anyone impatient, it’s a slow meditative stir that makes the best, smoothest curd. You’ll feel like it’s never going to thicken, but have faith, it will – it always does. If you get overexcited and turn the heat up too much it will become grainy. If it does, you can press it through a sieve to resurrect it, but the joy comes from the slow stirring. Any citrus can be swapped in for the grapefruit here, just adjust the level of honey a little depending on whether the fruits are sweeter or more acidic.
MAKES A DECENT JARFUL
250ml freshly squeezed grapefruit juice
a small thumb-sized piece of ginger, peeled and grated
75g unsalted butter, at room temperature
60ml runny honey
2 large organic egg yolks
2 large organic eggs
a good pinch of flaky sea salt
the juice of ½ a lemon
Put the grapefruit juice and ginger into a small saucepan, bring it to a simmer and leave it to reduce to about 150ml. Let it cool a bit, then strain through a sieve.
Cream the butter in a medium heatproof mixing bowl. Add the honey and beat until fluffy and light. Add the egg yolks, and then the eggs, one at a time, beating well to incorporate each one before you add the next. Stir in the salt, then gradually add the reduced grapefruit and lemon juice.
Rinse out the small saucepan you used earlier and fill it one-third full with water. Bring to a simmer and place your bowl of curd on top of it. Stir constantly and heat the curd slowly. This step usually takes me about 20 minutes. Pull the curd from the heat when it is just thick enough to coat your spoon; it will thicken as it cools.
There’s no need to strain the curd, unless it has some lumps. And you can keep it refrigerated for up to 2 weeks, or up to a month in the freezer.
Apple and white miso kimchi
This is a gentle kimchi; the apple, radish and white miso mellow the chilli and sharpness that comes from the fermentation. Fermented foods contain beneficial bacteria, which is important because we need a diverse population of bacteria in our gut for optimal health; I do notice the difference when I include some fermented foods in my diet (see Kombucha).
Make sure you use a pure sea salt, as iodised sea salt will prevent this fermenting properly. Check the heat of your chillies, as they vary so much. I use one to two, depending on their heat, for a medium-hot kimchi, but if you like things hot you can use a few more. The amount of time it will take for your kimchi to ferment will depend on two things: the air temperature and the humidity. How fermented you like your kimchi is a very personal thing – I like mine fermented for about two weeks in the winter and only a few days in the summer.
MAKES 4 JARS
1 Chinese leaf cabbage (about 850g)
4 spring onions
2 tablespoons good sea salt
1 mooli or kohlrabi (about 200g), or 200g radishes
2 firm green apples
2 teaspoons white miso paste
1 clove of garlic, finely sliced
2–4 red chillies, finely chopped (with seeds)
a thumb-sized piece of ginger, peeled and finely chopped
Coarsely shred the cabbage into 2cm-thick pieces, finely slice the spring onions, and put them both into your biggest bowl with the salt. Scrunch the lot with your hands for 5 minutes until the cabbage has released a lot of water, then leave it for 2 hours to release all its water, massaging it another couple of times to help this process.
Meanwhile, peel the mooli and cut it into thin 1cm-long matchsticks. Cut the apples into pieces about the same size – you can leave the skin on.
Mix the miso with the garlic, chillies, ginger and 2 tablespoons of cold water. Once the cabbage has had its 2 hours, add the mooli, apple and miso garlic paste to the bowl of cabbage and its water.
Put the kimchi and the liquid it sits in into a large jar or fermenting pot, taking care to pack the vegetables down firmly under the liquid so that no bits of vegetable are poking out, there are no air pockets and there are a few inches of space at the top of the jar for the air to escape.
Cover the jar loosely with a lid, or, if you would prefer to close the lid to keep the smell in, make sure you open it up every day to let the air out. Leave the kimchi on your work surface for 2–3 days, checking every day to see how it tastes. This winter I fermented mine in a cool cupboard for about 2 weeks. Once it tastes good to you, put it into the fridge, where it will keep for several months.
Ways to use your kimchi
• In the kimchi soup here
• In a toasted sandwich with a good sharp Cheddar
• In the bao here
• As a pickle on the side of your favourite bowl of noodles
• Wrapped into summer rolls
• To top some sriracha-spiked avocado on toast
• Chopped finely and mixed with oil and lemon for a punchy dressing for a grain
• As a base for a quick fried rice
• Added to the end of a stir-fry
• Fried in a pan before you add some eggs and scramble them
Tonics and teas for cold days
These are the things I make when winter sets in and coughs and colds strike; when we are cold to the bones or feeling a little depleted. I don’t intend these recipes to be medicine. I have no proof that they work but they make me and my family feel better. Perhaps it’s just the act of making something to nurture us, perhaps it’s the ingredients; whatever it is I keep making them.
Turmeric, ginger and black pepper tea to warm
For two cups, grate about a tablespoon of ginger into a teapot. Squeeze in the juice of 1–2 lemons (depending on their size), add half a teaspoon of ground turmeric or about a tablespoon of fresh grated turmeric, a tiny pinch of dried chilli flakes and a good few grinds of black pepper, then pour in 600ml of hot water. Allow it to cool a little before sweetening with a little honey (I use the raw stuff for maximum goodness); this will make sure the amazing properties of the honey aren’t killed by the boiling water.
Magic golden turmeric honey paste for colds
Mix 2 tablespoons of ground turmeric, or a small thumb of the freshly grated root, with 1 tablespoon of ground black pepper. Melt then cool 2 tablespoons of coconut oil. Add to the bowl and mix well then stir in 2 tablespoons of honey – raw is best. You can either eat this from the spoon or stir into hot water or warmed milk – I like oat milk.
Carrot, ginger and red chilli juice to lift and enliven
For one glass, peel 6 carrots and a thumb of ginger. Cut the green stalk off 1 chilli and if you like things hot keep the seeds in; if not then remove. Put the whole lot though a juicer and serve over ice. If you like you can gently warm this juice, though don’t heat it too much or let it boil.
Kombucha and kefir (here)
These are great things to drink when you are feeling under the weather. I mix some turmeric and lemon into my kombucha and stir some of the golden paste above into my morning kefir. Both support healthy bacteria so are particularly great to drink if you are taking antibiotics.
Cinnamon and cardamom for sore throats
Mix 1 tablespoon of ground cinnamon and the bashed seeds of a cardamon pod with 1 tablespoon of runny honey and 1 of melted, cooled coconut oil. Store in a glass jar at room temperature taking a teaspoon whenever you have a tickle in your throat.
Vilcabamba cold cure
A lady made this cold cure for me on a trip to Ecuador and it worked. Juice 6 oranges into a small saucepan, add the juice of 1 lemon and 1 cinnamon stick. Warm to almost boiling then leave for 10 minutes to steep. Once cooled add a little honey if you like.
Lemongrass and three-chilli tea
For 2 cups, roughly chop a good thumb of ginger, bash 2 lemongrass stalks and add to a pan with 1 red chilli, 1 green chilli and a pinch of dried chilli flakes. Add 1 litre of water and bring to the boil, then turn the heat down and simmer for 30 minutes, until it has a deep aromatic flavour. Now you can add a black or green tea bag and steep for 5 minutes before drinking. Sweeten with honey to taste.
Make the Not-chicken soup.
Ginger shots for the brave
Use your juicer to juice enough ginger to make about 2 tablespoons of juice. Just knock it back and wait 10 minutes before drinking any water.
Garlic shots for the braver
Stick with me here. This doesn’t taste great but I am sure it’s helped me stave off a cold more than a few times. Finely chop 1 clove of garlic, put it into a small glass with 3 tablespoons of cold water, take a deep breath and knock it back. Don’t chew it. It might make you feel a little weird, but don’t be tempted to drink water for about 10 minutes.


Конец ознакомительного фрагмента.
Текст предоставлен ООО «ЛитРес».
Прочитайте эту книгу целиком, купив полную легальную версию на ЛитРес.
Безопасно оплатить книгу можно банковской картой Visa, MasterCard, Maestro, со счета мобильного телефона, с платежного терминала, в салоне МТС или Связной, через PayPal, WebMoney, Яндекс.Деньги, QIWI Кошелек, бонусными картами или другим удобным Вам способом.


