Полная версия
Seashore


Dedication
For my Dad. Many adventures were had on the beaches, cliffs and mud flats of the Isle of Wight. It was armed with shrimping net, mask and snorkel that I had my first real adventures.
Contents
Cover
Titlepage
Dedication
The seashore
Life in stripes: zonation
Timetables of the tides
Handy stuff for exploring with
Rock pools
Handy stuff: mirror on a stick
The baiting game
Handy stuff: scavenger trap
Marvellous molluscs
Shell collecting
See inside a sea shell
Handy stuff: underwater window
Snorkelling for softies
Blobs!
Crab hunting
Crab catching
Handy stuff: plankton net
The fine, fiddly and frail
Sandy shores
Beachcombing
Catching sand-living creatures
Handy stuff: burrow box
Studying seaweeds
Preserving your seaweeds
Sand hoppers
Estuaries
Mud lovers
Grasping the razor
The tray of revelations
Shrimps and prawns
Cliffs
See sea birds
Fossil hunting
Sea watching
Going Further
Index
Author’s Acknowledgements
Keep Reading
Copyright
About the Publishers
The seashore
Lots of good things happen in nature when one thing meets another. These can be times of the day – for example, at twilight and dawn when night meets the day – or times of the year, when spring transforms into summer. Or they can be physical things, such as where a beach merges into another habitat, like the open sea.
To naturalists, these times and places of transition are well known as they can concentrate periods of activity, making certain creatures easier to see. When spring finally arrives, we get a sudden rush of frenzied activity, birds sing, frogs spawn and flowers bud, and where one habitat blends into another, you often get a special kind of ‘edge’; a place that is inhabited by life from both places.
In this book, we explore the seashore, a habitat that is probably one of the most exciting places a naturalist will ever get to explore and certainly one of my favourites. It is a unique place, a fringe of both the sea and the land, a narrow ribbon between the great ocean and the land mass against which it laps, as well as a junction between both of these and the air. Add to all this the daily effects of the timetable of the tides and the seasons and you have quite a lot of ‘edges’, each bringing its own survival challenges for the creatures that live there.
To help you get straight to the most useful sections of the book, depending on whether your toes are sinking into soft sand or being prickled by barnacles, the seashore habitat is broken down still further – into rock pools, sandy shores, estuaries and cliffs. But do not restrict yourself to these sections as there are no hard and fast definitions of each. For example, the beach you are on may be predominantly covered in rocks but there may be sandy stretches. Or there could be an estuary at one end of the beach, so there will be some overlap between each of the different habitats and the things you can do there.
I don’t set out to tell you everything there is to know about this wonderful habitat. Not only would that be impossible, but just to get close would make the book so heavy you wouldn’t stand a chance of getting it in your beach bag! So Seashore simply aims to kick start you in the right direction, opening a door onto a very special, exciting habitat and a lifetime of exploring. Go and stick your head in a rock pool!

The muddy ooze of an estuary is far from dreary – it is full of surprises.
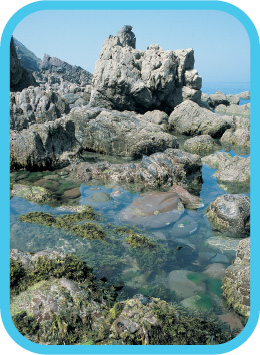
There is nothing like the nooks and crannies of a good rock pool.
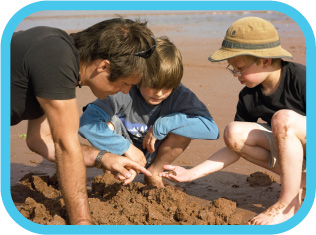
Playing in the sand isn’t all about sandcastles.
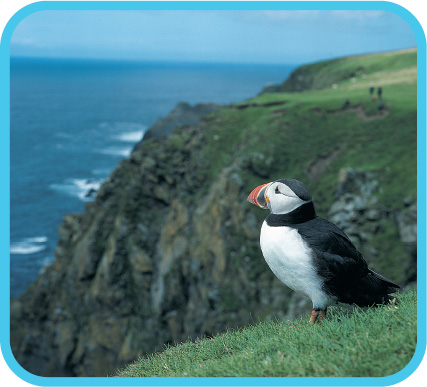
A puffin enjoying his view!
Life in stripes: zonation
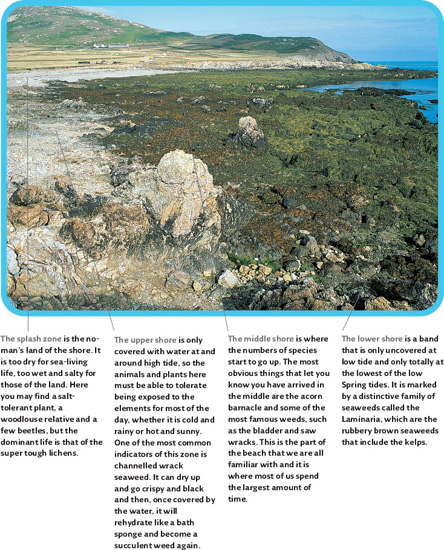
Look at a rocky shore from the top of a cliff or walk from the strand line towards the sea and you cannot help but notice bands of different colours and textures that run up and down the beach. These bands represent where on the beach certain plants and animals live, and it is clear that life is not scattered randomly all over the shore. Certain species that cannot move about freely, such as barnacles and seaweeds, live in very specific places and this is a reflection of what conditions they can tolerate between the tides.
These stripes are known as zones and all coasts have them, but they are much more obvious on rocky shores. There are four main zones – the splash zone, the lower shore, the middle shore and the upper shore – and each one is determined by how much time they spend getting wet every day between the high and low tides. Page 8 tells you how the tides change every day and throughout the year, and also the cycles of the Sun, Earth and Moon.
The best way to get to know the zones is by creating a simple beach map. This exercise is a very useful way to start to get to know the life between the tides, and you also start to see just how different life is in each zone.
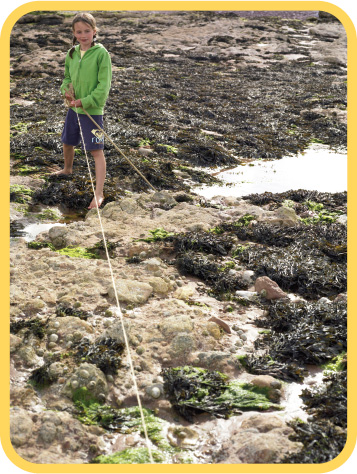
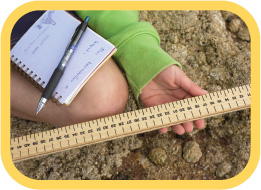
To get a good picture of the beach, survey it at low tide. Stretch a ball of string from the top of the beach to the sea. Then for every metre of its length, write down what you see in a note book. Are there barnacles? Are there limpets? What colours and different kinds of seaweeds can you see? Try to identify as much as possible from a good field guide.
Timetables of the tides
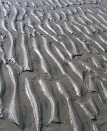
The tide – that’s the rise and fall of the ocean – pretty much shapes life on the shore and affects how it behaves at certain times. Many shore creatures have life cycles tied in with these pulses of the ocean and the tide also affects how and when we can explore the shore. So just a little understanding of this will add another dimension to your activities and avoid disappointment. It will also help you to avoid getting trapped by an incoming tide.
Why does the sea come in and go out? Well, it’s all down to the forces of gravity. The Moon and the Sun have a gravitational pull on the water in our oceans: imagine invisible strings attached to the sea tugging at the water and causing it to bulge out of shape. As the Moon rotates around the Earth every 28 days and the Earth spins around the Sun, the relative position of all three changes all the time, but in a predictable way. That is why we have tide timetables that you can get off the internet, a local newsagent or the TV weather. It works just like a bus timetable, but it is more reliable.
When the Sun and Moon are in line with each other, the pull on the sea is greater than when they are at right angles. The greater the pull, the higher and lower the tides. When the Sun is closest to the Earth we get especially strong effects and these are known as Spring tides. This happens in March and September. These largest tides (and those that occur around them) are some of the most useful to the naturalist, because the water goes out so far on a Spring tide that it gives us a glimpse of life beyond the usual tidal limits. Exciting times for a shore explorer!
When the Sun and Moon are at right angles, the pull on the sea is at its weakest and we have what are known as Neap tides. At this time, the water sometimes hardly seems to move.
But the most important thing for a naturalist to know is the daily tidal pattern, which means you usually get two high tides and two low tides a day. These high tides are separated by approximately 12 hours and 25 minutes and that 25 minutes means that every day the high tides are later by about 50 minutes.
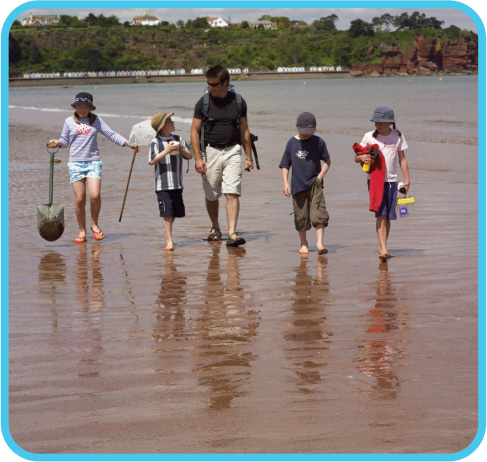
Following the retreating water is a good way to work the beach. You can take your time and see the effects that the receding tide has on the animals that live there. It also means that you will have maximum time to explore the lowest parts of the shore before the tide turns and covers everything up again!
Take my advise
I really hate rules and regulations; they seem to go against the grain when it comes to exploring. However, there are a few safety tips that I strongly suggest you think about when down on the coast.
Tides Be aware of how fast the tide is coming in! It is very easy to get distracted by what a limpet may be doing only to look up and find that huge expanse of rocky coast has become an island and, what’s worse, you are on it! On some shallow, sloping shores, the tide can come in almost at walking pace, so it pays to do your research first. A beach that has a cliff can be dangerous, too – if you are not familiar with ways up and off the beach, the rising tide could cut you off, which is particularly risky if the high water comes right up to the cliff base.
Getting wet Try to avoid swimming in fast-flowing water or at locations that are subject to strong tidal currents. It is all too easy to get swept away.
Buddy up – always swim with a partner. In case one of you gets into difficulties, it is twice as easy for two to get out of trouble as one.
Handy stuff for exploring with
To explore the seashore doesn’t require much equipment. Admittedly you will need to give a little thought to what you take with you, but the good news is that most of it can be improvised and made at home.
Big stick Acts as an extra leg, which is very useful for prevent you from ending in the drink and, as an added bonus, useful for lifting up curtains of weed.
Binoculars Not essential, but there is usually something to see out at sea. It may be some terns fishing, a passing seal, dolphin or even a basking shark!
Burrow box (see page 44) A home-made tank that allows you to watch burrowing creatures in action. A smaller one works well for looking at smaller water creatures, especially in conjunction with a magnifying lens.
Clear plastic robust pots I find these useful when collecting frail and brittle specimens such as delicate shells, skate and ray egg cases, and sea urchins.
Garden fork A small gardener’s fork is easy to carry around, but if you are going for big worms and doing a lot of under-the-sand investigations then a large fork will be a better bet.
Magnifying lens Useful to any naturalist, anywhere!
Mirror on a stick (see page 13) Handy little home-made device for looking underneath overhangs and ledges without cutting your knees on barnacles or by falling in. A whole new perspective on rock pools!
Nets A good robust net is vital. Forget those flimsy coloured ones stuffed in the end of a bamboo cane found for sale in most beach shacks – they are good for nothing!
Non-slip, free-draining shoes/sandals Stops slippage, barnacle cuts on the toes and saves pain in case of treading on hidden glass or sea urchin spines. And if they drain, they are easily washed and won’t stink the house out.
Plastic tank Forget the traditional plastic bucket. It doesn’t have clear sides and so you can’t see in. Instead, take with you a small clear plastic tank. Now you can see any animals you catch at their level.
Plastic Zip-loc bags Versatile and invaluable, you can put in them everything from pellets and smelly specimens to shells or your lunch.
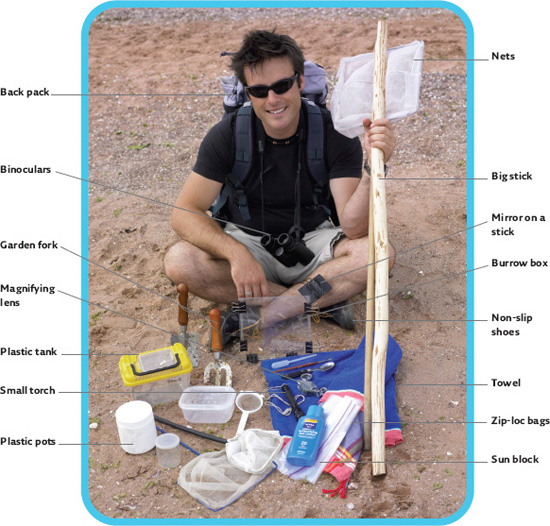
Small torch Useful for illuminating those dark cracks and crevices in rocks.
Sun block The combination of exposed environments and the way the Sun bounces back off the water is dangerous. You will burn very quickly and easily, so slap it on!
Towel Things do get wet that shouldn’t and that could be you or some equipment. Can also be used as a shade to protect living specimens from the sun.
Back pack To put it all in!
Rock pools
I still can’t resist peering into these puddles of sea water or turning over a rock. The addiction is simple and this habitat is one of the most exciting and surprising places on planet Earth. To this day, almost every stone I turn reveals another creature that I have never seen before.
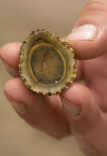
Each rock pool is unique. Those higher up the beach will be exposed for longer, and on a hot sunny day they will experience evaporation, meaning the water gets saltier. This, in turn, means less oxygen in the water for the creatures to breath. If it rains, the pools can get diluted to the point of almost being fresh water; this is very stressful for animals that are used to salty water. So, as a result, these rock pools are where the beach’s real tough nuts hang out; the rock pool specialists.
The further down the shore you go, the less time is spent isolated from the sea and so the more stable the conditions. Here you will tend to find a greater variety of life, and in the very last pools to be exposed at the lowest Spring tides, you may even find truly ocean-going creatures that simply get caught out.
Over the course of the seasons, life in the pools changes and as well as year-round residents, some creatures make migrations to and from the rock pools to deeper water. Every tide that sweeps over the beach and then retreats again can bring with it fresh surprises, so you can never be totally sure of what you may find.
I always find that animals and plants that live underwater tend to look pretty flat, boring or just plain uncomfortable out of it. Nowhere is this more obvious than at the seaside ‘rock pooling’. So instead of turning over stone after stone you can make a naturalist’s version of a dentist’s mirror to allow you to look under overhanging rocks and in crevices. I call this quite simply a mirror on a stick.
Handy stuff: mirror on a stick
Use this extended mirror to bounce light into the shadows. I find it one of the best ways to find egg cases of dog whelks and other creatures that want to keep out of harm’s way.
YOU WILL NEED
> thick, but bendable wire
> travel mirror
> gaffer tape
> scissors
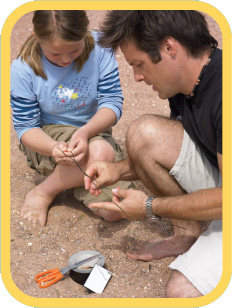
1 Take 6ocm of thick but bendable wire, fold it in half and twist.
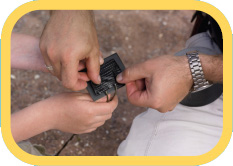
2 Bend one end at right angles and attach to a travel shaver’s mirror with reinforced gaffer tape (from a DIY shop). Make a more solid handle by binding the other end with the gaffer tape.
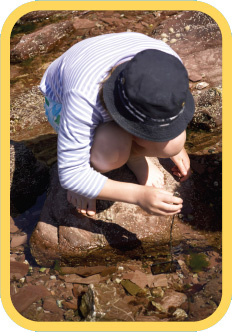
3 Use the mirror to shed light on those otherwise dark and sinister cracks and crevices.
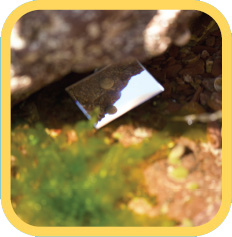
4 Bend the wire into a right angle so you can look in all those rock pools. You can even get an idea of what the world is like looking up from a crab’s point of view.
The baiting game
I remember going ‘shrimping’ as a kid, hunting for prawns for my supper. This involved tossing bait into the pools and coming back later to scoop up the unfortunate crustaceans into a net. But I found that some of the bait was seemingly being pulled by an invisible force across the bottom of the pools while other pieces exploded into hundreds of fragments, which would then be shunted around rapidly, resembling underwater fireworks. Other bits had simply disappeared! Very soon I was gazing into the pools trying to figure out who the thieves were. It was at that moment I was hooked, and so I became a rock pool investigator.
Many of the residents of rock pools are opportunists – they take whatever they can, whenever they can. They are the scavengers and the waste disposal units of the sea. By placing bait in the pools you are actually recreating something that happens all the time in nature.
When a creature dies anywhere in any ecosystem on the planet, there are a whole host of other creatures ready to return the goodness its body contains back into the living system, and rock pools are no exception. Animals die here, and our coasts are also the last resting place for many other creatures that die at sea and are washed up. Believe me, a body in a rock pool will not last long. But don’t just believe me, try it out for yourself.
Really it’s all about experimenting. Different baits may work better in different places and at different times, but the basic principle is the same. For best results, you need to spread the word to the rock pool community that bait has arrived, and you want the word to reach as many different creatures as quickly as possible.
Nick’s trick
Use the smelliest bait possible and ideally one that contains an element of ‘soup’; soft stuff that will break up into tiny particles and get wafted around in the water currents.
YOU WILL NEED
> smelly bait
> piece of string
OR
> pot of fish paste
> piece of mesh or old stocking
> elastic band
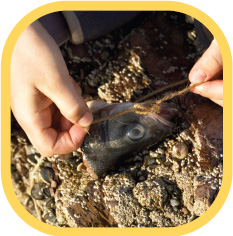
1 Bring your own bait; the smellier the better as this will waft around in the water and draw in creatures from further afield. I have used everything from scraps and trimmings that my local fishmonger has given me, like nice and smelly fish heads and tails, to bacon or ham that I have removed from my own sandwiches.
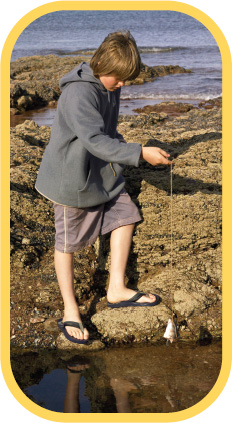
2 Attach your bait to a piece of string so you can lift the bait out of the water if a particularly greedy or boisterous crab or fish comes along. Many scavengers, such as crabs and blennies, can be very greedy and will leave the scene altogether, taking your bait with them.
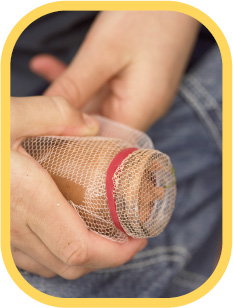
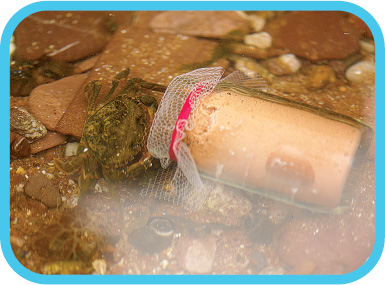
3 If the idea of handling smelly dead fish bits really fills you with disgust, there is a neater little trick that also works well using a pot of fish paste. Take the lid off your pot and stir up the contents a bit. Then cover with the mesh or old stocking and secure firmly with the elastic band.
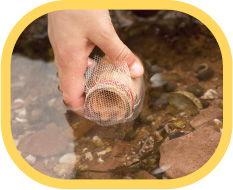
4 Pop the pot into a rock pool and that’s it! Just sit back and watch as the residents come scuttling.
Handy stuff: scavenger trap
Around areas where there is a fishing business, you may well come across large rope and wooden structures used to catch crabs and lobsters. You can borrow this idea and make your own rock pool version.
The trap is made from a container, which lets the smell of your bait escape into the water. When the creatures come searching, they find their way in via a funnel. This then acts as a one-way valve, trapping them inside. The cheapest way to do this is with an old plastic drinks bottle.
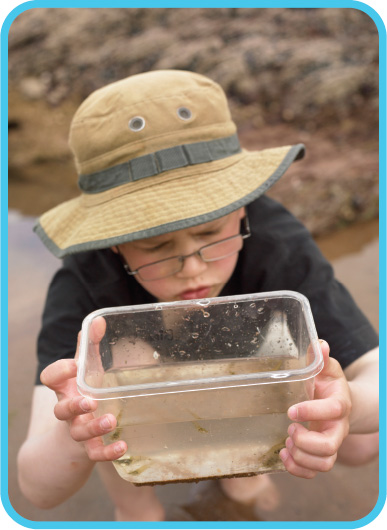
With the aid of your scavenger trap and a field guide you will soon be able to identify many different rock pool creatures.


