Полная версия
The Hummingbird Bakery Cake Days: Recipes to make every day special
Serves 10–12
FOR THE SPONGE
120g (4oz) unsalted butter, softened
400g (14oz) caster sugar
360g (12½oz) plain flour
1½ tbsp baking powder
40g (1½oz) desiccated coconut
¼ tsp salt
3 large eggs
260ml (9fl oz) coconut milk
100ml (3½fl oz) whole milk
FOR THE FILLING AND FROSTING
500ml (18fl oz) coconut milk
250ml (9fl oz) whole milk
1 tsp vanilla essence
7 egg yolks
300g (10½oz) caster sugar
40g (1½oz) plain flour
40g (1½oz) cornflour
200ml (7fl oz) double cream
50g (1¾oz) fresh coconut, shaved with a vegetable peeler and roasted if you wish
Three 20cm (8in) diameter
loose-bottomed sandwich tins
1. Preheat the oven to 170°C (325°F), Gas mark 3, and line the tins with baking parchment.
2. Using a hand-held electric whisk or a freestanding electric mixer with the paddle attachment, mix the butter, sugar, flour, baking powder, desiccated coconut and salt together on a low speed until sandy in consistency.
3. Place the eggs in a jug with the coconut milk and whole milk, and mix together by hand. With the electric whisk or mixer running on a low speed, pour the liquid ingredients into the dry mixture and beat together until all the ingredients are combined.
4. Divide the cake batter equally between the three prepared cake tins, then place in the oven and bake for 20–25 minutes or until the sponges are golden brown and springy to the touch. Allow to cool a little in the tins before turning out on to a wire rack, then leave to cool completely before you assemble the cake.
5. While the sponges are cooking, make the custard cream for filling and frosting the cake. Pour the coconut milk, whole milk and vanilla essence into a saucepan and bring to the boil. Meanwhile, put the egg yolks in a bowl, along with the sugar, flour and cornflour, and mix together to form a thick paste. If it is too dry to come together, add 1 tablespoon of the milk mixture to loosen it up.
6. Once the milk mixture has come to the boil, add 4–5 tablespoons to the paste and stir until the paste has become a thick liquid. Pour this into the pan with the remaining milk mixture and, stirring constantly, bring the custard back to the boil and allow to thicken. It should boil for at least 1 minute to allow the flour and cornflour to cook.
7. Pour the custard on to a baking tray, then cover with cling film to stop a skin from forming, and leave to cool completely for about 30 minutes. Meanwhile, whip the cream, either by hand or using the electric whisk, until it forms soft peaks.
8. Place the cooled custard in a separate bowl, mixing it to break it up, as it will have set while in the tray. Keep stirring until the custard is smooth, then fold the whipped cream into the custard and leave in the fridge for 20–30 minutes to chill and set slightly.
9. Once the sponges have cooled, you can assemble the cake. Place the first layer on a plate or cake card and top with 3–4 tablespoons of the coconut custard cream. Smooth it out using a palette knife, adding a little more if needed.
10. Continue this process, adding the second layer of sponge and topping it with frosting, followed by the third layer. Using the remainder of the custard cream, frost the sides and top of the cake, covering it completely so that no sponge is visible.
11. To finish, generously sprinkle the coconut shavings all over the top and sides, leaving space if you want to add further decoration to the top of the cake. To create a decoration like the one shown in the photograph, mix your desired colouring(s) with some vanilla frosting and pipe on to the cake in whatever shape or style you like.
TIP
If you want to roast the coconut, spread the shavings out on a baking tray and bake in the oven (preheated to 180°C/350°F/Gas mark 4) for 4–5 minutes or until toasted a light brown. Keep a close eye on the shavings while they cook and stir them about frequently as they can burn very easily.
CARAMEL CUPCAKES
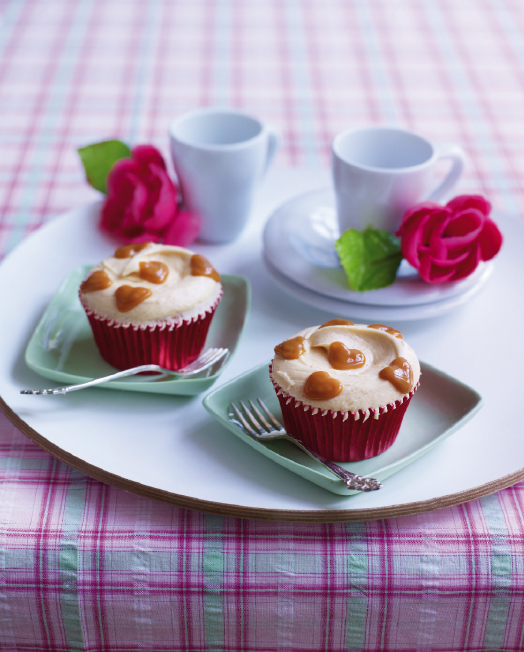
When we discovered dulce de leche – South American tinned caramel – we got very excited. It can be found in most large supermarkets and gives these cupcakes a wonderful creamy, caramely taste.
Makes 12–16 cupcakes
FOR THE SPONGE
80g (3oz) unsalted butter, softened
280g (10oz) caster sugar
240g (8½oz) plain flour
1 tbsp baking powder
¼ tsp salt
240ml (8½fl oz) whole milk
½ tsp vanilla essence
2 large eggs
150g (5½oz) tinned caramel or dulce de leche
FOR THE FROSTING
500g (1lb 2oz) icing sugar
160g (5½oz) unsalted butter, softened
50ml (1¾fl oz) whole milk
100g (3½oz) tinned caramel or dulce de leche, plus extra to decorate (optional)
One or two 12-hole
deep muffin tins
1. Preheat the oven to 190°C (375°F), Gas mark 5, and line a muffin tin with muffin cases.
2. Using a hand-held electric whisk or a freestanding electric mixer with the paddle attachment, whisk together the butter, sugar, flour, baking powder and salt on a low speed until crumb-like in consistency.
3. Place the milk and vanilla essence in a jug with the eggs and whisk by hand until combined. Pour three-quarters of this mixture into the dry ingredients and mix together on a slow speed, then increase the speed to medium and keep beating until smooth and thick. Scrape down the sides of the bowl, then add the remaining milk mixture and the tinned caramel, and continue to mix until all the ingredients are incorporated and the batter is smooth.
4. Divide the batter between the muffin cases, filling each by two-thirds. Any remaining batter can be used to fill one to four more cases in a separate tin. Place in the oven and bake for 18–20 minutes or until well risen and springy to the touch. Leave to cool for a while in the tin, then transfer to a wire rack to cool down fully while you make the frosting.
5. Using the electric whisk or freestanding mixer with the paddle attachment, beat the icing sugar with the butter on a low speed until combined and still powdery in texture. Slowly mix in the milk, and once it is incorporated, increase the speed to high and whisk until light and fluffy. Add the caramel and beat in well.
6. Spoon the frosting on to the cupcakes once they have cooled, smoothing it on with a palette knife and swirling the frosting. If you want to decorate the cakes, spoon some tinned caramel or dulce de leche into a piping bag with a small nozzle and pipe on to the cakes in little hearts, or whatever shape takes your fancy.
CHOCOLATE FONDANT CUPCAKES

Rich, decadent, chocolaty and creamy: has there ever been a better combination? If you want to be even more indulgent, serve with a dollop of whipped cream or custard.
Makes 12–16 cupcakes
FOR THE SPONGE
80g (3oz) unsalted butter, softened
280g (10oz) caster sugar
200g (7oz) plain flour
40g (1½oz) cocoa powder
¼ tsp salt
1 tbsp baking powder
2 large eggs
240ml (8½fl oz) whole milk
FOR THE FILLING AND FROSTING
400g (14oz) dark chocolate, finely chopped, plus 50g (1¾oz) extra to decorate (optional)
400ml (14fl oz) double cream
One or two 12-hole
deep muffin tins
1. Preheat the oven to 190°C (375°F), Gas mark 5, and line a muffin tin with muffin cases.
2. Using a hand-held electric whisk or a freestanding electric mixer with the paddle attachment, set on a low speed, mix together the butter, sugar, flour, cocoa powder, salt and baking powder. Mix until the ingredients are sandy in consistency and no large lumps of butter remain.
3. Place the eggs in a jug, then pour in the milk and mix together by hand. With the whisk or mixer still on a low speed, pour three-quarters of the milk and eggs into the dry ingredients. When all the liquid has been incorporated, scrape down the sides of the bowl to pick up any ingredients that have got stuck there, then add the remaining milk mixture and mix again, now on a medium speed, until you have a smooth and even batter.
4. Spoon the batter into the paper cases, filling them two-thirds full. If any batter is left, use it to fill up to four more cases in a second muffin tin, then place in the oven and bake for 18–20 minutes or until well risen and springy to the touch. Leave to cool slightly before removing from the tin and placing on a wire rack to cool completely while you make the filling and frosting.
5. Place the finely chopped chocolate in a bowl. Pour the cream into a saucepan and heat just to boiling point. Pour the hot cream over the chocolate, give it a stir and then leave until all the chocolate has melted. Stir again until smooth, then cover with cling film and set aside to cool.
6. Place the cooled cupcakes on a board and hollow out the centre of each cake using a sharp knife, cutting out a piece about 2cm (¾in) in diameter and 3cm (1¼in) long. Set the cut-out pieces to one side, then, using a teaspoon, fill the hollow of each cake half full with the chocolate cream filling. Place the cut-out pieces of sponge on top of the filling, like a lid, trimming the pieces to fit, if you need to, and then top each cupcake with some of the chocolate cream and swirl it.
7. If you wish to decorate further, grate or chop the extra 50g (1¾oz) chocolate, and sprinkle over the cupcakes to finish.
SPRING WEEKEND BAKES

APRICOT AND ALMOND COOKIES
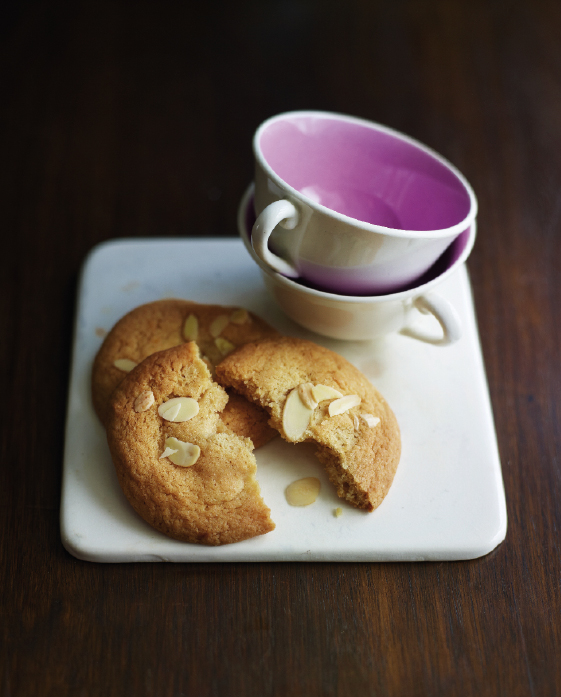
You might not be able to resist these cookies enough to let them cool down before devouring! For softer, chewier cookies, take them out of the oven as soon as they begin to turn golden brown.
Makes 10–12 cookies
135g (5oz) unsalted butter
80g (3oz) caster sugar
80g (3oz) soft light brown sugar
1 large egg
½ tsp vanilla essence
190g (7oz) plain flour
½ tsp salt
½ tsp ground cinnamon
½ tsp bicarbonate of soda
100g (3½oz) dried apricots, roughly chopped
60g (2oz) ground almonds
20g (¾oz) flaked almonds, roasted
1. Preheat the oven to 170°C (325°F), Gas mark 3, and line two baking sheets with baking parchment.
2. Using a hand-held electric whisk or a freestanding electric mixer with the paddle attachment, cream together the butter and both types of sugar until pale and fluffy. Add the egg and mix thoroughly on a medium-to-high speed, then add the vanilla essence and mix further.
3. Sift together the flour, salt, ground cinnamon and bicarbonate of soda. Add the dry ingredients to the creamed butter and sugar in two batches, mixing into a dough either by hand or using the freestanding mixer, then stir in the chopped apricots and ground almonds.
4. Break off pieces of the dough, about 2 tablespoons per cookie, then roll into balls and place on the prepared baking sheets. Allow five to six cookies per tray, making sure to space them evenly apart, with gaps of about 7cm (3in), as they will spread when baking.
5. Press a sprinkling of the flaked almonds on top of each cookie ball, then place in the oven and bake for 15–20 minutes or until a light golden brown in colour. Allow to cool for 10 minutes or so on the sheets before transferring to a wire rack.
LEMON AND THYME LOAF
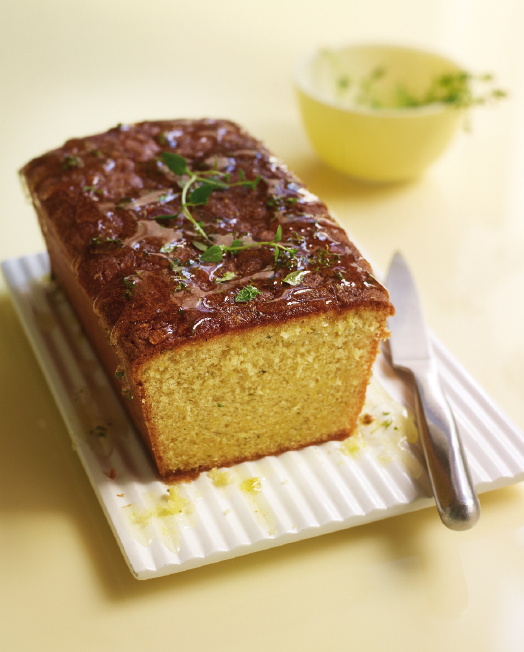
Trust us, thyme really works in a sweet dessert. The combination of lemon and thyme is perfect – tangy and fresh.
Serves 8–10
FOR THE SPONGE
190g (7oz) unsalted butter, softened, plus extra for greasing
190g (7oz) plain flour, plus extra for dusting
Zest of 2 unwaxed lemons
3 tsp finely chopped lemon thyme leaves
190g (7oz) caster sugar
3 large eggs
1 tsp baking powder
¼ tsp salt
25ml (1fl oz) soured cream
FOR THE SOAKING SYRUP
40g (1½oz) caster sugar
Zest and juice of 1 lemon
2 tsp finely chopped lemon thyme leaves, plus extra sprigs to decorate
One 8.5 x 17.5cm (3½ x 7in)
loaf tin with 7.5cm (3in) sides
1. Preheat the oven to 170°C (325°F), Gas mark 3, then grease the loaf tin with butter and dust with flour.
2. Using a hand-held electric whisk or a freestanding electric mixer with the paddle attachment, slowly beat together the butter, lemon zest, thyme leaves and sugar to bring the ingredients together, then whisk on a medium speed until light and fluffy. Break the eggs into the bowl one at a time, mixing well after each addition and scraping down the sides of the bowl to make sure all the ingredients are well combined.
3. Sift together the flour, baking powder and salt, then add to the creamed butter and egg mixture in two batches and mix together lightly. Add the soured cream and then pour the batter into the prepared loaf tin.
4. Bake in the oven for 40–50 minutes or until the sponge is firm to the touch or a skewer inserted into the middle of the loaf comes out with no cake batter sticking to it.
5. While the loaf is cooking, make the syrup. Place all the ingredients in a small saucepan, along with 40ml (1½fl oz) of water. Bring this to the boil, allowing it to reduce by about half, then pour over the cooked loaf as soon as it comes out of the oven.
6. After adding the syrup, allow the loaf to cool a little in the tin, then transfer to a wire rack to cool completely before serving. Decorate with a couple of sprigs of lemon thyme.
APPLE BLOSSOM CUPCAKES

These were sold as part of our summer floral range and proved really popular. This recipe is ideal for more experienced bakers, and variations can be made using different flower teas and essences.
Makes 12–16 cupcakes
FOR THE SPONGE
4 tbsp apple iced-tea powder
3 tbsp just-boiled water
80g (3oz) unsalted butter, softened
280g (10oz) caster sugar
240g (8½oz) plain flour
1 tbsp baking powder
¼ tsp salt
200ml (7fl oz) whole milk
2 large eggs
FOR THE FROSTING
4 tbsp apple iced-tea powder
50ml (1¾fl oz) whole milk
500g (1lb 2oz) icing sugar
160g (5½oz) unsalted butter, softened
One or two 12-hole
deep muffin tins
1. Preheat the oven to 190°C (375°F), Gas mark 5, and line a muffin tin with muffin cases.
2. Place the apple tea powder in a bowl, add the just-boiled water and allow to dissolve completely. Using a hand-held electric whisk or a freestanding electric mixer with the paddle attachment, whisk together the butter, sugar, flour, baking powder and salt on a low speed until all the ingredients are well incorporated and resemble fine breadcrumbs.
3. Place the milk in a jug with the eggs and apple tea and whisk together by hand. Pour three-quarters of the milk mixture into the dry ingredients and mix on a low speed to combine. Increase the speed to medium and keep mixing until smooth and thick. Scrape down the sides of the bowl, add the remaining milk mixture and continue to beat on a medium speed until everything is mixed in and the batter is smooth.
4. Divide the batter between the paper cases, filling them up to two-thirds. Any remaining batter can be used to fill up to four more cases in a second muffin tin. Place in the oven and bake for 18–20 minutes or until well risen and springy to the touch. Leave to cool slightly before removing from the tin, then place on a wire rack to cool down fully before adding the frosting.
5. To make the frosting, dissolve the apple tea powder in a small bowl with the milk. Using the electric whisk or the freestanding mixer with paddle attachment, slowly whisk the icing sugar with the butter until sandy in texture and no large lumps of butter remain. Gradually pour the tea-infused milk into the icing sugar and butter mixture. Once all the milk has been added, increase the speed to high and whisk until light and fluffy.
6. Top each cake with a generous spoonful of frosting, then gently smooth over with a palette knife, adding a swirl at the top if you wish.
7. To decorate with flowers, as in the photograph. Alternatively, you can finish the cakes with shop-bought decorations of your choice.
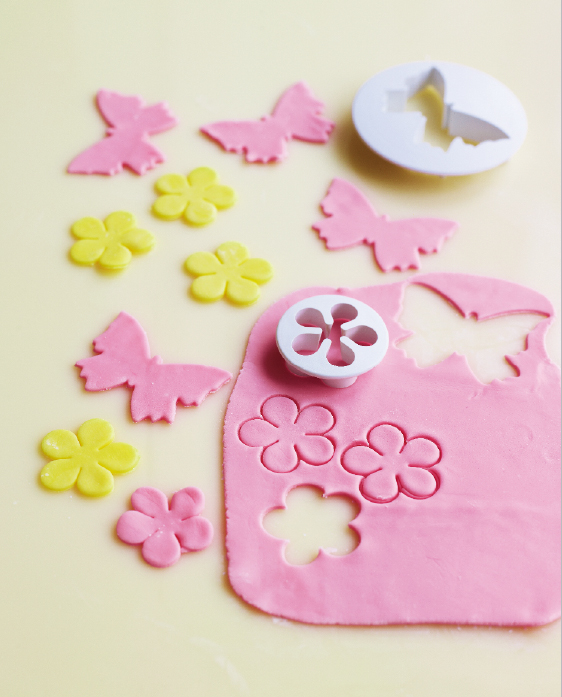
VARIATIONS
Cherry blossom cupcakes: Follow the previous recipe, replacing the apple tea powder in the sponge batter with 3 cherry blossom teabags. Put the teabags in a bowl, add 3 tablespoons of just-boiled water and leave to draw for 30 minutes. Add the brewed tea to the jug with the milk and eggs, retaining the teabags for use in the frosting. To make the frosting, first place the teabags in a small bowl with the milk, then leave to stand for 30 minutes. Remove the teabags from the milk, giving them a good squeeze to extract the maximum flavour, and mix the tea-infused milk with the butter and icing sugar, as in step 5.
Orange blossom cupcakes: Make as for apple blossom cupcakes, replacing the apple tea powder in the sponge with 1 tablespoon of orange blossom water and in the frosting with 3 teaspoons of orange blossom water. For the sponge, mix the tablespoon of orange blossom water with the milk in a jug, add the eggs and whisk together before adding to the dry ingredients as in step 3. For the frosting, first mix the orange blossom water with the milk and then mix with the butter and icing sugar.
APPLE STREUSEL CAKE
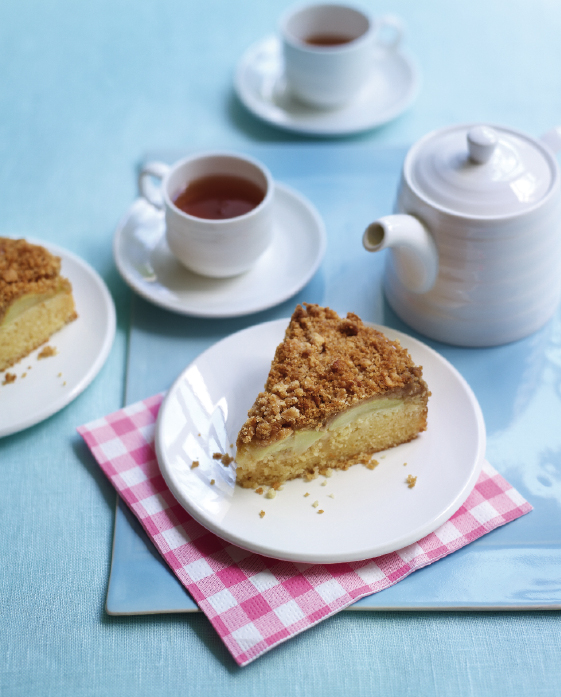
Imagine a moist apple cake … with apple crumble on top. Serve this with whipped cream, ice cream or custard.
Serves 8–10
FOR THE SPONGE
60g (2oz) unsalted butter, softened, plus extra for greasing
140g (5oz) plain flour, plus extra for dusting
100g (3½oz) caster sugar
1 large egg
½ tsp vanilla essence
1 tsp baking powder
⅛ tsp salt
80ml (3fl oz) whole milk
3 Granny Smith apples
FOR THE STREUSEL TOPPING
70g (2½oz) plain flour
½ tsp ground cinnamon
40g (1½oz) unsalted butter, chilled and diced
70g (2½oz) soft light brown sugar
One 20cm (8in) diameter
spring-form cake tin
1. Preheat the oven to 170°C (325°F), Gas mark 3, then grease the tin with butter and dust with flour.
2. First make the streusel topping. Sift the flour and ground cinnamon into a bowl. Add the butter and, using your fingertips, rub the ingredients together until they resemble breadcrumbs. Stir in the sugar and set aside while you make the sponge batter.
3. Using a hand-held electric whisk or a freestanding electric mixer with the paddle attachment, cream together the butter and sugar until pale and fluffy. Add the egg and vanilla essence, and mix thoroughly, scraping down the sides of the bowl to ensure all the ingredients are fully incorporated.
4. Sift together the flour, baking powder and salt, then add half of this mixture to the creamed butter and sugar, followed by half the milk. Mix well on a medium speed after each addition, scraping down the sides of the bowl, then repeat with the rest of the dry ingredients and the milk. Pour the batter into the prepared cake tin.
5. Peel, core and slice the apples into quarters and each quarter into three or four slices, depending on the size of the apples. Arrange the slices in concentric circles on top of the cake batter, then sprinkle with the streusel topping, making sure it forms an even layer.
6. Place in the oven and bake for 35–45 minutes or until it is golden brown on top and a skewer inserted into the middle of the cake comes out clean, with no uncooked mixture sticking to it. Set aside to cool, and then remove from the cake tin. This cake can be enjoyed warm or cold with some whipped cream, ice cream or custard.
GRASSHOPPER PIE
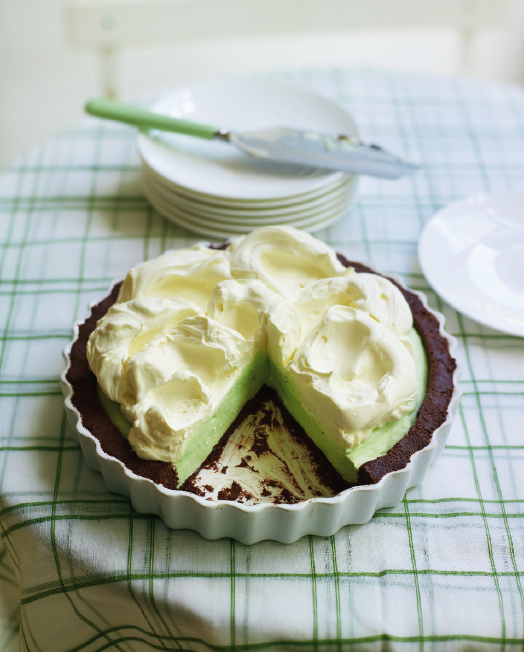
An old American favourite: creamy, minty and chocolaty.
Serves 10–12
FOR THE BISCUIT BASE
250g (9oz) chocolate-flavoured biscuits or double-chocolate cookies
175g (6oz) unsalted butter, melted
FOR THE FILLING
180g (6½oz) large white marshmallows
180ml (6½fl oz) whole milk
¼ tsp peppermint essence
⅛ tsp green food colouring (such as Dr Oetker)
700ml (1 pint 4fl oz) double cream
Chocolate shavings, to decorate (optional)
One 23cm (9in) diameter
pie dish or loose-bottomed
tart tin
1. In a food processor with the blade attachment, blitz the chocolate biscuits into a fine crumb. Alternatively, place in a plastic bag, seal the bag shut and crush with a rolling pin. Pour the crumbs into a bowl and add the melted butter, mixing until all the crumbs are coated and can be squeezed together.
2. Tip the crumb mixture into the pie dish or tart tin, pressing it into the base and sides, then place in the fridge and leave for 30–40 minutes to set completely.
3. Meanwhile, make the filling. In a saucepan over a low heat, melt the marshmallows in the milk. Remove from the heat, then add the peppermint essence and food colouring and stir into the marshmallow mixture until it is evenly green in colour. Set aside to cool for 10–15 minutes.
4. Pour 300ml (10½fl oz) of the cream into a bowl and whip into soft peaks either by hand or using a hand-held electric whisk, then fold into the marshmallow mixture. Pour the filling into the chilled biscuit base and leave in the fridge for 1–2 hours to set completely.
5. Once set, whip the remaining cream and spoon on to the top of the pie. You can also sprinkle with chocolate shavings if you wish.
RHUBARB AND ALMOND LOAF
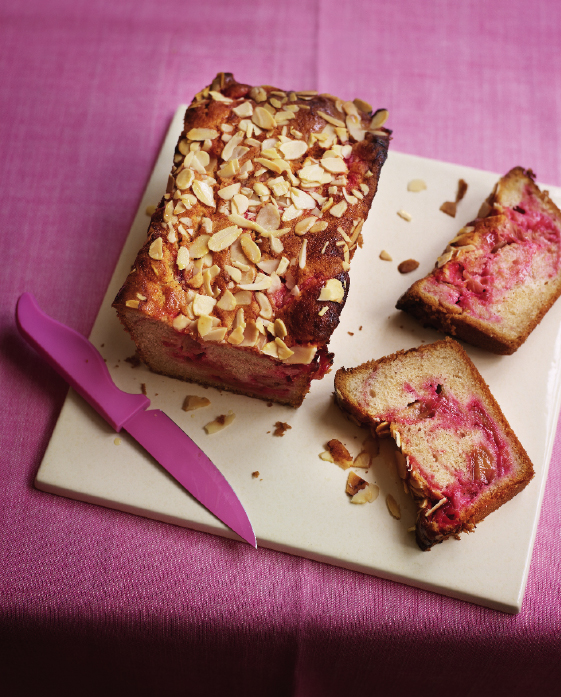
Tangy rhubarb moistens the sponge in this easy-to-make loaf. We love to eat this with a nice cup of milky tea.
Serves 8–10
FOR THE STEWED RHUBARB
4–5 stalks of rhubarb, chopped into 2cm (¾in) pieces
70g (2½oz) caster sugar
20g (¾oz) unsalted butter
FOR THE SPONGE
190g (7oz) unsalted butter, softened, plus extra for greasing
140g (5oz) plain flour, plus extra for dusting
190g (7oz) caster sugar
3 large eggs
1 tsp baking powder
50g (1¾oz) ground almonds
½ tsp ground cinnamon
½ tsp ground ginger
25ml (1fl oz) whole milk
100g (3½oz) stewed rhubarb
15g (½oz) flaked almonds
One 8.5 x 17.5cm (3½ x 7in)
loaf tin with 7.5cm (3in) sides
1. Preheat the oven to 170°C (325°F), Gas mark 3, then grease the loaf tin with butter and dust with flour.
2. Place the rhubarb in a saucepan along with the sugar, butter and 50ml (1¾fl oz) of water. Cook on a medium heat, stirring frequently, until the rhubarb softens, then remove the pan from the hob and set aside to cool completely.


