Полная версия
Lorraine Pascale’s Fast, Fresh and Easy Food
+ Now, here you can either spoon blobs of the choux pastry onto the baking sheets or (my favourite method with my piping bag obsession) pipe the blobs using a disposable piping bag cut to give a 1.5cm opening. Either way, make them about 2–3cm in diameter and space them a little bit apart. This makes about 25. Use a finger slightly moistened with water to push down any end bits that may be sticking up (so they don’t burn in the oven), then bake for 25 minutes.
+ The puffs should be crisp and golden on top when cooked. These are really best served piping hot when they are still slightly moist as they are cut open.
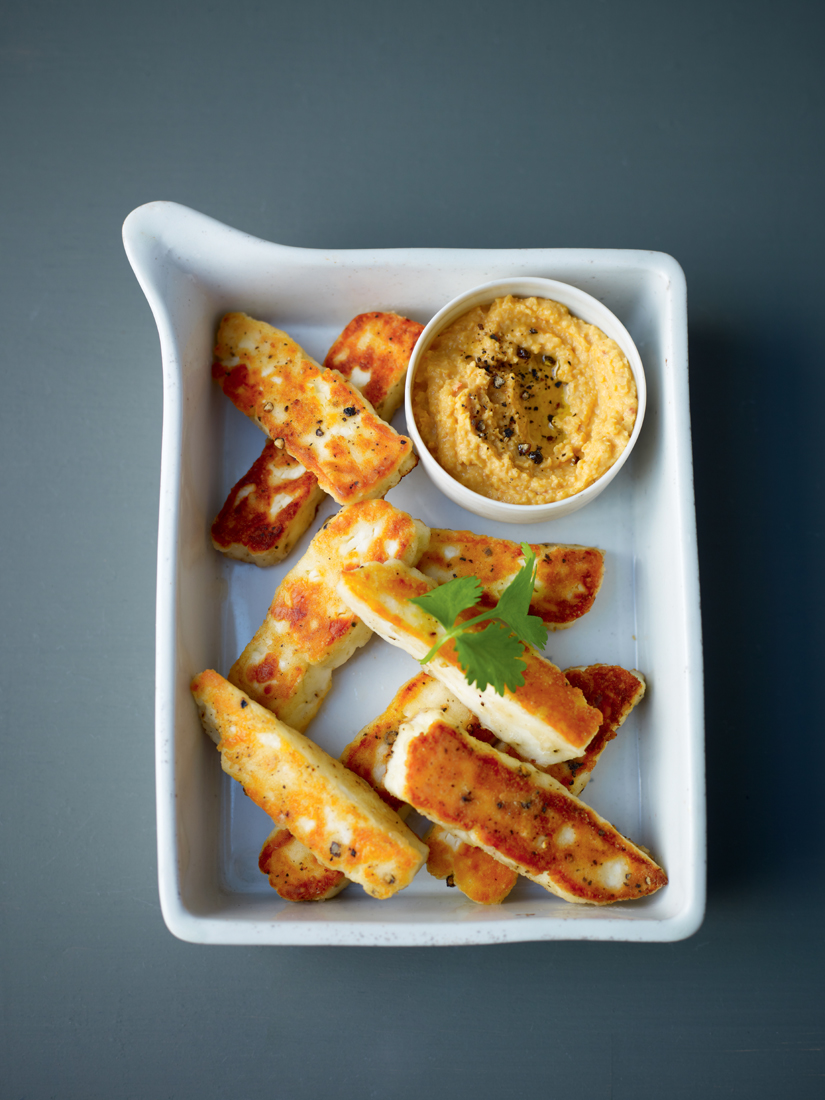
Crunchy black pepper halloumi dip sticks with harissa hummus
Before I tested this recipe I had not had the privilege of cooking halloumi. I’d eaten it many times, but never felt the urge to give it a go at home. Halloumi is an eccentric-textured-and-tasting cheese which is very salty on the palate. It prefers, unlike its cheesy counterparts, to be pan-fried and grilled as it holds itself together very well once cooked.
Time from start to finish: 15 minutes
Serves: 4
Equipment: Colander, blender or food processor, large frying pan, plate
Hummus
400g tin of chickpeas
1 garlic clove
100g half- or full-fat crème fraîche
1–4 tbsp harissa paste (easy to find at the supermarket)
Drizzle of extra virgin olive oil (optional)
Halloumi
Sunflower oil
50g plain flour
2 × 250g blocks of halloumi cheese
1 lime
Small handful of fresh coriander
Salt and freshly ground black pepper
+ First, make the hummus. Drain and rinse the chickpeas, peel the garlic and add both to a blender or food processor. Add the crème fraîche and enough harissa paste to taste (depending on how hot you like it). Blitz until smooth, season to taste with salt and pepper and add a drizzle of oil if you think it needs it. Then spoon it into a serving bowl and set aside.
+ Next, prepare the halloumi. Put three big glugs of oil in a large frying pan over a medium heat. Put the flour on a plate, season with a little pepper and set aside. Cut the halloumi into thick sticks. I cut each block into quarters lengthways and then lay each piece on its side and cut it in half again to give eight big chunky chips. Toss them in the flour so they are well covered, then gently lower them into the hot oil and fry for 4–5 minutes, turning regularly with tongs, until golden brown all over.
+ Remove the halloumi from the pan and drain on kitchen paper for a minute. Then arrange on a large serving plate and squeeze the lime juice over. Sit the dip bowl on the plate beside the halloumi, pick and scatter the coriander leaves on top and serve. Halloumi really comes to life with these flavours.
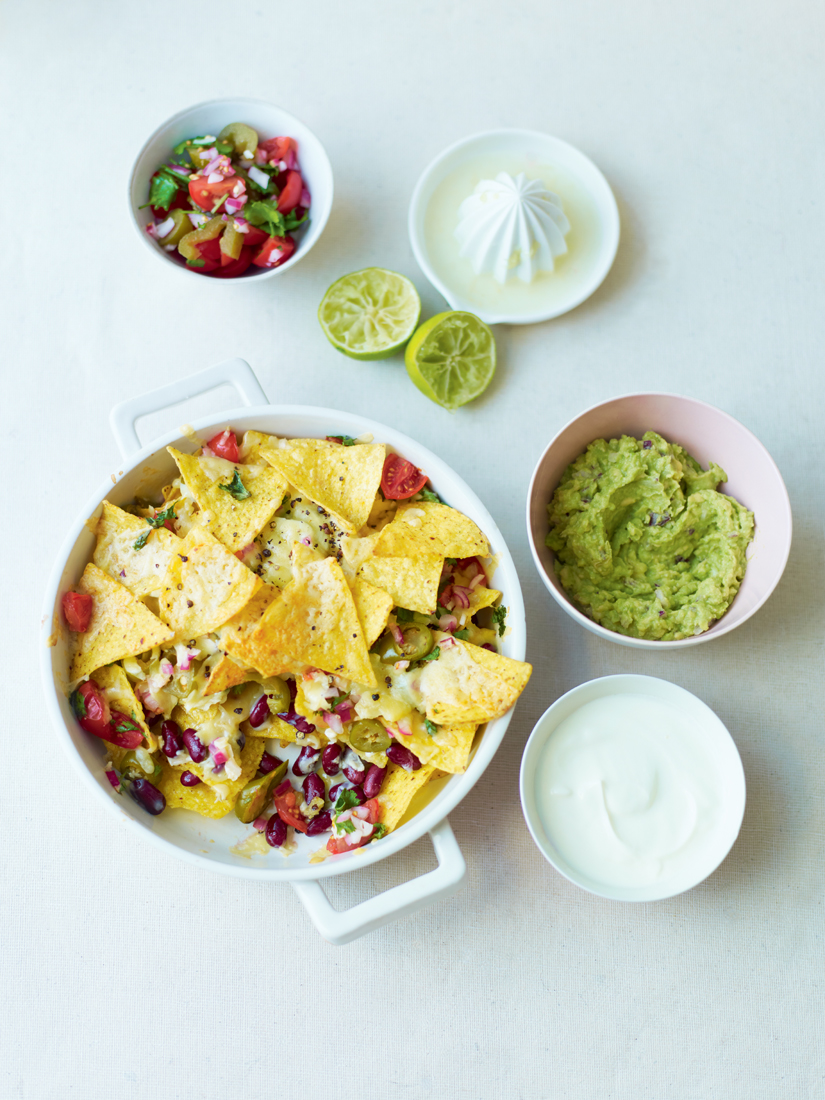
Naughty, naughty nachos
Lots of cheese, chips and cream. Just what I feel I need on those days when I want that extra bit of comfort on a plate. There are a few parts to this recipe, but it is really, really quick and I find myself gravitating to make this at the weekend, as it is a great sharing dish. It is on the side of naughty, but really tasty. Everything in balance is my mantra. I found the jars of jalapeños in the supermarket, but if you can’t get them, just use two regular green or red chillies, deseeded and finely sliced.
Time from start to finish: 25 minutes
Serves: 6
Equipment: Colander, 2 small bowls, 25.5cm-square baking dish at least 6cm deep
Salsa
200g jar red or green jalapeños
200g cherry tomatoes
1 red onion (or 1 bunch of spring onions)
Small handful of fresh coriander
Nachos
200g Cheddar cheese
400g tin of kidney beans
200g bag of tortilla chips
200g sour cream
Guacamole
3 perfectly ripe avocados
A few drops of Tabasco sauce (optional)
½ lime
Salt and freshly ground black pepper
+ Preheat the oven to 200°C, (fan 180°C), 400°F, Gas Mark 6.
+ Firstly, prepare the salsa. Drain the jalapeños, quarter the cherry tomatoes and toss both into a small bowl. Peel and finely chop the red onion (or finely slice the spring onions, if using), reserve a small handful and add the remainder to the bowl. Rip the leaves from the coriander stalks, roughly chop them, then toss everything together and season to taste.
+ Finely grate the cheese and drain and rinse the beans.
+ Now to assemble the nachos. Scatter a third of the tortilla chips in the bottom of the baking dish and scatter over a third of the cheese and then all of the beans. Then follow with a third more tortillas, a third more cheese and some of the salsa. Finish with the remaining tortillas and cheese. This is actually a total freeform dish; my only thing is I love cheese on the top.
+ Now pop it into the oven to bake for 10 minutes while you make the guacamole.
+ Halve the avocados, discard the stones and use a spoon to scoop the flesh out into a small bowl. Lightly mash with a fork and then stir the reserved chopped onion through with a few drops of Tabasco, if you like. Season to taste with salt and pepper and squeeze in the lime juice.
+ Spoon the sour cream, remaining tomato salsa and guacamole into small serving bowls. Remove the now-cooked nachos from the oven. The cheese should be bubbling and the tortillas just catching colour. Serve in the centre of the table with the accompaniments for everyone to dig in and help themselves.
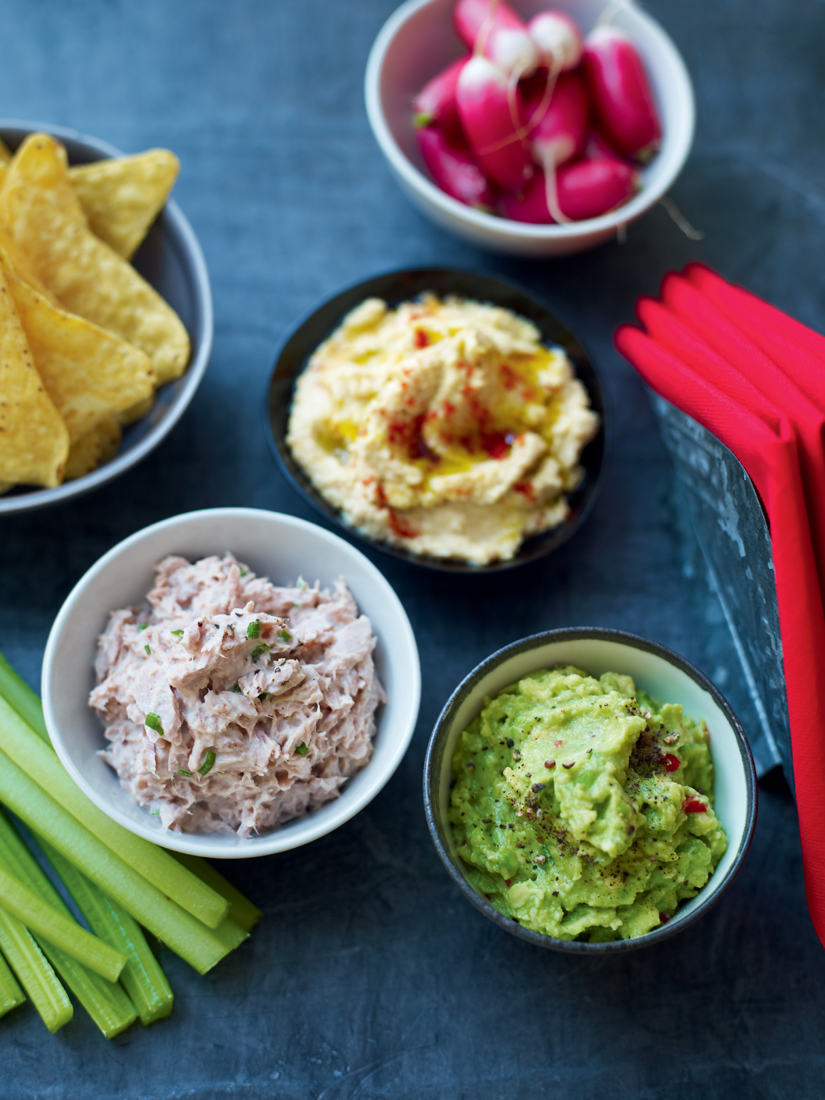
Skinny dipping
Three tasty, no-cook skinny dip numbers; great to eat with potato-skin crisps, tortilla chips or crudités such as carrots, radishes and celery. You can make them all or just one or two. They can all be made ahead of time for stress-free snacking!
Time from start to finish (for all three): 15 minutes (about 5 minutes each)
Equipment: 2 medium bowls, scissors, colander, blender
Tuna & crème fraîche dip with black pepper
Makes: about 225g
185g or 200g tin of tuna in spring water
75g half- or full-fat crème fraîche
A few fresh chives
¼ lime (or lemon)
Teeny squidge of honey (optional)
Salt and freshly ground black pepper
Hummus with cumin & paprika
Makes: about 350g
400g tin of chickpeas
100g half- or full-fat crème fraîche
2 tsp cumin powder
Extra virgin olive oil
1 garlic clove
¼ lime (or lemon)
A good pinch of paprika
A few fresh coriander or flat leaf parsley leaves
Salt and freshly ground black pepper
Avocado, chilli & chive dip
Makes: about 275g
2 ripe avocados
1 small red chilli
A few fresh chives
1 lime (or lemon)
Salt and freshly ground black pepper
Tuna & créme fraîche dip with black pepper
+ Drain the tuna well, squeezing out as much of the water as possible. Place in a medium bowl, add the crème fraîche and then snip in the chives using scissors. Mix together well and season to taste with salt, pepper and a good squeeze of lime (or lemon) juice. Add a little honey to sweeten, if liked, also. Spoon into a serving bowl to serve.
Hummus with cumin & paprika
+ Drain the chickpeas, rinse well and then tip them into a blender (I find a stick blender brilliant). Add the crème fraîche, cumin and a drizzle of oil, then peel and add the garlic clove. Season well with salt and pepper and blitz until fairly smooth. Check the seasoning, adjusting if necessary, add a squeeze of lime (or lemon) juice and then blitz again briefly. Spoon into a serving bowl, sprinkle the paprika on top, rip over some coriander or parsley leaves and serve.
Avacado, chilli & chive dip
+ Cut the avocados in half, discard the stones and then scoop out the flesh into a medium bowl. Deseed and finely slice the chilli and add. Then, using scissors, snip in the chives. Mash everything up until fairly smooth, season to taste with a good amount of salt and pepper and squeeze in the lime (or lemon) juice. Spoon into a serving bowl to serve.
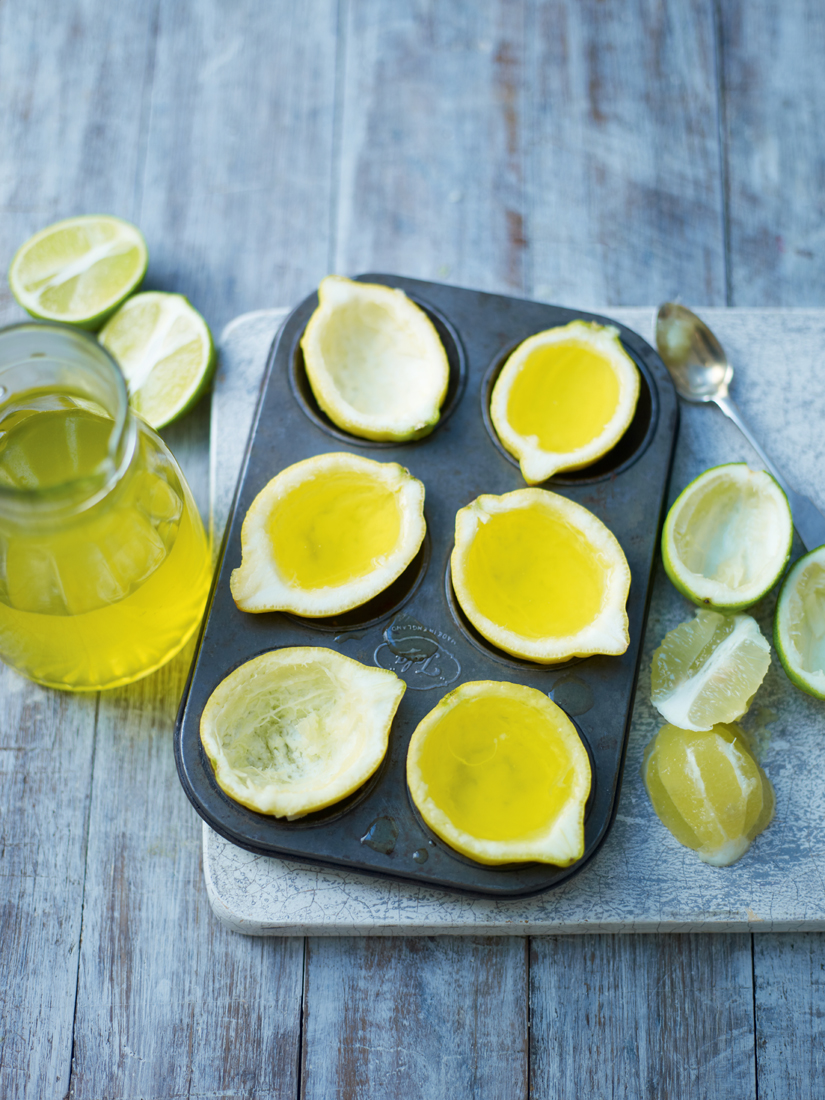
Lemoncello jello shots
Remove these sassy sunshine slices from the freezer or fridge an hour or so before you want to use them so they soften slightly before eating. Of course, these can be made for the kiddies, but for adults I like to add 150ml of lovely, luscious limoncello to 350ml of water. No need to heat it; just dissolve the jelly in boiling water, add the gelatine leaves, then finish with the limoncello and sugar.
Prep time: 15 minutes
Setting time: 30 minutes in the freezer (or 1 hour in the fridge)
Makes: 20–28 (depending on the size of lemons used)
Equipment: Kettle, small wide bowl, large tray or 12-hole muffin tin, heatproof measuring jug
Seven 6.5 × 11.5cm or eight 7.5 × 11cm leaves of gelatine
7 medium or 5 big lemons
135g pack of lemon jelly
400ml hot water
Couple of small drops of lemon essence (optional)
1 tbsp caster sugar
+ Put the kettle on to boil. Then put the gelatine leaves into a small wide bowl, cover them with cold water and set aside to soften.
+ Cut the lemons in half lengthways and, using a spoon, scoop out the juicy flesh. It takes a bit of wiggling and getting squirted by the juice, but you will get there! The trick is not to break through the skin. (You don’t need the flesh here, but afterwards I like to squeeze the juice out and freeze it in an ice-cube tray for handy lemon juice needs at other times.)
+ Set each lemon shell half, cut side up, on a large tray or put each one in the hole of a 12-hole muffin tin. If you have 14 shells, then nestle the remaining two on top in between the others and they should sit still.
+ Next, break up the lemon jelly a bit and put it into a heatproof measuring jug, then pour over enough hot water to reach 400ml in the jug.
+ Pick up the gelatine leaves – they will feel all soft. Gently squeeze out as much liquid as you can from them, discard the bowl of water and then put the soft gelatine leaves into the jelly and hot water. Stir constantly until it dissolves. Then stir in the lemon essence (sometimes the lemon jelly just is not lemony enough) and sugar until dissolved.
+ Use the jelly to fill each lemon shell right up to the very top so it is almost overflowing. Let them cool down for about 5 minutes and then whack them in the freezer for 30 minutes to firm up (but not much longer or they will freeze!). They will set in the fridge also, but allow double the time.
+ Once they are firm, remove them from the freezer (or fridge). Then, using a sharp, non-serrated knife, cut them in half, straight down, lengthways, and there you have it!
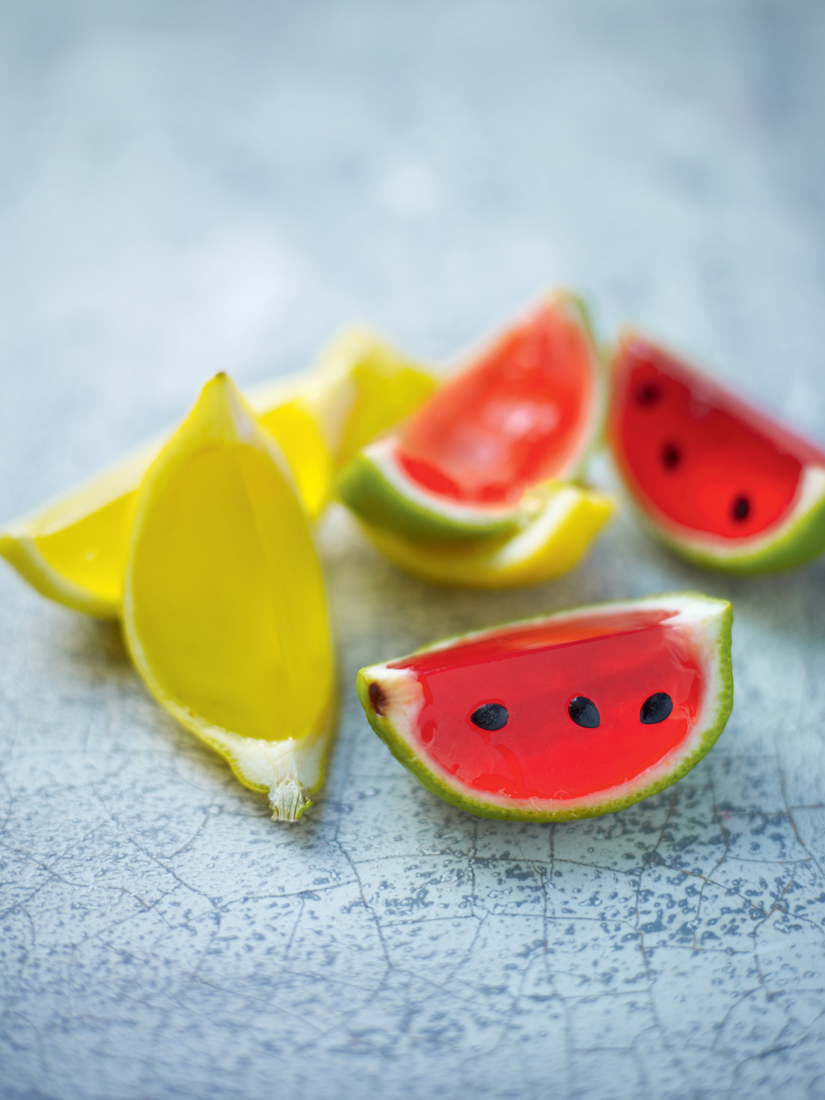
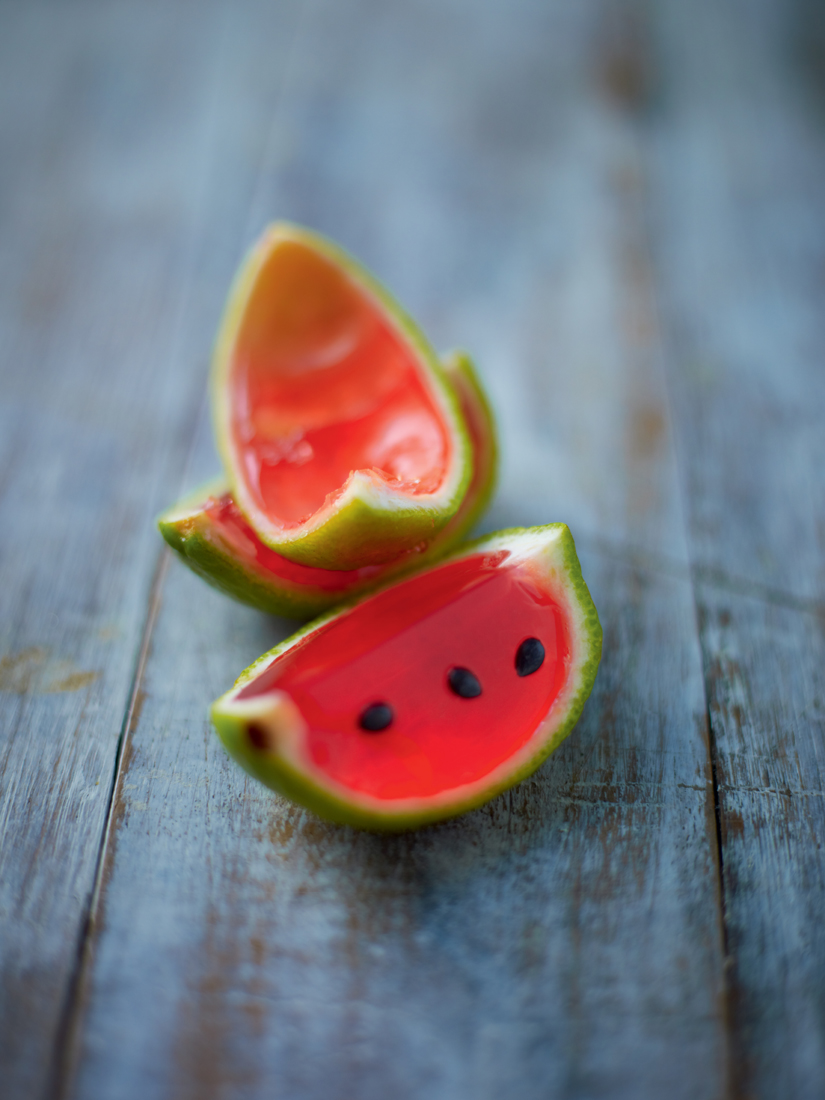
Watermelon jello shots
If you were a sporty type at school, you may remember those little orange slices that were given out at half-time during matches. A momentary respite from jumping and leaping in the air on a cold windy netball court in the depths of winter seems to be a vivid memory from my early teenage years. Naturally, giving you a recipe for orange slices may have proven uninspiring so, with a bit of cooking magic, I would like to introduce you to my watermelon jello shots … A happy walk down memory lane with a very modern twist. For an alcoholic version, replace 150ml of the water with some vodka.
Prep time: 25 minutes
Setting time: 25 minutes in the freezer, plus 15 minutes if using passion fruit seeds
Makes: 56–64 (depending on the size of limes used)
Equipment: Kettle, small wide bowl, large tray or 2–3 × 12-hole muffin tins, heatproof measuring jug
Seven 6.5 × 11.5cm or eight 7.5 × 11cm leaves of gelatine
16 small or 14 medium limes
135g pack of strawberry jelly
400ml hot water
1 tbsp caster sugar (optional)
1 large or 2 small passion fruit (optional)
+ Put the kettle on to boil. Then put the gelatine leaves into a small wide bowl, cover them with cold water and set aside to soften.
+ Cut the limes in half lengthways, rather than around their middles and, using a spoon, scoop out the juicy flesh. It takes a bit of wiggling and getting squirted by the juice, but you will get there! The trick is not to break through the lime skin. (You don’t need the flesh for this recipe, but afterwards I like to squeeze the juice out and freeze it in an ice-cube tray for handy lime juice needs at other times.)
+ Set each half, cut side up, on a large tray, or put each one in the hole of a 12-hole muffin tin. They fit perfectly and don’t move around too much that way. You will need two or three 12-hole muffin tins, but if you don’t have enough, you can nestle the excess lime shells on top in between the others and they should sit still.
+ Next, break up the strawberry jelly a bit and put it into a heatproof measuring jug and then pour enough hot water over the jelly to reach 400ml in the jug.
+ Pick up the gelatine leaves – they will feel all soft. Gently squeeze out as much liquid as you can from them, discard the bowl of water and then put the soft gelatine leaves into the jelly and hot water. Leave to stand for a few minutes until everything begins to melt, then stir a little until everything is completely dissolved. Next, stir in the sugar, if using, until dissolved also.
+ Use the jelly to fill each lime shell right up to the very top so it is almost overflowing. Let them cool down for about 5 minutes and then whack them in the freezer for about 25 minutes to firm up (but not much longer or they will freeze!). They will set in the fridge also, but allow double the time.
+ Meanwhile, prepare the passion fruit by cutting it (or them) in half and scooping out the seeds onto kitchen paper. Dab the seeds dry with the paper and set them aside.
+ Halfway through the setting time (once the jellies are just beginning to firm up), remove them and carefully arrange the passion fruit seeds on top. Arrange about six seeds on each one, keeping them away from the middle as you will be cutting them in half later, and lightly press each one down a little so it will set into the jelly. Then return to the freezer until completely firm.
+ Once they are firm, remove them from the freezer. Then, using a sharp, non-serrated knife, cut them in half, straight down (again, lengthways), and there you have it!
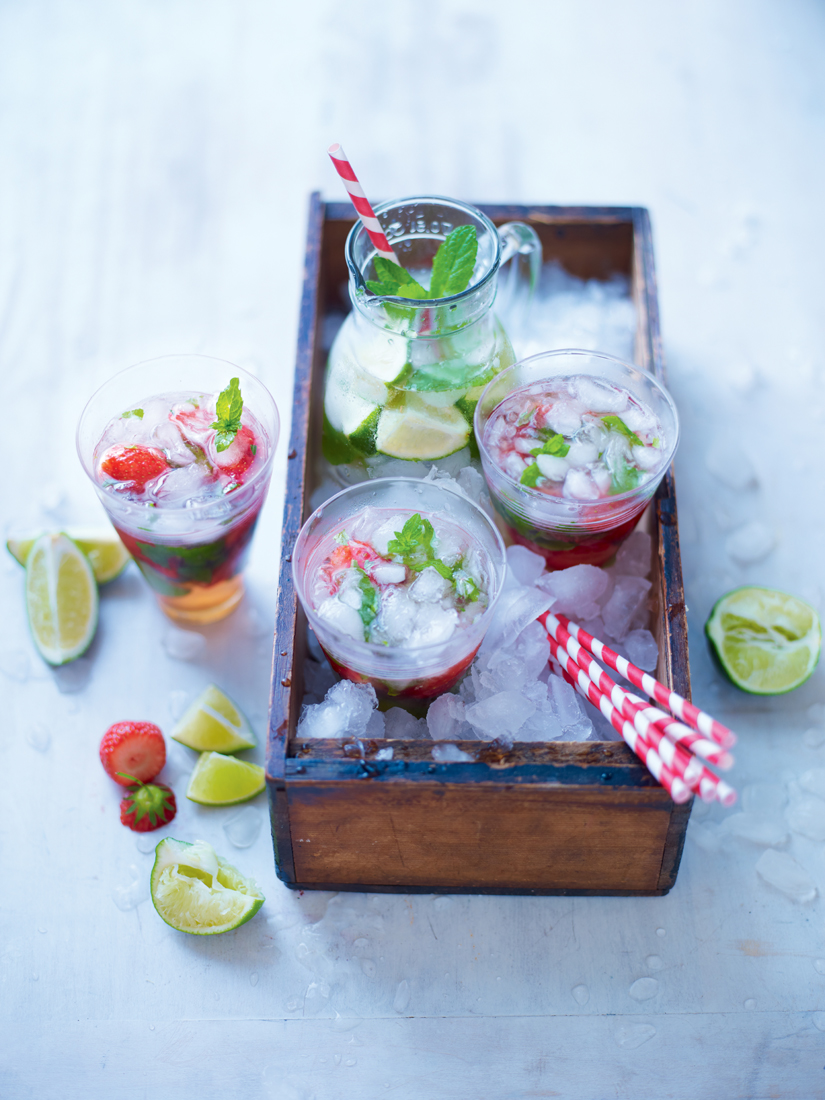
Strawberry & mint mojitos
Ahh, mojitos. My Achilles heel, for sure. Whether they be alcoholic or virgin, I love these sugary South American drinks. Strawberries can be substituted with other fruit, such as blackberries or raspberries, and the rum replaced with extra soda water or lemonade for a non-alcoholic version.
Time from start to finish: 15 minutes
Makes: 4
Equipment: Four 350ml glasses, rolling pin, straws or cocktail stirrers
3 limes
8 tbsp demerara sugar
12 strawberries
400g crushed ice
Small handful of fresh mint
250ml white rum
250ml soda water or lemonade (or even Pimm’s)
+ Cut the limes into quarters lengthways and put three pieces in the bottom of each of four 350ml serving glasses. Make sure the glasses are wide enough to fit the end of a rolling pin in. (You’ll see why.)
+ Add 2 tablespoons of the sugar to each one. Then, using the end of a rolling pin, squash everything together to squeeze the lime juice out and mix with the sugar.
+ Hull the strawberries (cut out the green bit with the point of a sharp knife) and add three to each glass. Then very gently crush them a bit too.
+ Fill the glasses almost to the top with the crushed ice. Pick and reserve four nice mint sprigs from the bunch and then rip the remaining leaves off the stalks and scatter them onto the ice. Divide the rum evenly between the glasses and then top with the soda water or lemonade.
+ Mix everything together with a spoon, then add a sprig of mint to each glass and serve at once with a straw or cocktail stirrer popped in.
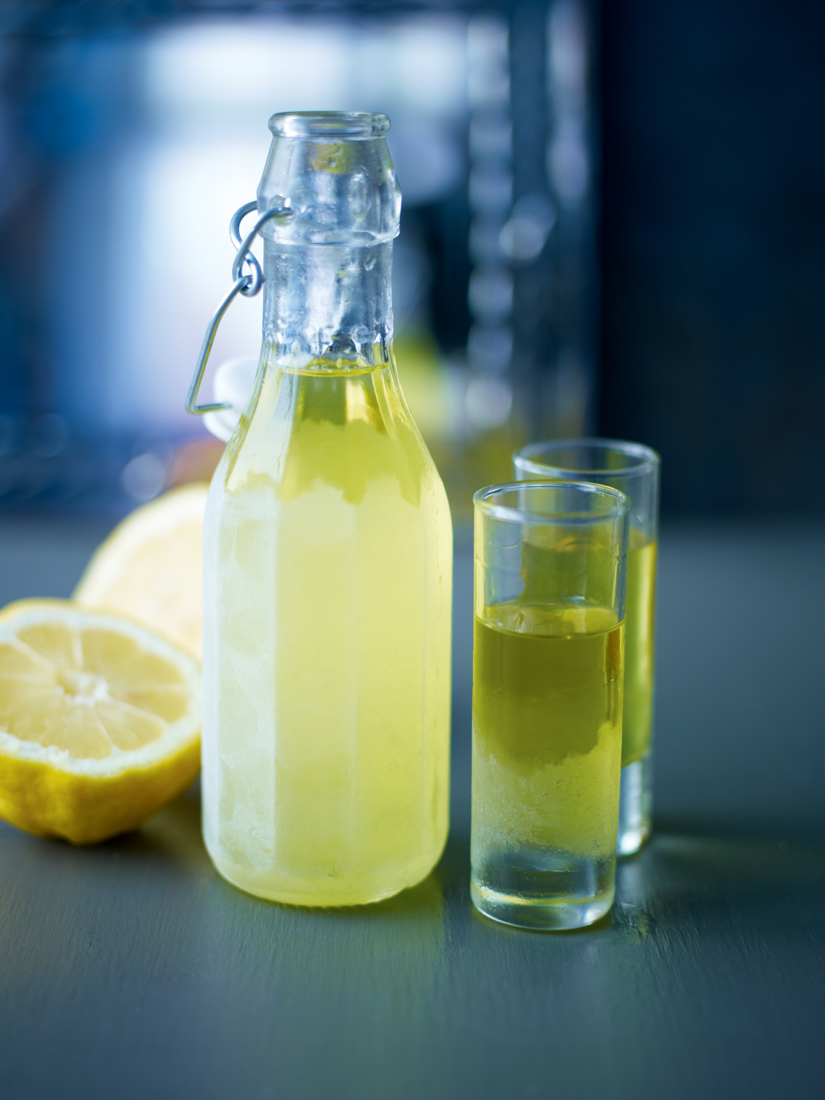
Lovely limoncello
To prepare the containers for this luscious lemon drink, sterilise a 1-litre glass bottle with a stopper or a Kilner jar in the dishwasher on the hottest wash, or carefully put them in just-boiled water (off the heat) for a couple of minutes and dry with a clean tea towel.
Prep time: 10 minutes
Infusing time: from 1 day to 3 months
Makes: 1 litre
Equipment: Medium pan, zester, 1-litre glass bottle with a stopper or a Kilner jar (sterilised), fine sieve
300g granulated sugar
200ml cold water
8 lemons
600ml vodka
+ Put the sugar in a medium pan over a low to medium heat with the water. Cook for a few minutes, giving it a stir from time to time, until the sugar has melted. Then turn up the heat, bring to the boil and leave to bubble away for 2 minutes.
+ Meanwhile, give the lemons a wash in hot soapy water to get rid of the shiny, waxy coating and then rinse and dry them well. Finely grate the zest, avoiding the white pith, and set aside.
+ Remove the syrup from the heat, carefully add the vodka and stir in the lemon zest.
+ Pour into the sterilised bottle or jar and leave to infuse for at least 1 day, but up to 3 months. The flavour will develop further the longer you leave it.
+ Once ready, strain the liquid through a fine sieve to remove the zest. Serve freezer cold.
Starters, snacks + soups
‘Believe deep down in your heart that you are destined to do great things.’
Joe Paterno
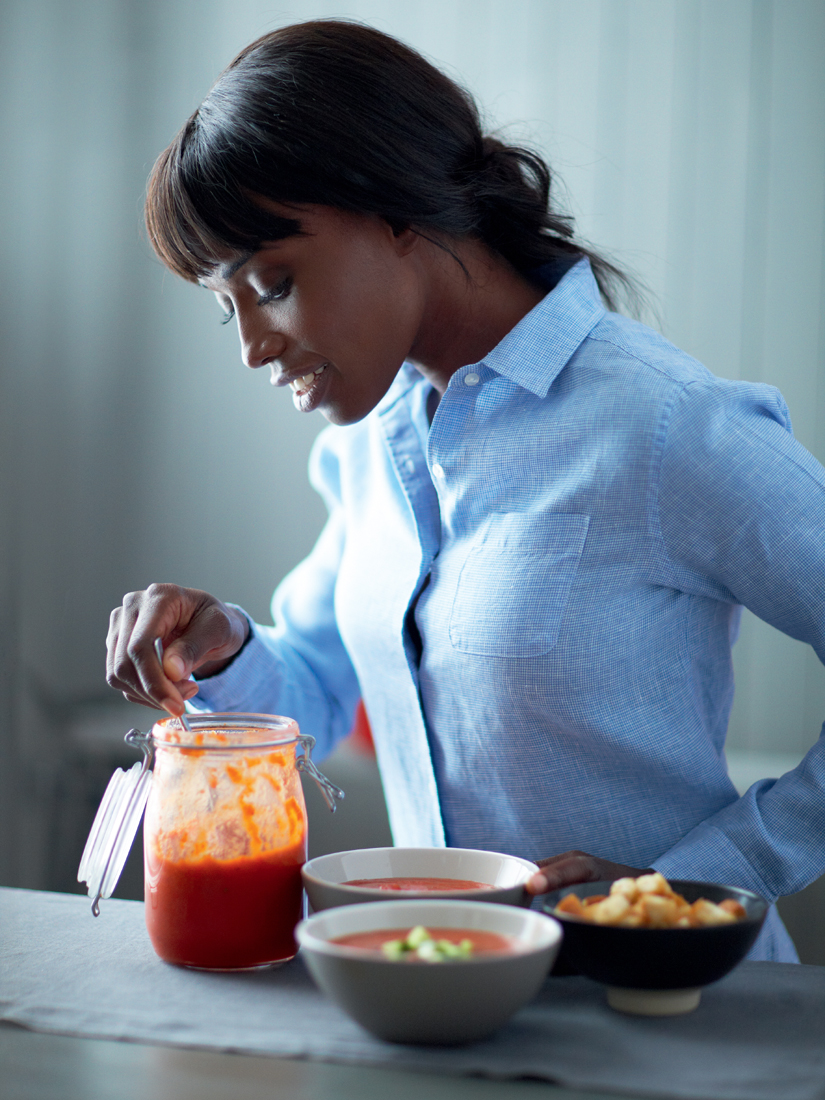
My first experience of soup was the rich, red tomato variety, poured straight from a can, but as I learned more about food, I began to see that there was so much more to soup than that. My idea of a soup is something jam-packed full of taste and texture, with layers and layers of flavour, which can be achieved in a reasonable time span for maximum impact. I love to make large batches of soup and pour some into a flask for part of my laptop lunch. Of course, other light bites such as Aussie Sweetcorn Breakfast Fritters are a must when a small meal is desired or as a precursor to a larger one. I wasn’t sure where on earth to put my Pizza Expressed Three Ways, and so placed it in this chapter for a pleasing light bite.
Starters, snacks + soups
Vegetarian mushroom & port ‘faux gras’ with tarragon & chestnuts
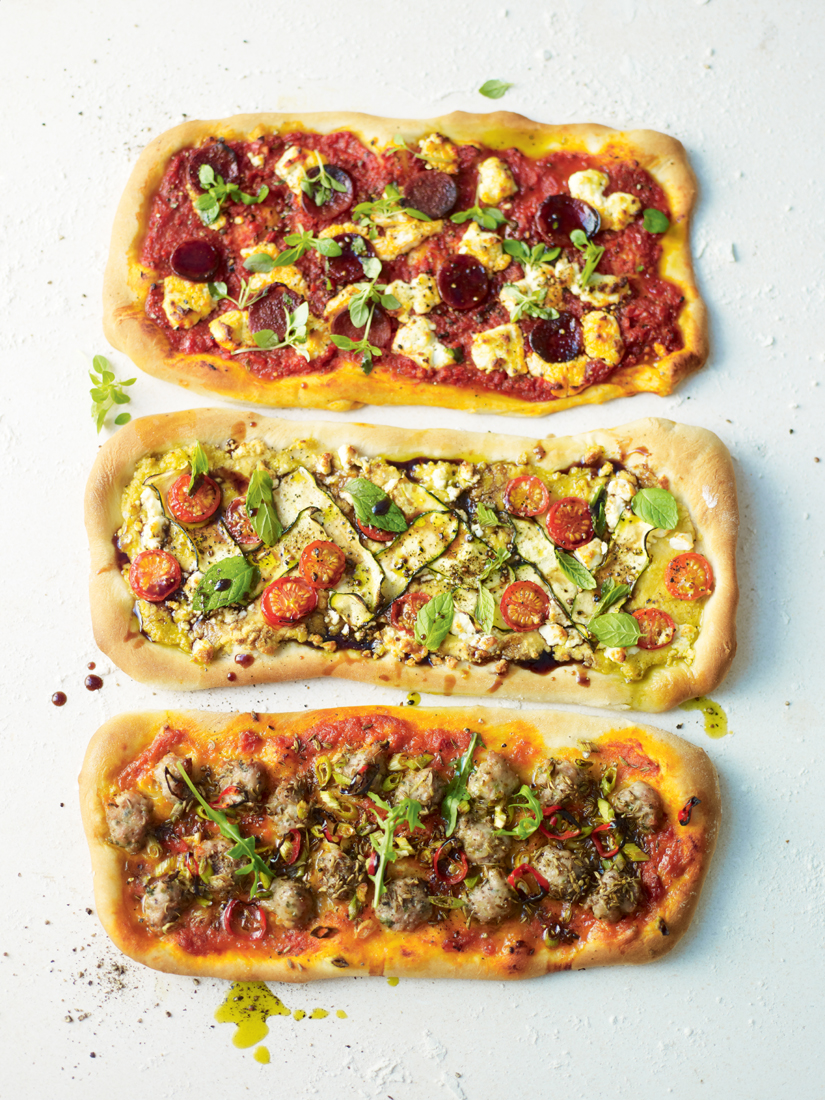
Pizza expressed three ways
Aussie sweetcorn breakfast fritters with avocado & rocket salad & sweet chilli jam
Simple salmon ceviche with tortilla chips
Gingerbread pancakes with Parma ham & maple syrup
Roasted new patatas & chorizo bravas with aïoli
Potato & leek vichyssoise with crispy bacon & chives
Thai chicken soup with coconut milk & ginger
Hot-and-sour king prawn soup
Red pepper, tomato & basil gazpacho with salt & pepper croutons
Broccoli & blue cheese soup with chive mascarpone & warm garlic bread
French onion & sage soup with big fat Gruyère & mustard croutons
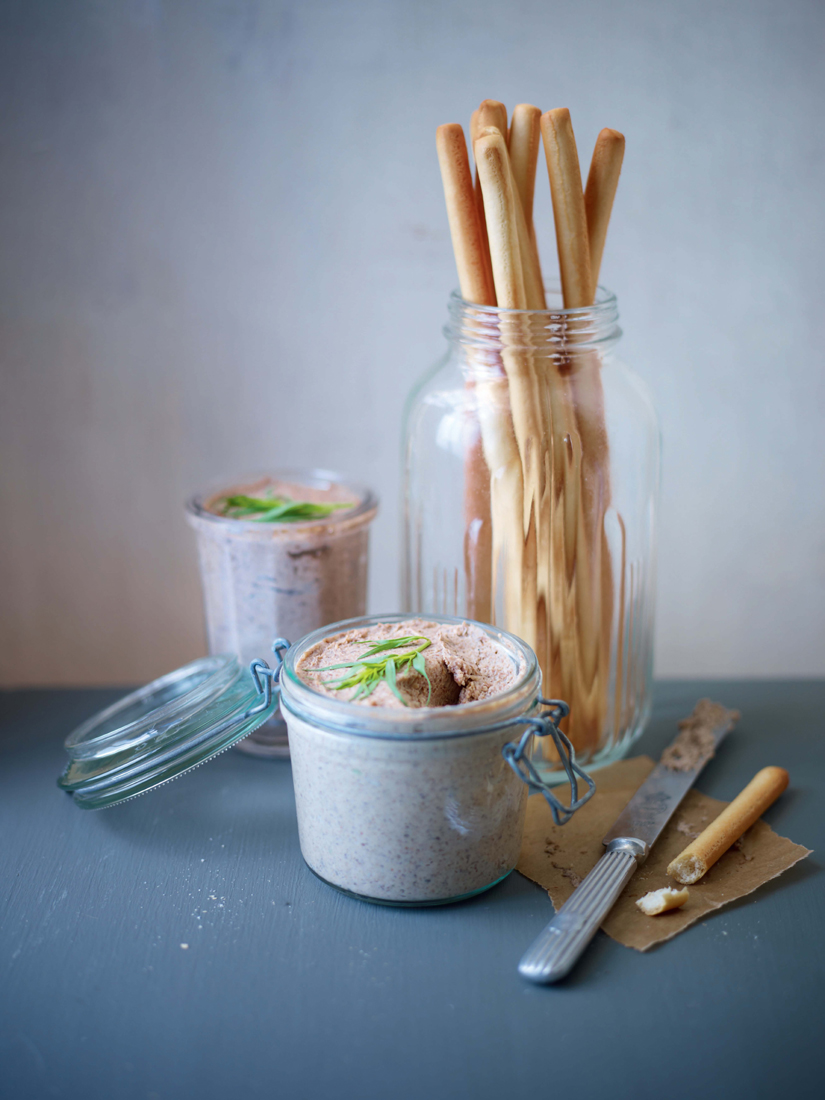
Vegetarian mushroom & port ‘faux gras’ with tarragon & chestnuts
Great for presents, these will keep in the fridge for up to 4 days. I have been known to give these little bad boys away as part of a hamper at Christmas and they are good to have on hand, year round, as a really tasty snack.
Time from start to finish: 20 minutes (+ ideally 6 hours in the fridge)
Serves: 4
Equipment: Medium frying pan, food processor, 4 × 175ml ramekins
Oil
25g butter
2 shallots
3 garlic cloves
500g chestnut mushrooms
4 tbsp port (optional)
2 sprigs of fresh tarragon
100g cooked chestnuts (available vac packed or tinned from the supermarket)
300g cream cheese
Salt and freshly ground black pepper
Your favourite bread, crackers or breadsticks, to serve
+ Put a drizzle of oil and the butter in a medium frying pan over a low heat.
+ Peel and finely chop the shallots and garlic and add to the pan. Cook for 3 minutes, stirring now and again, until soft and slightly golden.
+ Finely slice the mushrooms. Add them to the pan along with the port, if using, and season with salt and pepper. Turn up the heat to medium and cook for 8 minutes, or until the mushrooms have softened and all their liquid has evaporated.
+ Meanwhile, pick the leaves from one sprig of tarragon, divide the other sprig into four smaller pieces and then roughly chop the chestnuts.
+ Tip the cooked mushroom mixture into a food processor with the chestnuts, individual leaves of tarragon and the cream cheese. Blitz for a few minutes until really smooth, scraping down the sides of the bowl once or twice. Have a taste of it and adjust the seasoning if necessary.
+ Divide between the ramekins, smooth their tops and place a tarragon sprig on top of each to decorate. Arrange them on a small tray or plate, cover with cling film and refrigerate for at least 6 hours or overnight. You can also serve these straight away, but their texture will be much softer and flavour not so intense. Serve with your favourite bread, crackers or breadsticks.
