Полная версия
Home Baking
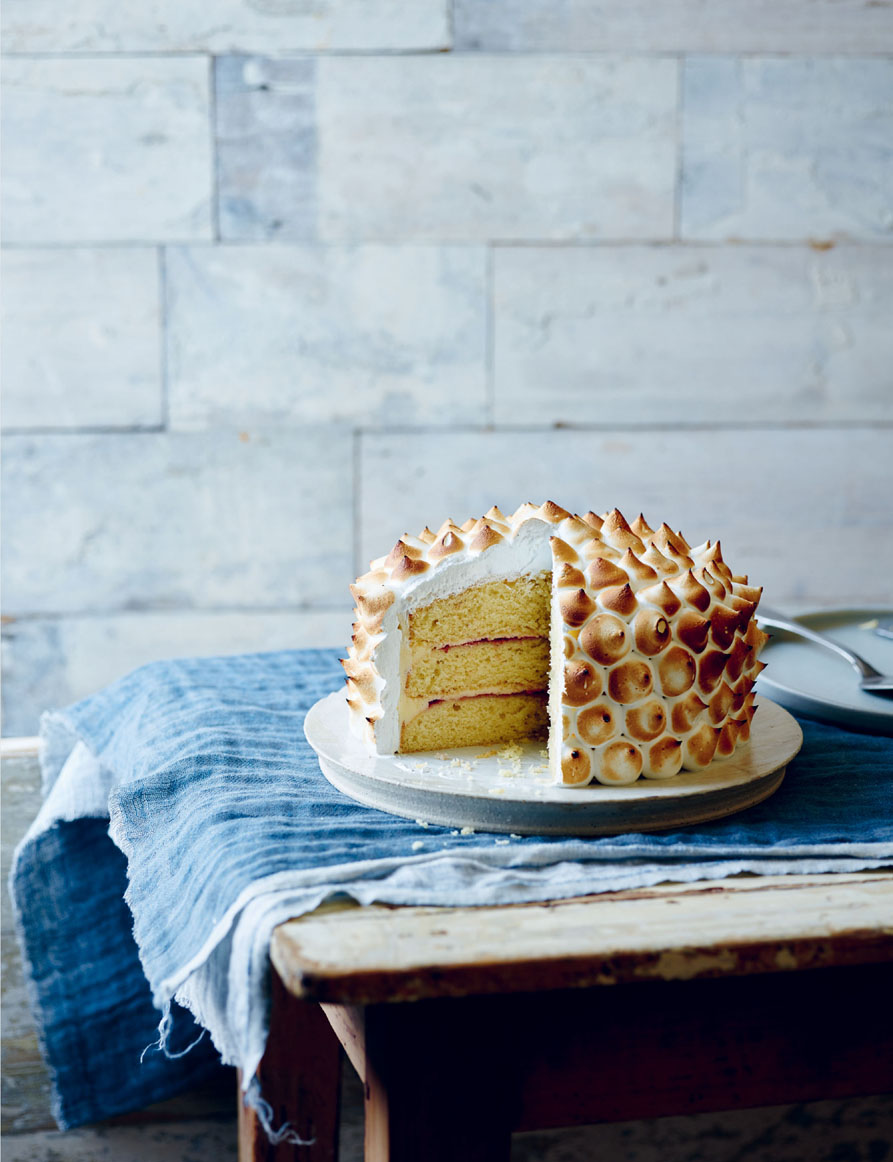
8. Using a blowtorch according to the manufacturer’s instructions, move it over the meringue in a circular movement until the surface of the meringue is a light golden colour. Serve.
Chocolate, honey and hazelnut cake
This incredible cake is gluten-free because it’s made from ground hazelnuts instead of wheat flour. It’s rich, nutty, chocolatey – and absolutely irresistible.
Serves 8
100g (3½oz) butter, plus extra for greasing
175g (6oz) dark chocolate (55–62% cocoa solids), roughly chopped
90g (3¼oz) honey
4 eggs, separated
100g (3½oz) hazelnuts, with skins
salt
For the chocolate honey glaze
100g (3½oz) dark chocolate (55–62% cocoa solids), roughly chopped
150g (5½oz) butter, cut into cubes
50g (1¾oz) honey
For the decoration
2 tbsp toasted hazelnuts, coarsely chopped
1 generous tsp honey
two 18cm (7in) sandwich tins
1. Preheat the oven to 180°C (350°F) Gas mark 4. Grease the sides of the tins, and line the bases with baking parchment. Put the chocolate and butter in a heatproof bowl over a saucepan of water, making sure the base of the bowl doesn’t touch the water. Put over a medium heat and bring the water to the boil, then immediately remove the pan from the heat. Leave the mixture to melt slowly, stirring regularly.
2. Once melted (and the mixture is not hot), stir in the honey. Beat the egg yolks into the chocolate mixture.
3. Put the hazelnuts in a food processor and whizz until still a bit gritty. Add to the chocolate mixture. Put the egg whites into a clean, grease-free bowl, add a pinch of salt and whisk with an electric beater until they form stiff peaks, or use a food processor.
4. Fold the egg whites into the chocolate mixture in two halves, then divide between the two prepared tins and bake for 20 minutes or until a skewer inserted into the centre comes out clean. Leave to cool in the tins on a wire rack for 5 minutes. Run a knife around the edge and remove the cakes from the tins. Leave to cool on a wire rack, then remove the paper.
5. Meanwhile, make the glaze. Put the chocolate in a heatproof bowl over a saucepan of water, as before. Put over a medium heat and bring the water to the boil, then immediately remove the pan from the heat. Leave the chocolate to melt slowly, stirring regularly. Once melted, add the butter, a few pieces at a time, until it has all been mixed in and melted. Stir in the honey and place the bowl with the glaze in the fridge, stirring every 5–10 minutes and scraping down the sides of the bowl.
6. When the glaze has thickened, put one of the cakes upside down on a cake stand or plate. (You can use a plate turned upside down, which is quite convenient for icing the sides of the cake.)
7. Put some of the glaze on the top of the cake on the plate to cover it. Put the second cake on the first and then tip all the remaining glaze on top and, using a palette knife, spread it to cover the sides and top of the cake. To decorate the cake, scatter the toasted hazelnuts over the top and drizzle with the teaspoon of honey. Serve.

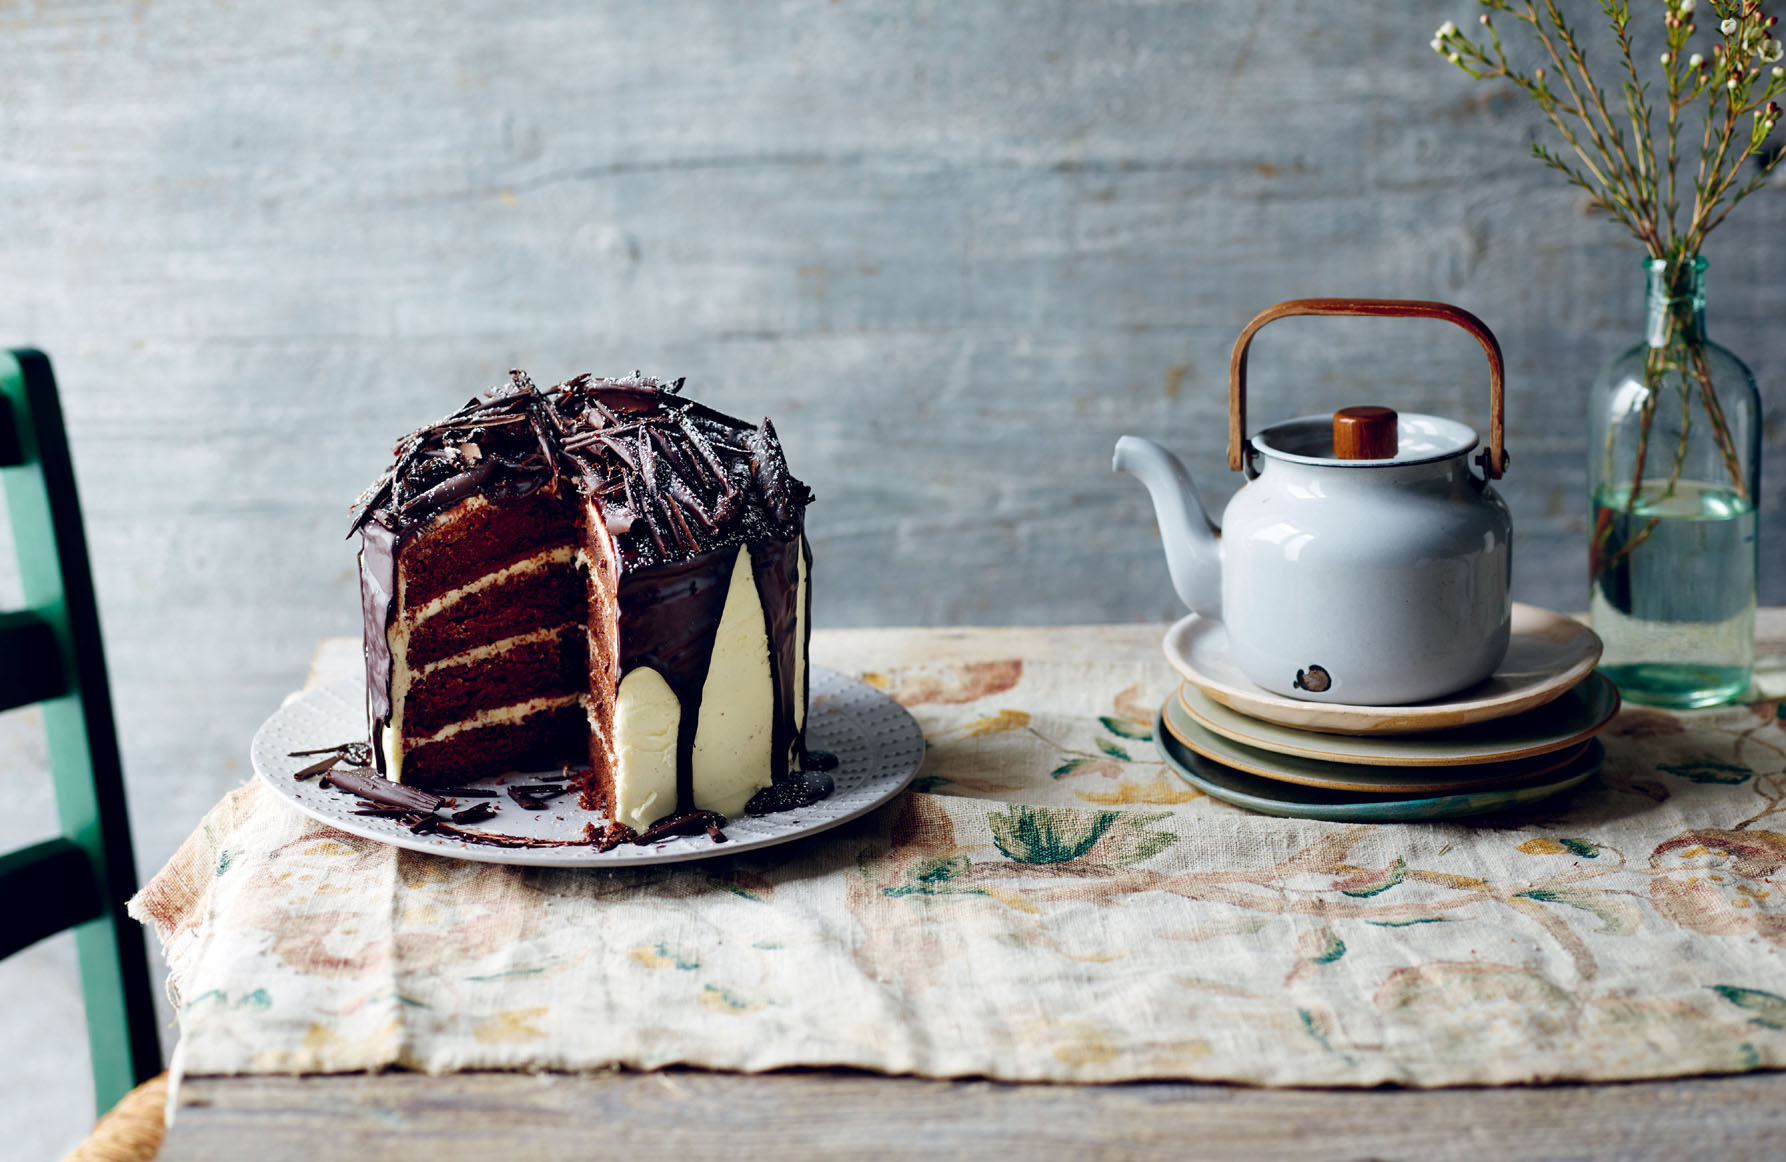
Triple Chocolate celebration cake
Developed by my friend Pamela Black, this is a cake that doesn’t need too much of an introduction – the title says it all! It’s a guaranteed crowd-pleaser.
Serves 10–12
350g (12oz) butter, softened, plus extra for greasing
350g (12oz) caster sugar
6 eggs
350g (12oz) plain flour
2 tsp baking powder
40g (1½oz) cocoa powder
40g (1½oz) drinking chocolate
200g (7oz) natural yoghurt
110g (3¾oz) dark chocolate (55–62% cocoa solids), roughly chopped
gold leaf or icing sugar, to decorate
For the white chocolate buttercream filling
110g (3¾oz) white chocolate (melted and cooled)
225g (8oz) butter, softened
450g (1lb) icing sugar
For the chocolate glacé icing
110g (3¾oz) icing sugar
50g (1¾oz) cocoa powder
15g (½oz) butter
½ tsp vanilla extract
four 18cm (7in) sandwich tins; baking sheet
1. Preheat the oven to 180°C (350°F) Gas mark 4. Grease the base and sides of the tins, and dust lightly with flour. Put the butter in a large bowl and cream it with a wooden spoon until soft, or use an electric beater on slow or a food processor. Add the sugar and beat until light and fluffy.
2. Add the eggs, one at a time, adding 1 tablespoon flour each time and beating well after each addition. Sift the remaining flour, the baking powder, cocoa and drinking chocolate together in a bowl. Gradually fold into the egg mixture to combine. Finally, fold in the yoghurt.
3. Divide between the prepared tins. Bake for 20–25 minutes until firm to the touch. Leave to cool in the tins on a wire rack for 5 minutes, then turn out and leave on the rack to cool completely.
4. Meanwhile, make chocolate curls for the topping. Melt the chocolate in a heatproof bowl over a pan of gently simmering water, making sure the base of the bowl doesn’t touch the water, and stirring regularly. Spread thinly over the back of a baking sheet and leave it to cool in the fridge until firm but not fridge-hard.
5. Hold a long, sharp knife at the top of the baking sheet and tilt it at an angle towards you with one hand on the handle and the other at the top of the blade. Very carefully pull the knife towards you, scraping the chocolate as you go. Curls should start to peel up from the sheet. If it crumbles, the chocolate is too cold, and if it goes gooey, it’s too warm. Keep scraping down, returning the sheet to the fridge for a few minutes if it gets too warm, until you have shaved all the chocolate and collected enough curls for the top of the cake. Leave somewhere cool until needed. (They can be made a few days in advance.)
6. To make the buttercream filling, melt the chocolate in a heatproof bowl over a pan of gently simmering water, making sure the base of the bowl doesn’t touch the water, and stirring regularly. Leave to cool.
7. Put the butter in a large bowl and cream it with a wooden spoon until light and fluffy, or use an electric beater on slow or a food processor. Sift in the icing sugar, beat well, then add 2 tablespoons hot water. Gently fold in the cooled melted white chocolate.
8. To make the icing, sift the icing sugar and cocoa powder into a bowl. Heat the butter, vanilla extract and 3 tablespoons water in a saucepan over a medium heat until just at boiling point. Pour into the icing sugar and cocoa, then beat well using a wooden spoon. The icing should be the consistency of fresh double cream; if it is too thick, add a little more warm water, then cool slightly before using.
9. Spread three cakes with half the white chocolate filling and then stack them together on an icing turntable. Put the remaining cake on top and carefully spread the top and sides with the remaining buttercream. Chill in the fridge for at least 1 hour until firm.
10. Gently pour the chocolate glacé icing over the top of the cake, allowing it to drizzle slightly and unevenly down the sides. Leave to set before piling the chocolate curls on top. Decorate with a little gold leaf for total decadence or dust the chocolate curls with icing sugar.
Chocolate pain d’épices
This cake is not overly sweet but it has an intriguing spice combination. It’s worth splashing out on a really good high-cocoa chocolate bar that will add to the layers of wonderful flavours and aromas.
Serves 8
125g (4½oz) butter, plus extra for greasing
150g (5½oz) dark chocolate (55–62% cocoa solids), roughly chopped
150g (5½oz) caster sugar
3 eggs, lightly beaten
55g (2oz) ground almonds
¾ tsp ground cinnamon
½ tsp ground ginger
½ tsp ground cloves
½ tsp ground cardamom
icing sugar, for dusting
a mint sprig or an edible flower, to decorate
lightly whipped cream, to serve
20cm (8in) round springform cake tin with a high side
1. Preheat the oven to 160°C (315°F) Gas mark 2½. Grease the sides of the tin, and line the base with baking parchment.
2. Put the chocolate, butter and sugar in a large heatproof bowl over a saucepan of water, making sure the base of the bowl doesn’t touch the water. Put over a medium heat and bring the water to the boil, then immediately remove the pan from the heat. Leave the chocolate to melt slowly, stirring regularly. When smooth, stir in the eggs. Fold in the ground almonds and then sift in the cinnamon, ginger, cloves and cardamom. Fold in to combine.
3. Pour the mixture into the prepared tin and bake for 40–50 minutes until the centre is just set. Leave to cool in the tin on a wire rack.
4. When the cake is completely cool, carefully take it out of the tin and put it on a serving plate or cake stand. Dust with icing sugar and decorate with a sprig of mint or edible flower. Serve with cream.
Glazed chocolate cake
Enjoy this unadulterated chocolate indulgence for the truest of chocaholics. I top this with beautiful crystallised rose petals to add some colour for an occasion, but if that’s too much of a distraction from the chocolate, I understand.
Serves 8
125g (4½oz) butter, plus extra for greasing
150g (5½oz) dark chocolate (55–62% cocoa solids), chopped
150g (5½oz) caster sugar
3 eggs, lightly beaten
50g (1¾oz) ground almonds
crystallised rose petals (optional), to decorate
For the chocolate glaze
110g (3¾oz) dark chocolate (55–62% cocoa solids), chopped
2 tbsp milk
50g (1¾oz) butter
20cm (8in) cake tin
1. Preheat the oven to 160°C (315°F) Gas mark 2½. Grease the side of the tin, and line the base with baking parchment. Put the chocolate, butter and sugar in a large heatproof bowl over a pan of gently simmering water, making sure the base of the bowl doesn’t touch the water. Melt the mixture and stir until smooth. Beat in the eggs, then fold in the almonds.
2. Pour the mixture into the prepared cake tin and bake for 40–50 minutes until the centre is just set. Leave to cool in the tin on a wire rack.
3. To make the chocolate glaze, put all the ingredients in a heatproof bowl over a pan of gently simmering water as before and melt together, stirring occasionally until smooth. Leave for 10 minutes to cool a little or until it has thickened slightly, but do not put the bowl in the fridge, as the mixture will lose its glossy sheen.
4. Transfer the cake onto a plate or cake stand, and pour the glaze over the top, allowing it to drizzle down the sides. I like to decorate this for a celebration with crystallised rose petals.
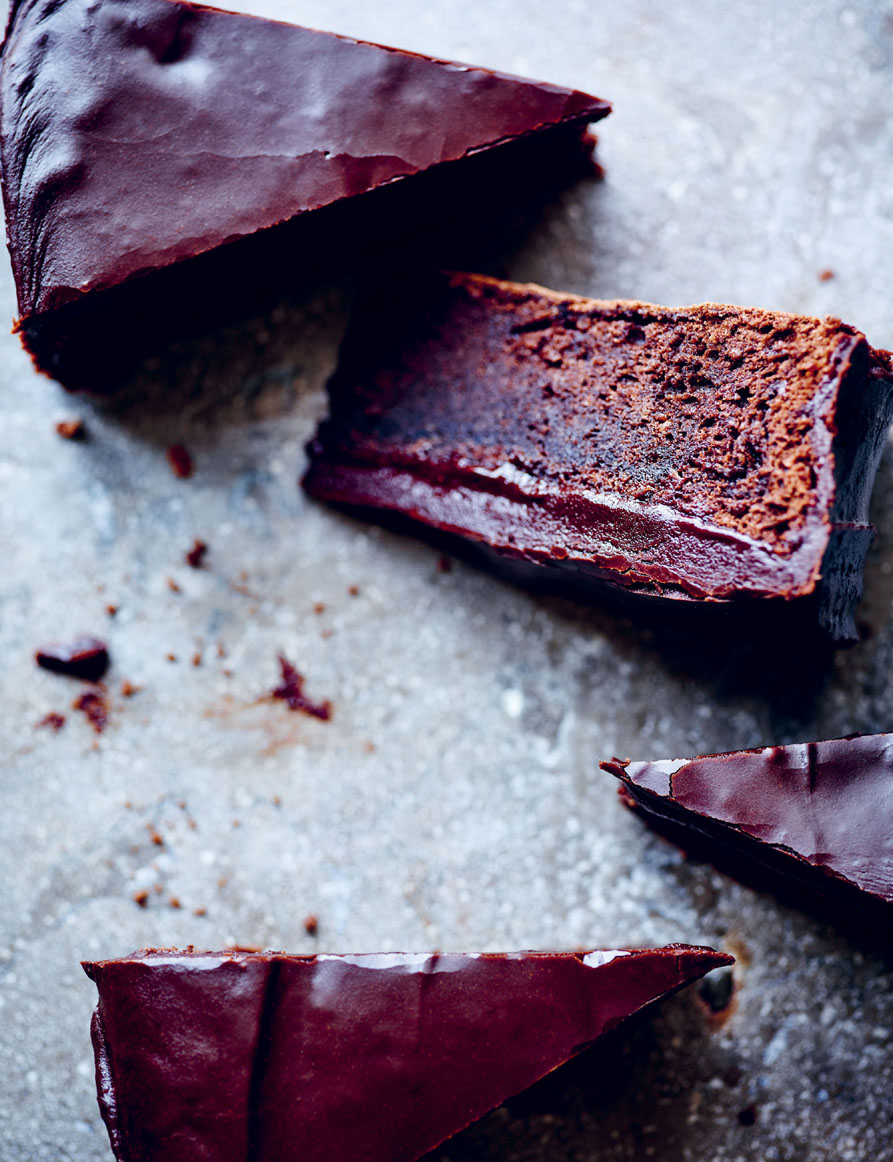
Dodo’s Sachertorte
The mixture of dense chocolate cake, sweet apricot jam and that glossy, chocolate mirror glaze has made the Sachertorte a classic and much-loved dessert. This recipe is from Dodo, my fab brother-in-law. It takes a bit of time, but it’s worth the effort.
Serves 10–12
150g (5½oz) butter, soft at room temperature, plus extra for greasing
½ vanilla pod
125g (4½oz) icing sugar
6 eggs, separated
125g (4½oz) dark chocolate, (55–62% cocoa solids), roughly chopped
100g (3½oz) caster sugar
150g (5½oz) plain flour, plus extra for dusting
200g (7oz) apricot jam whipped cream, to serve
For the chocolate glaze
200g (7oz) caster sugar
200g (7oz) chocolate (55–62% cocoa solids), roughly chopped
24cm (9½in) springform cake tin
1. Preheat the oven to 170°C (325°F) Gas mark 3. Grease the side of the tin, and line the base with baking parchment. Scrape out the seeds from the vanilla pod and put in a large bowl. Add the butter and icing sugar, and cream with a wooden spoon until soft, or use an electric beater on slow. While continually mixing, add the egg yolks one by one to make a thick, creamy paste.
2. Melt the chocolate in a heatproof bowl over a pan of gently simmering water, making sure the base of the bowl doesn’t touch the water, and stirring regularly. Leave to cool.
3. Use a spatula to scrape out the chocolate into the mixture in the bowl. Stir into the mixture using a wooden spoon, or with the mixer on slow. Set aside and wash the mixer blades for the next step.
4. Put the egg whites into a clean, grease-free bowl and add the caster sugar. Whisk with an electric beater until they form stiff peaks, or use a food processor. Put the egg white mixture into the first bowl and sift the flour over the top. Gently fold into the ingredients in the bowl using a wooden spoon until fully mixed together.
5. Pour the mixture into the prepared tin and gently even it out with the back of a wooden spoon. Bake for 45 minutes, turning the cake half a turn after 30 minutes. It’s ready when a skewer inserted into the centre comes out clean.
6. Leave the cake to cool completely in the tin on a wire rack. Remove from the tin and remove the paper. Carefully transfer to a serving plate or cake stand.
7. Gently dissolve the apricot jam in a small saucepan over a medium-low heat. Stir the jam and brush a thin layer all over the sides and top, then leave it to absorb into the cake.
8. Meanwhile, to make the chocolate glaze, put the sugar and 100ml (3¼fl oz) water in a small saucepan over a medium-high heat and bring to the boil. Boil for 5–7 minutes, then leave to cool.
9. Put the chocolate in a heatproof bowl over a saucepan of water and melt as before. Once melted, add the sugar syrup a little at a time, constantly stirring with a spatula or wooden spoon. It will try to thicken, so keep stirring and adding the syrup until it has a shiny, slightly thick, liquid appearance.
10. You need to work quickly at this stage, as the glaze needs to be poured over the cake while still warm. Starting at the edges and working inwards in a circular motion, and using the glaze in the bowl, brush it on to the sides of the cake and level any unevenness on the top with as few movements as possible. Allow the glaze to cool and harden. Serve with cream.
Ombré cake
Here is another of my friend Pam Black’s creations. The ombré effect for icing is a simple idea but it makes an impressive-looking cake. If you are already nifty with a palette knife to ice cakes, this one is not too much of a stretch further. A turning icing table comes in handy, but alternatively you can use an upturned plate to put the cake on while you ice it. Pick whichever colours you like: go bright and pretty for a child’s birthday, or keep to chocolates, caramels and vanillas for a more sophisticated look.
Serves 10–12.
225g (8oz) butter, softened, plus extra for greasing
225g (8oz) caster sugar
4 eggs
1 tsp vanilla extract
225g (8oz) plain flour
1 tsp baking powder
2 tbsp milk, if needed
For the filling and topping
2 × quantity Classic Buttercream Icing
your choice of food colouring
your choice of fresh edible flowers or edible decorations
four 20cm (8in) sandwich tins
1. Preheat the oven to 180°C (350°F) Gas mark 4. Grease the sides of the tins, and dust lightly with flour, then line each base with baking parchment. Put the butter in a large bowl and cream it with a wooden spoon until soft, or use an electric beater on slow or a food processor. Add the sugar and beat it until light and fluffy.
2. Beat in the eggs and vanilla extract a little at a time, adding 1 tablespoon flour each time and beating well after each addition.
3. Sift in the remaining flour and the baking powder and fold in to combine, then add a little milk if needed to give a dropping consistency.
4. Spoon the batter into the prepared tins and spread evenly. Bake for 20–25 minutes until well risen, golden brown and springy to the touch. Leave the cakes to cool in the tins on a wire rack for 5 minutes, then turn them out on the rack to cool completely. Once cool, trim the tops off the cakes so that they are level.
5. Split the buttercream icing into four bowls. Use the food colouring to tint three of the bowls: one a pale colour, one medium and one a deep shade of the same colour.
6. Sandwich the cake layers on top of one another using the plain icing. Use a palette knife to cover the sides of the bottom third of the cake using the deepest colour icing. Cover the centre third with the medium icing, then spread the top third and the top of the cake with the pale icing.
7. Warm a clean, palette knife in boiling water, then run it around the cake sides to smooth out and blend the colours. Decorate the cake with flowers or as you prefer.
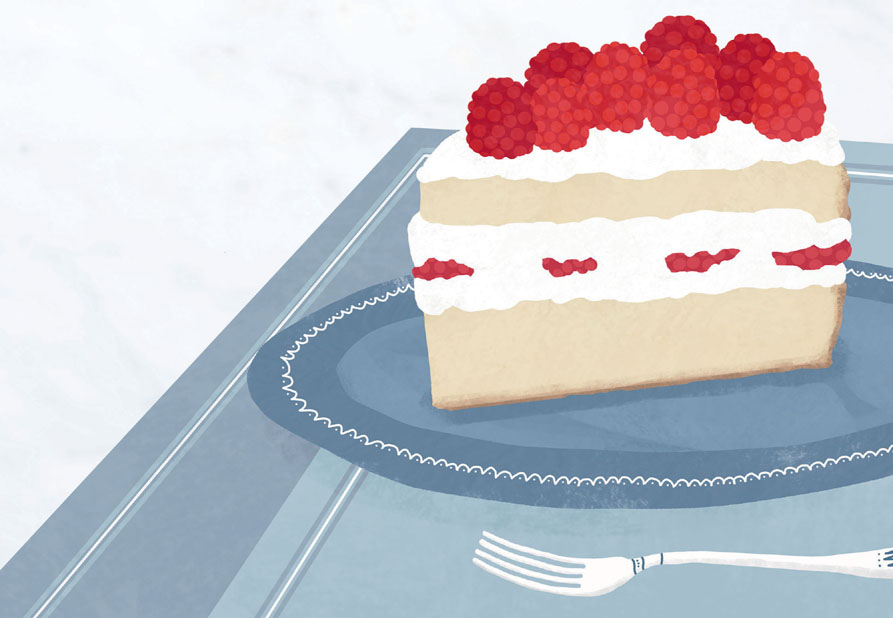
Mary Jo’s tres leches cake
Mary Jo McMillin is the most wonderful cook and a great friend of everyone at Ballymaloe. She comes regularly from her home town of Chicago to spend time at the Cookery School and we all swap inspiration. This is Mary Jo’s version of the famous three-milks cake: rich, yet not heavy, and completely delicious.
Serves 8–10
butter for greasing
150g (5½oz) plain flour, plus extra for dusting
5 eggs
1 tsp vanilla extract
150g (5½oz) caster sugar
For the filling and topping
225ml (8fl oz) fresh double cream
1 × 400ml (14fl oz) tin sweetened condensed milk
110–175ml (4–6fl oz) whole milk
1½ tsp vanilla extract
2 tbsp Grand Marnier or Cointreau (optional)
300ml (11fl oz) whipping cream
½ tbsp caster sugar
175g (6oz) raspberries
two 20cm (8in) cake tins; piping bag and medium star nozzle
1. Preheat the oven to 180°C (350°F) Gas mark 4. Grease the sides of the tins, and line the bases with baking parchment, then dust the sides with flour. Put the eggs, vanilla and sugar in a large bowl and whisk on high speed using an electric beater for 5 minutes until the mixture is pale and mousse-like.
2. Sift in the flour, then fold in thoroughly but lightly to retain the volume. Quickly divide the mixture between the two prepared tins and put in the centre of the oven to bake for 20–25 minutes until golden and a skewer inserted into the centre comes out clean. Cool the cakes in the tins on a wire rack for 2 minutes, then carefully turn out from the tins and remove the paper. Leave to cool completely.
3. To make the filling, put the cream in a large bowl and add the condensed milk, whole milk, 1 teaspoon of the vanilla extract and the Grand Marnier, if using. Mix together well.
4. Put the whipping cream in a bowl and whip until just holding its shape, then briefly stir in the sugar and remaining vanilla extract.
5. Using a small fruit knife, cut half the quantity of raspberries into halves. Put one layer of sponge on a serving plate, then use a cocktail stick to pierce holes over the surface.
6. Drizzle 200ml (7fl oz) of the condensed milk mixture over the sponge cake, then spread a thin layer of whipped cream on top and add the halved raspberries.
7. Top the berries with a thin layer of whipped cream. Put the second layer of sponge upside down on a plate. Make holes with a cocktail stick as before, then drizzle 3–4 tablespoons of the condensed milk mixture over the sponge. Now, quickly and carefully flip the second sponge layer over and put it on top of the first sponge. Poke more holes on the top of the sponge. Drizzle with a further 3 tablespoons of the condensed milk mixture until the cake feels moist but not very wet.
8. Spread the cake with some of the whipped cream, then pipe the remaining cream on top of the cake and around the sides and decorate with the whole raspberries. Chill in the fridge for at least 2 hours or overnight. Serve the cake with a drizzle of the remaining condensed milk mixture.
White chocolate and strawberry celebration cake
Here is a beautiful cake for a summer celebration. If made in the autumn, dark blackberries and blackberry jam would make a stunning substitute for the strawberries, providing a striking dark contrast against the white icing and chocolate.
Serves 10–12
250g (9oz) butter, plus extra for greasing
300g (11oz) caster sugar
3 large egg whites
1 tbsp vanilla extract
250g (9oz) plain flour
2 tsp baking powder
175ml (6fl oz) whole milk
For the topping
100g (3½oz) white chocolate, roughly chopped
250g (9oz) good-quality strawberry conserve
250g (9oz) strawberries, hulled edible fresh flowers such as nasturtiums, roses, pansies, borage, marigolds, lavender or carnations (optional)
icing sugar, for dusting
three 20cm (8in) sandwich tins
For the white chocolate buttercream
100g (3½oz) white chocolate, roughly chopped
2–3 egg whites, making 85g (3oz)
120g (4¼oz) icing sugar
240g (8¾oz) unsalted butter, softened and cubed
1. Preheat the oven to 180°C (350°F) Gas mark 4. Grease the sides of the tins, and line the bases with baking parchment. Put the butter in a large bowl and cream it with a wooden spoon until soft, or use an electric beater on slow or a food processor. Add the sugar and beat until light and fluffy.
2. Whisk the egg whites and vanilla extract into the mixture well to add lightness. Sift half the flour and baking powder over the butter mixture and fold in. Add half the milk and fold again to combine. Repeat to add the remaining flour and milk, folding carefully so that you don’t knock all the air out of the mixture.
3. Divide the mixture evenly between the prepared tins and bake for 20 minutes until they are risen and light golden, and a skewer inserted into the centre comes out clean. Remove the cakes from the tins and leave on a wire rack to cool completely.
4. Meanwhile, make chocolate curls for the topping. Melt the chocolate in a heatproof bowl over a pan of gently simmering water, making sure the base of the bowl doesn’t touch the water, and stirring regularly. Spread thinly over the back of a baking sheet and leave it to cool in the fridge until firm but not fridge-hard.


