
Полная версия
Marcus Everyday: Easy Family Food for Every Kind of Day
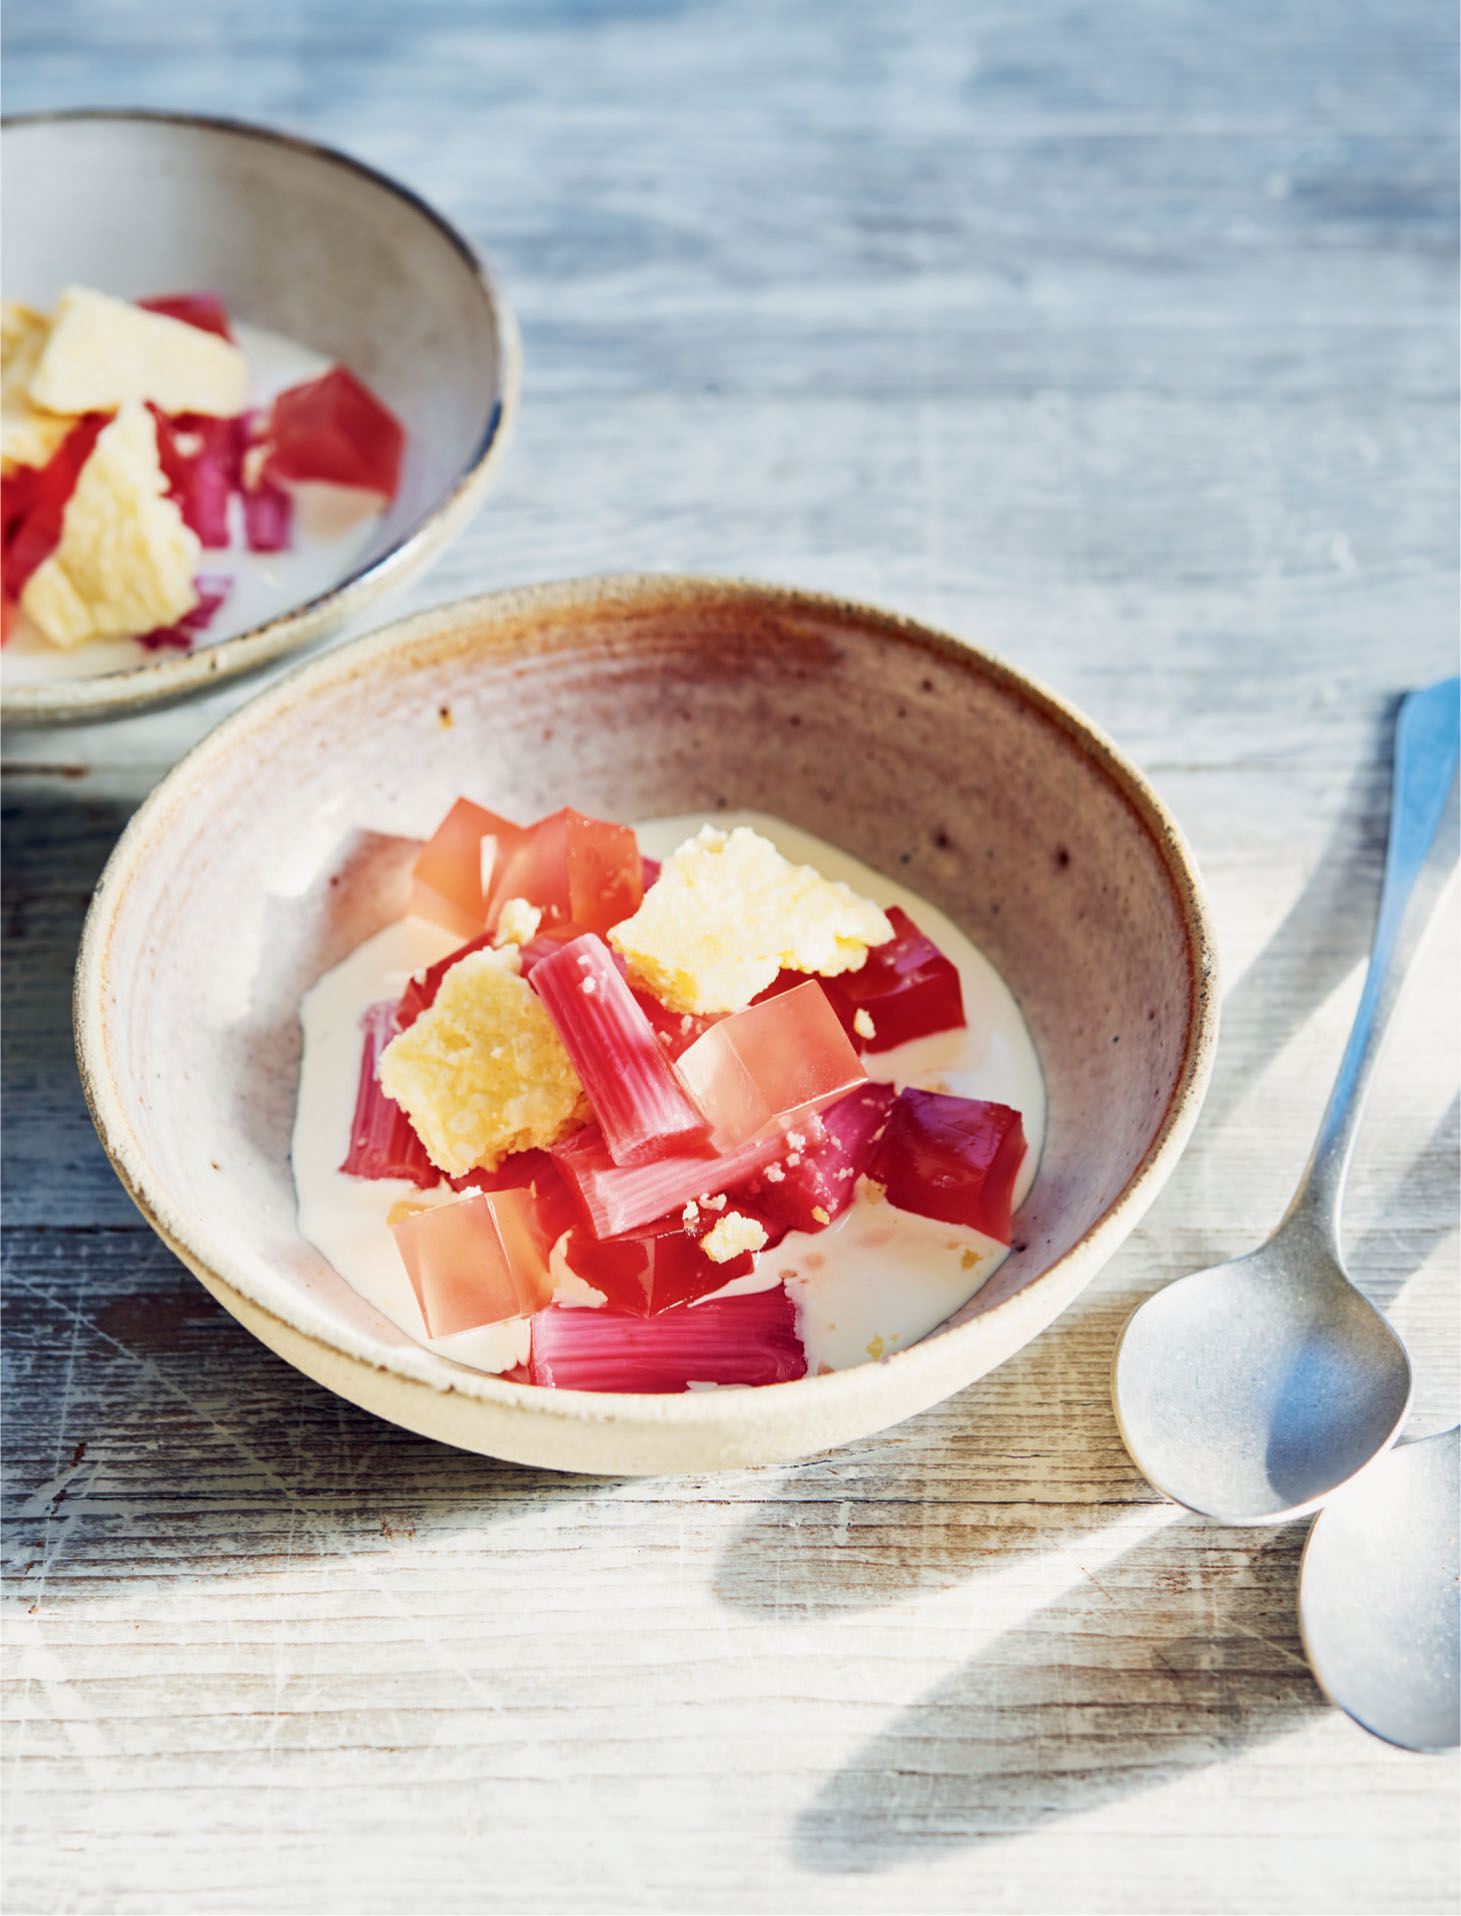
2 To make the jelly, soak the 3 gelatine leaves in a bowl of cold water for 5 minutes. Heat the 400ml of rhubarb cooking liquor until it just reaches the boil, then remove the pan from the heat. Squeeze the excess water from the gelatine leaves and stir them into the hot liquid until completely dissolved. Strain the liquid into a clean container lined with baking parchment (around 15cm square), which gives the jelly at least 1cm height, and chill until set. Remove from the container and cut into squares.
3 For the bay leaf cream, heat the milk in a small saucepan. Break up the bay leaves and add them to the milk. Remove from the heat as soon as it reaches the boil. Cover the surface of the milk with clingfilm and set aside to infuse for 20 minutes. Using a stick blender, blitz the milk to disperse the leaves, strain and place in the fridge to cool. Once cool, mix in the double cream.
4 To make the shortbread, preheat the oven to 200°C/180°C fan/gas 6 and line a baking tray with baking parchment.
5 Put all of the dry ingredients in a food processor and blitz to combine. Add the butter and pulse in short bursts until you have a dough that clumps together in little bits. It may take some time to incorporate the butter into the dry ingredients. Tip onto a clean surface and work together. Place on the lined baking tray and shape into a rectangle about 6mm thick. Bake in the oven for 10–12 minutes until a pale golden colour. Remove from the oven, allow to cool slightly, then break up into pieces.
6 To serve, divide the the cream and rhubarb pieces among 6 bowls. Top with the jelly and shortbread pieces.
MARCUS’ TIP:
Make a double batch of shortbread and freeze half of the dough, ready to bake another day.
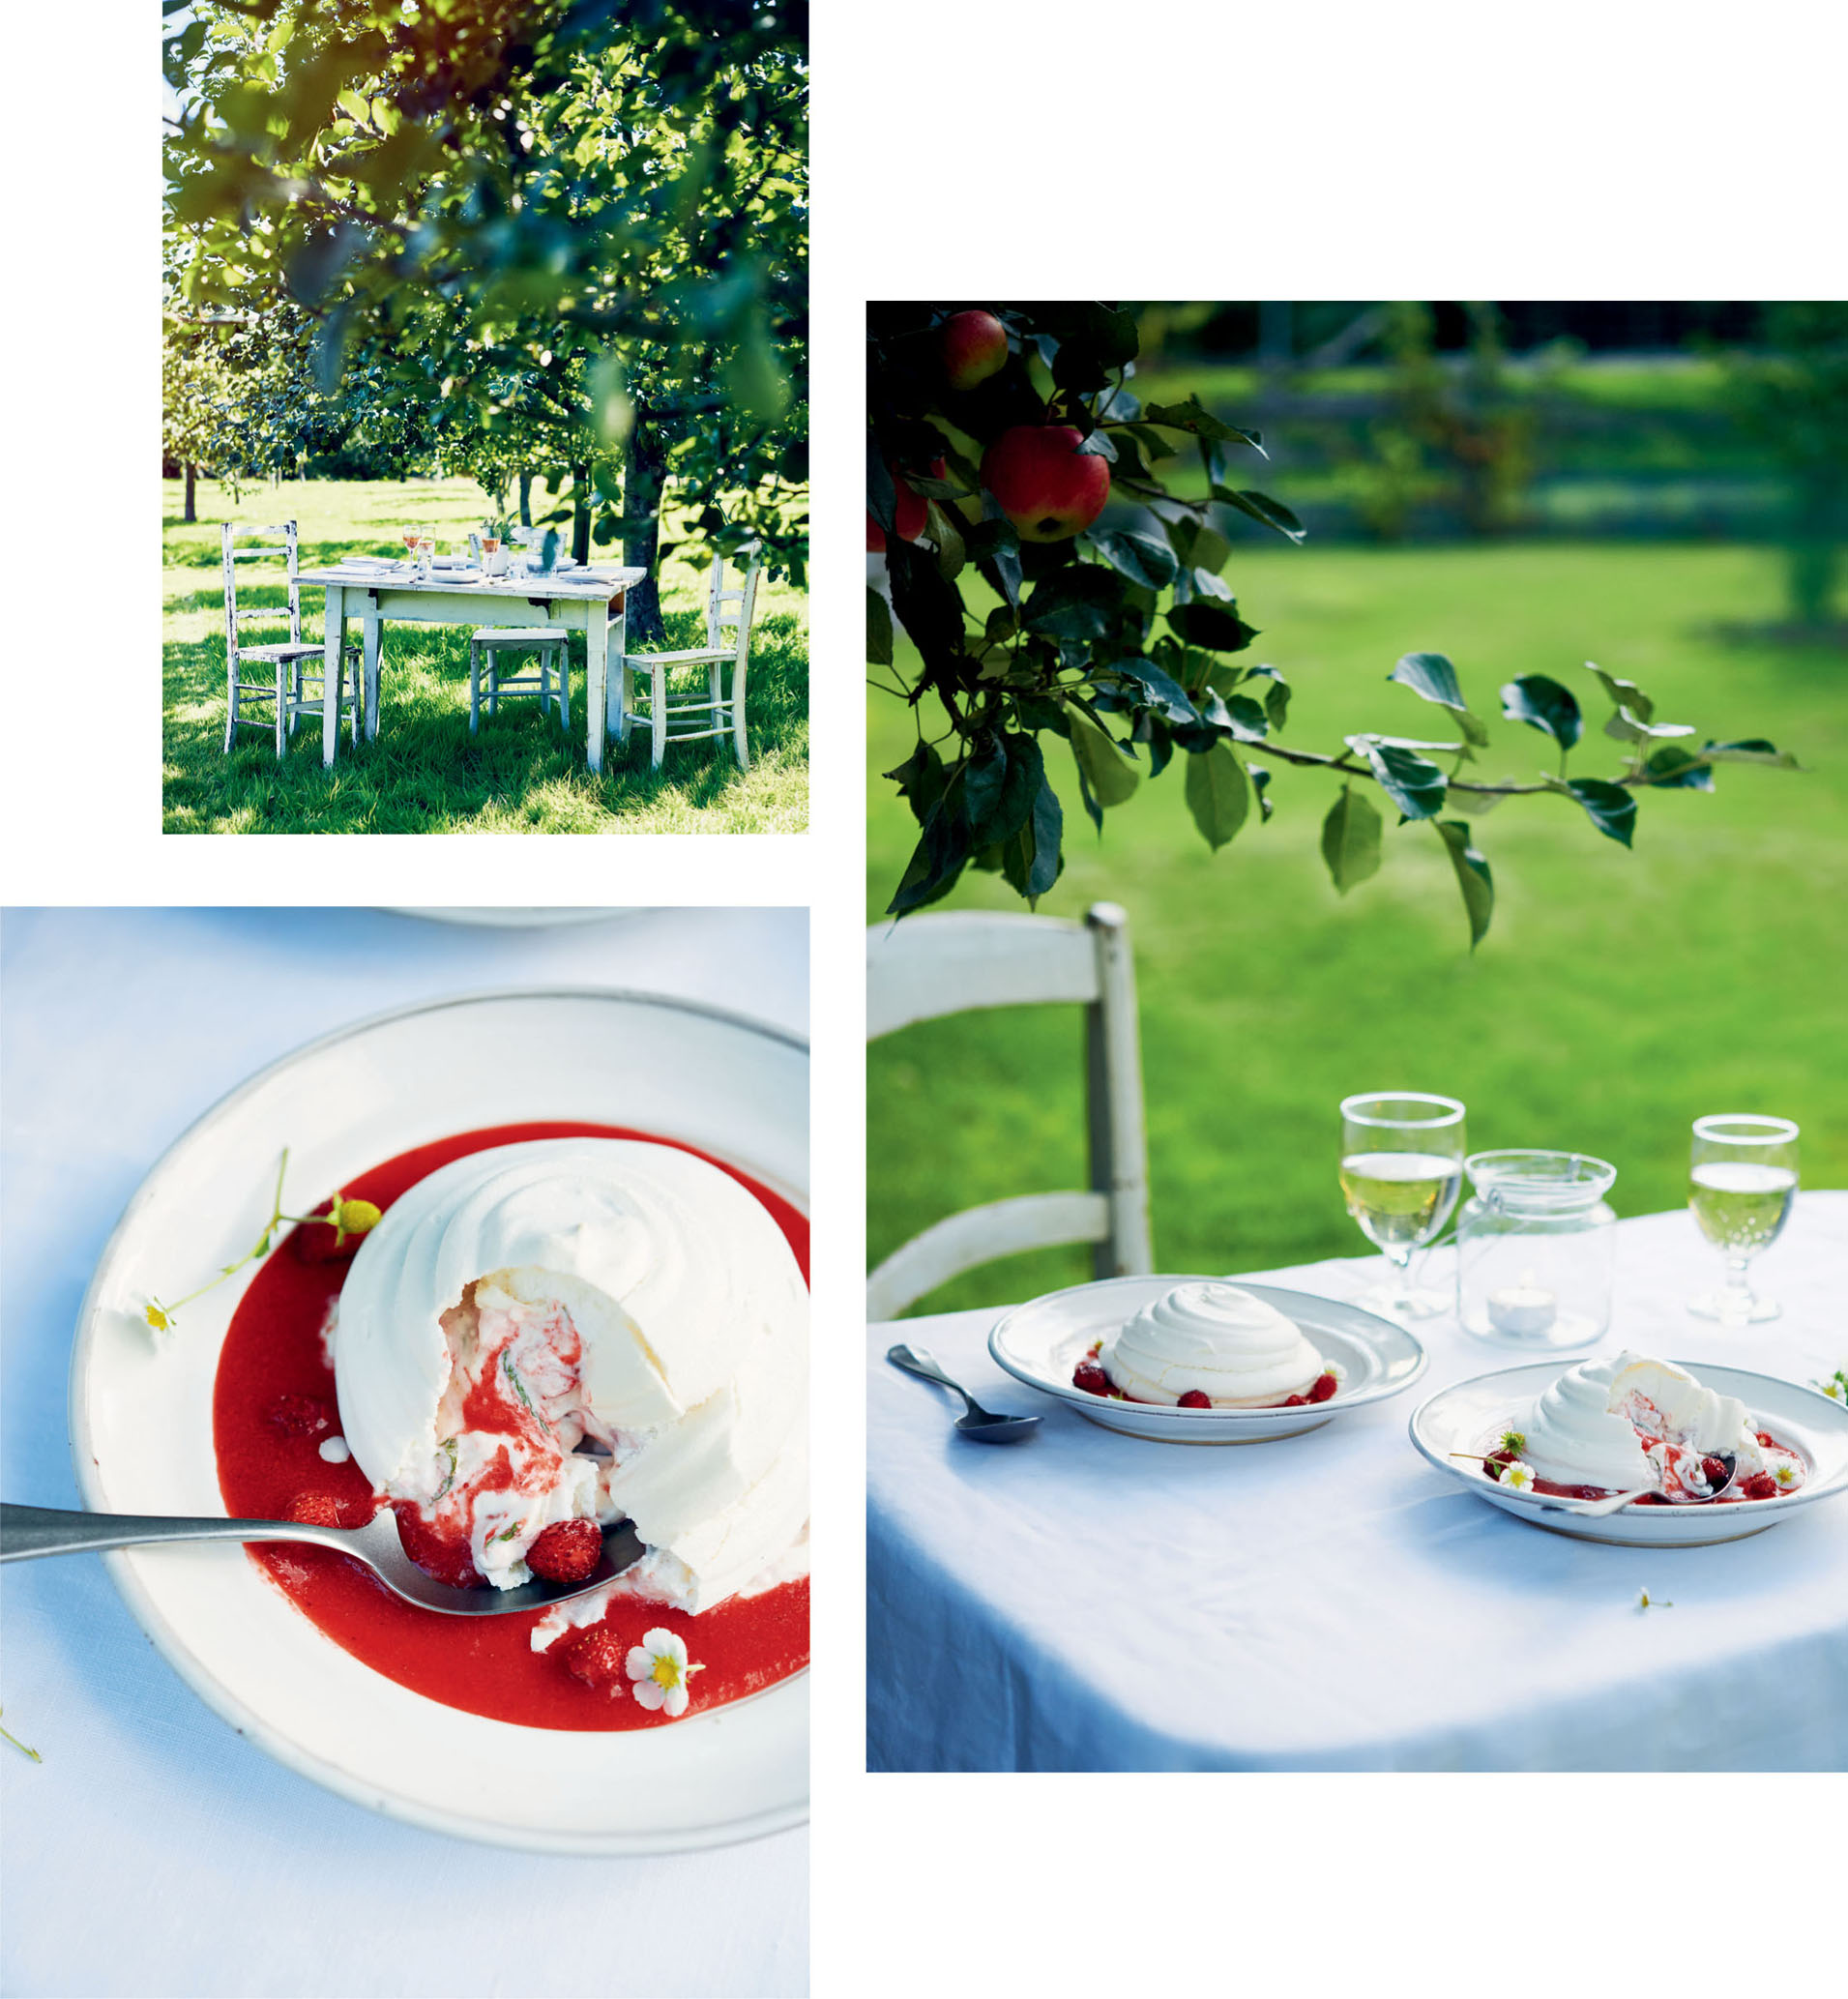
Strawberry and Mint Eton Mess
Eton mess, said to have originated from Eton when a tray of meringues was dropped on the floor, is a great summer pudding. This is more of a ‘make your own mess’ pudding – the presentation is neat and tidy then you create your own mess by smashing it. All the fun’s inside but you can’t initially see it. The mint gives the dish a freshness which helps cut through the sweetness of the meringue.
SERVES 4 | PREP TIME: 25 MINUTES | COOKING TIME: 1 HOUR
350g strawberries, hulled
25ml vodka
2 tbsp strawberry jam
200g double cream, lightly whipped
12 mint leaves, finely sliced
FOR THE MERINGUE
1 lemon wedge
4 egg whites, at room temperature
110g caster sugar
110g icing sugar, sifted
1 Preheat the oven to 120°C/100°C fan/gas ½ and line a large baking sheet with non-stick baking parchment. Draw 4 × 10cm circles on the paper.
2 To make the meringue, rub the lemon wedge around the inside of a clean mixing bowl or the bowl of a stand mixer. Add the egg whites and whisk on high speed until they form stiff peaks. Decrease the mixing speed to medium and gradually add the sugar, whisking continuously. Increase to high speed and whisk for 5–10 minutes until you have a stiff meringue and all grains of sugar have dissolved. Add the icing sugar and whisk until well combined.
3 Place the meringue into a piping bag, and pipe into the centre of each circle on the parchment-lined baking sheet to form a dome. Create 3 more domes.
4 Bake in the oven for 40–50 minutes until crisp on the outside, but still soft in the centre. Turn off the oven and leave the door ajar until the meringues are cool to touch. Very gently, scoop out the soft meringue with a spoon, leaving the shell intact. Set the soft meringue aside.
5 Take 200g of the strawberries and blend together with the vodka. Pass through a fine sieve. Chop the remaining 150g of strawberries and add to the soft meringue. Fold in the strawberry jam, whipped cream and finely sliced mint.
6 Divide the strawberry sauce between 4 bowls then carefully fill the meringue shells with the cream mix. Gently place a meringue in each bowl, on top of the sauce. Allow your guests to then make their own mess by smashing the meringue shell with their spoons!
Gooseberry and Basil Fool
When my dad was a young boy, gooseberries were one of his favourite fruits. Gooseberries tend to grow like weeds, and are a great fruit to just pick and pop in the freezer, whole, to save for a rainy and not so warm day. You can use frozen or tinned berries in this recipe, or try them in a crumble. The addition of basil in this recipe brings a slightly savoury note to the fool and creates an even richer floral aroma. You can make these fools up to a day ahead, if you wish.
SERVES: 4 | PREP TIME: 15 MINUTES | COOKING TIME: 30 MINUTES, PLUS SETTING
150g caster sugar
400g gooseberries, topped and tailed
200ml double cream
FOR THE CUSTARD
160ml milk
16 large basil leaves
2 egg yolks
1 tsp custard powder
30g demerara sugar
1 Put the caster sugar in a large saucepan. Add 200ml of warm water and bring to a simmer. Add the gooseberries and simmer gently for 5 minutes, then remove a fifth of the berries and set them aside. Keep cooking the remaining berries for about another 10 minutes until soft. Transfer to a blender or food processor and blitz until smooth.
2 To make the custard, put the milk and half of the basil leaves in a small saucepan and bring just to the boil, stirring frequently.
3 Put the egg yolks, custard powder and sugar in a heatproof bowl and whisk until well combined. Slowly pour in the hot milk mixture, whisking continuously. Return the mixture to the pan and cook over very low heat, stirring constantly, for about 5 minutes or until the custard coats the back of a wooden spoon (take care not to boil the custard as the egg yolks will scramble). Strain through a fine sieve into a clean container, cover the surface of the custard with clingfilm (to avoid a skin forming) and chill in the fridge.
4 Lightly whip the double cream.
5 Once the custard is cold, whisk it well then fold it into the lightly whipped cream. Fold in the gooseberry purée. Thinly slice the remaining basil leaves and fold them through the mix.
6 Divide the fool among 4 glasses. Halve the gooseberries you cooked and set aside, and arrange them on top of the fools. Place in the fridge for at least 1 hour, until set.
Caramelised Honey-roasted Pears with Mascarpone and Filo
One of the wonderful discoveries of Melfort Farm was the honey I inherited. The floral taste is quite remarkable and I found myself wanting to use it in a lot of my cooking. This discovery coincided with the pears ripening too, so it was a no-brainer to combine the two.
SERVES: 4 | PREP TIME: 20 MINUTES | COOKING TIME: ABOUT 30 MINUTES
8 tbsp runny honey
4 ripe (but not too soft) pears, peeled, quartered and cored
6 sprigs of thyme
20g butter, melted
pinch of sea salt
7 sheets of filo pastry
200g mascarpone
100ml double cream
25ml brandy
1 Preheat the oven to 210°C/190°C fan/gas 7.
2 Place the honey in a roasting tray just large enough to fit the pear quarters in a single layer (about 20 × 20cm). Put the dish in the oven for 5 minutes to warm the honey, then add the pear quarters and thyme and return to the oven for 15–20 minutes, until the pears are golden and cooked through. Remove from the oven, carefully lift out the pears and set them aside. Scrape the honey into a bowl, removing the thyme sprigs and set it aside, too.
3 Add 2 tablespoons of the baked honey to the melted butter in a bowl, along with the salt, and mix well.
4 Take one sheet of filo pastry and brush it with the honey butter. Repeat with the remaining sheets and lay them on top of each other. Cut the large rectangle into 8 equal squares and gently scrunch up the edges of each layered piece. Place them on a baking tray and bake for 8–10 minutes until golden and crisp.
5 In a large bowl, whisk the mascarpone until smooth. Add the double cream, brandy and 2 tablespoons of the baked honey and whisk together until stiff.
6 To serve, place 2 pastry pieces on each plate then add the baked pear quarters. Dollop with the mascarpone and drizzle over the remaining baked honey.
MARCUS’ TIP:
Filo pastry is a great ingredient to have on hand in the freezer. You can use it for a speedy pie in winter, or for a summer quiche.
Harvest Preservation
When you have an abundance of fruit or vegetables from the garden it is sometimes hard to know what to do with it all if it is too much to get through in your daily meals. Preserving is something we chefs do quite a lot. It’s wonderful coming across a little jar of wonder a month or two down the line when the fresh ingredient is no longer available. And preserved foods tend to just get better and better the longer you keep them. They look great on the kitchen shelves, too – just like a good cookbook. The methods of preservation below detail ways to ensure you can maximise the use, and enjoyment, of seasonal produce. It also means a lot less waste, and plenty to look forward to throughout the year.
For any form of preservation, you will need clean, sterilised glass jars, with clean lids. I find the best way to do this is place the clean jars in an oven, at 140°C/120°C fan/gas 1 for 10 minutes. Clean any non-ovenproof lids and rubber seals separately in hot soapy water, then rinse and dry. Remove the jars from the oven and allow to cool slightly before filling and sealing.
The recipes that follow are meant as guidelines so you can adapt them according to what you have a lot of, or flavours you enjoy. Garden herbs, spices and citrus peel are all great things to add to any of the recipes below.
FERMENTING
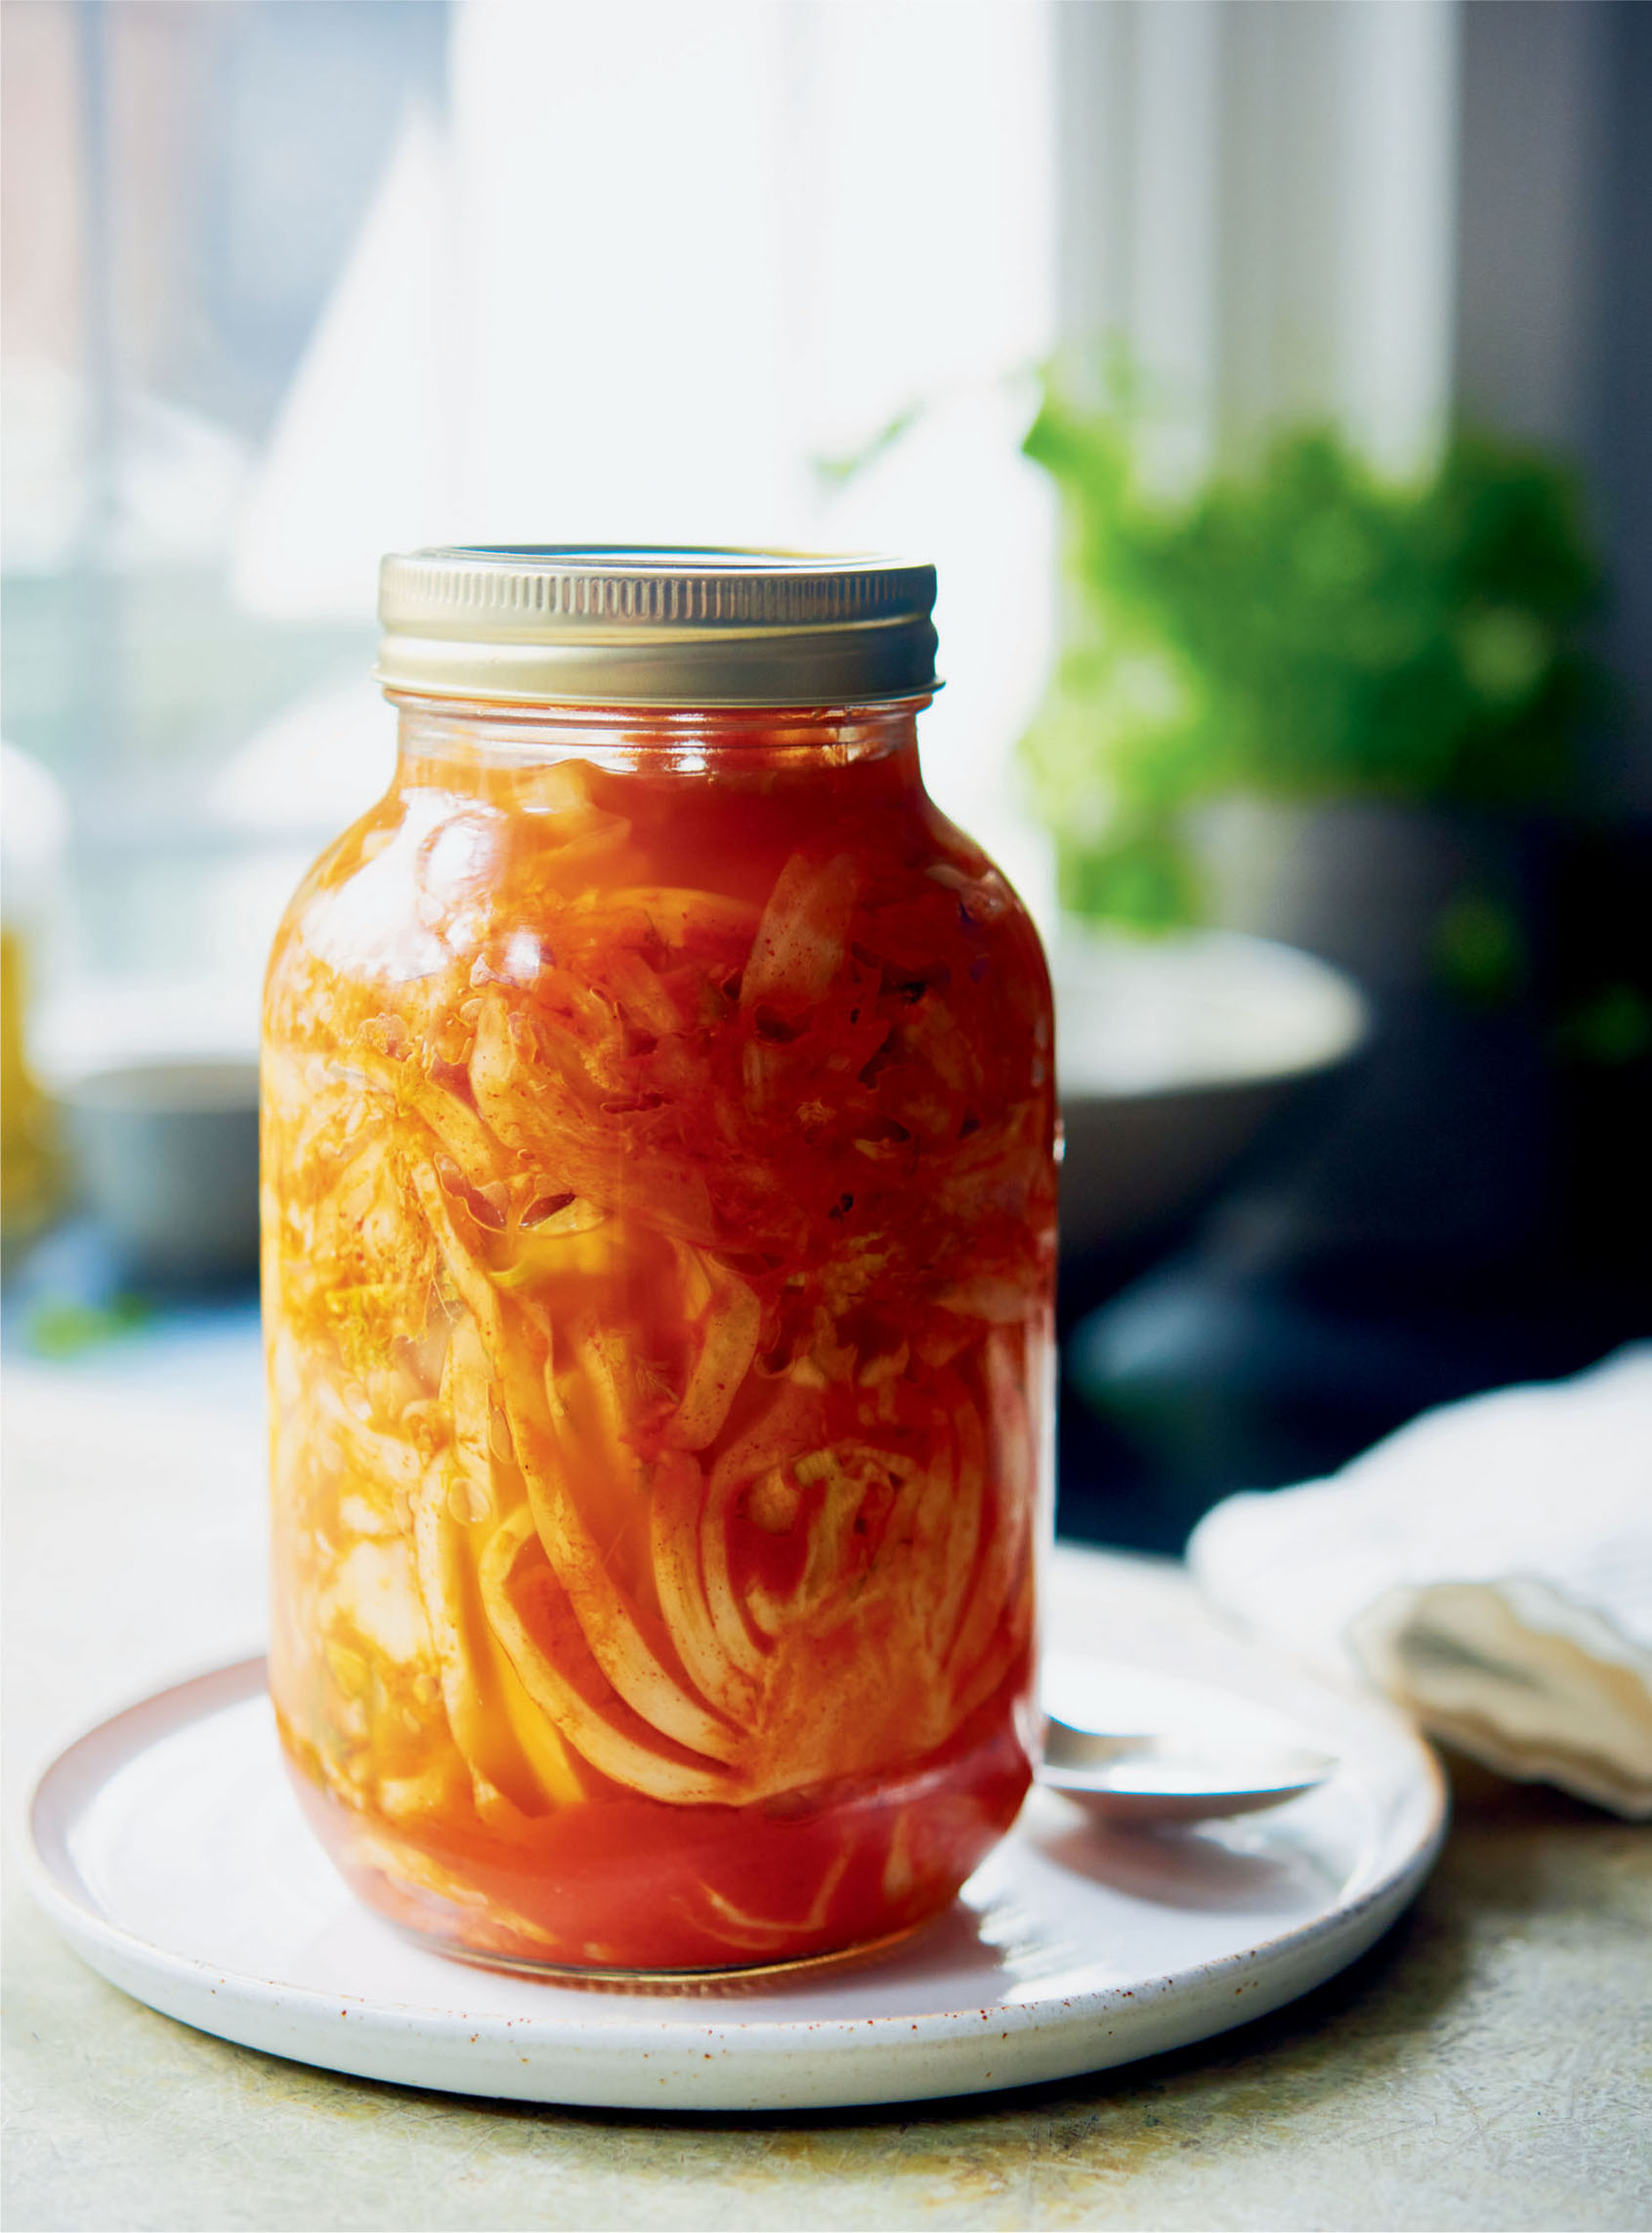
Fermentation is an age-old preservation method that has had somewhat of a resurgence of late. It’s a little more adventurous, and is something everyone should try. It’s good for your gut, too. A lot of items we consume daily are actually a product of fermentation, such as cheese and wine. Kimchi is Korean in origin and is a spicy, fermented cabbage. It is great to shred up and use in salads, on burgers, in frittatas and in toasted sandwiches.
Best for fermenting
Cabbage, Cauliflower leaves, Fennel, Lettuce, Kale
Fennel Kimchi
MAKES: AROUND 1KG | PREPARATION TIME: 20 MINUTES, PLUS 2 WEEKS’ FERMENTATION
2 garlic cloves, grated
15cm piece of fresh ginger, peeled and grated
1 tsp demerara sugar
2 tbsp gochujang paste
3 tbsp rice wine vinegar
1 tbsp table salt
3 fennel bulbs (about 900g), cut into 5mm-thick slices
1 Put all of the ingredients, apart from the fennel, in a blender or food processor. Blitz until well combined and a paste has formed.
2 Using gloves, massage the paste into the fennel for at least 4 minutes.
3 Pack the fennel kimchi into sterilised jars and seal with a lid. Leave to ferment at room temperature for at least 2 weeks before eating. The longer you leave it the more developed the flavour will become. To stop the fermentation, place in the fridge.
PICKLING
Jars of pickled produce not only look beautiful, they are also a very tasty thing to have on hand all year round. Always ensure what you are pickling has been thoroughly washed and that all the pieces are of an equal size. I recommend a minimum pickling time of 14 days, but up to 1 year will yield flavoursome results. Make sure you evenly distribute the bay leaves and peppercorns, and any other flavourings you use, between the jars. And always ensure the lids are properly sealed, to prevent any spoilage, along with storing the jars in a cool, dark place.
Best for pickling
Cucumber, Beetroot, Cauliflower, Beans, Cabbage, Rhubarb, Carrots
Pickled Cucumbers
MAKES: AROUND 700G | PREPARATION TIME: 10 MINUTES, PLUS CURING AND PICKLING | COOKING TIME: UNDER 5 MINUTES
2 small cucumbers (about 200g each), washed
4 tbsp rock salt
FOR THE PICKLING LIQUOR
250ml white wine vinegar
55g demerara sugar
½ tsp caraway seeds
6 black peppercorns
6 dill sprigs
1 Cut the cucumbers in half widthways, then each half lengthways into four. Put them in a dish, sprinkle them with the rock salt and leave for 2 hours. Wash off the salt and pack into a sterilised jar.
2 Put all ingredients for pickling liquor, apart from the dill, in a medium saucepan and bring to the boil. Simmer for 2 minutes, to dissolve the sugar, then remove from the heat and add the dill.
3 Pour the hot pickling liquor over the cucumbers and seal with a lid. Leave for at least 2 weeks before eating. They will keep for a good few weeks in the fridge once opened.
JAM-MAKING
I have sisters-in-law, brothers-in-law, friends and uncles who all make jam, and everyone makes it completely differently. I wanted to put jams in this book as there is a right way and a wrong way to go about jam-making, and it’s all about balance. A big pot of steaming fruit sends delicious aromas throughout the house and is the perfect way to use up overripe fruit. One of the issues we find we have to tackle as parents is the amount of added sugar in shop-bought products. Making your own preserves allows you to control the levels of sugar you add, and thus the end result on your larder shelf. Obviously, fruit that is sourer will need more sugar, but if you combine a few different ones you can get the best of both worlds.
Best for jam
Stone fruit, Berries, Rhubarb, Figs, Quince
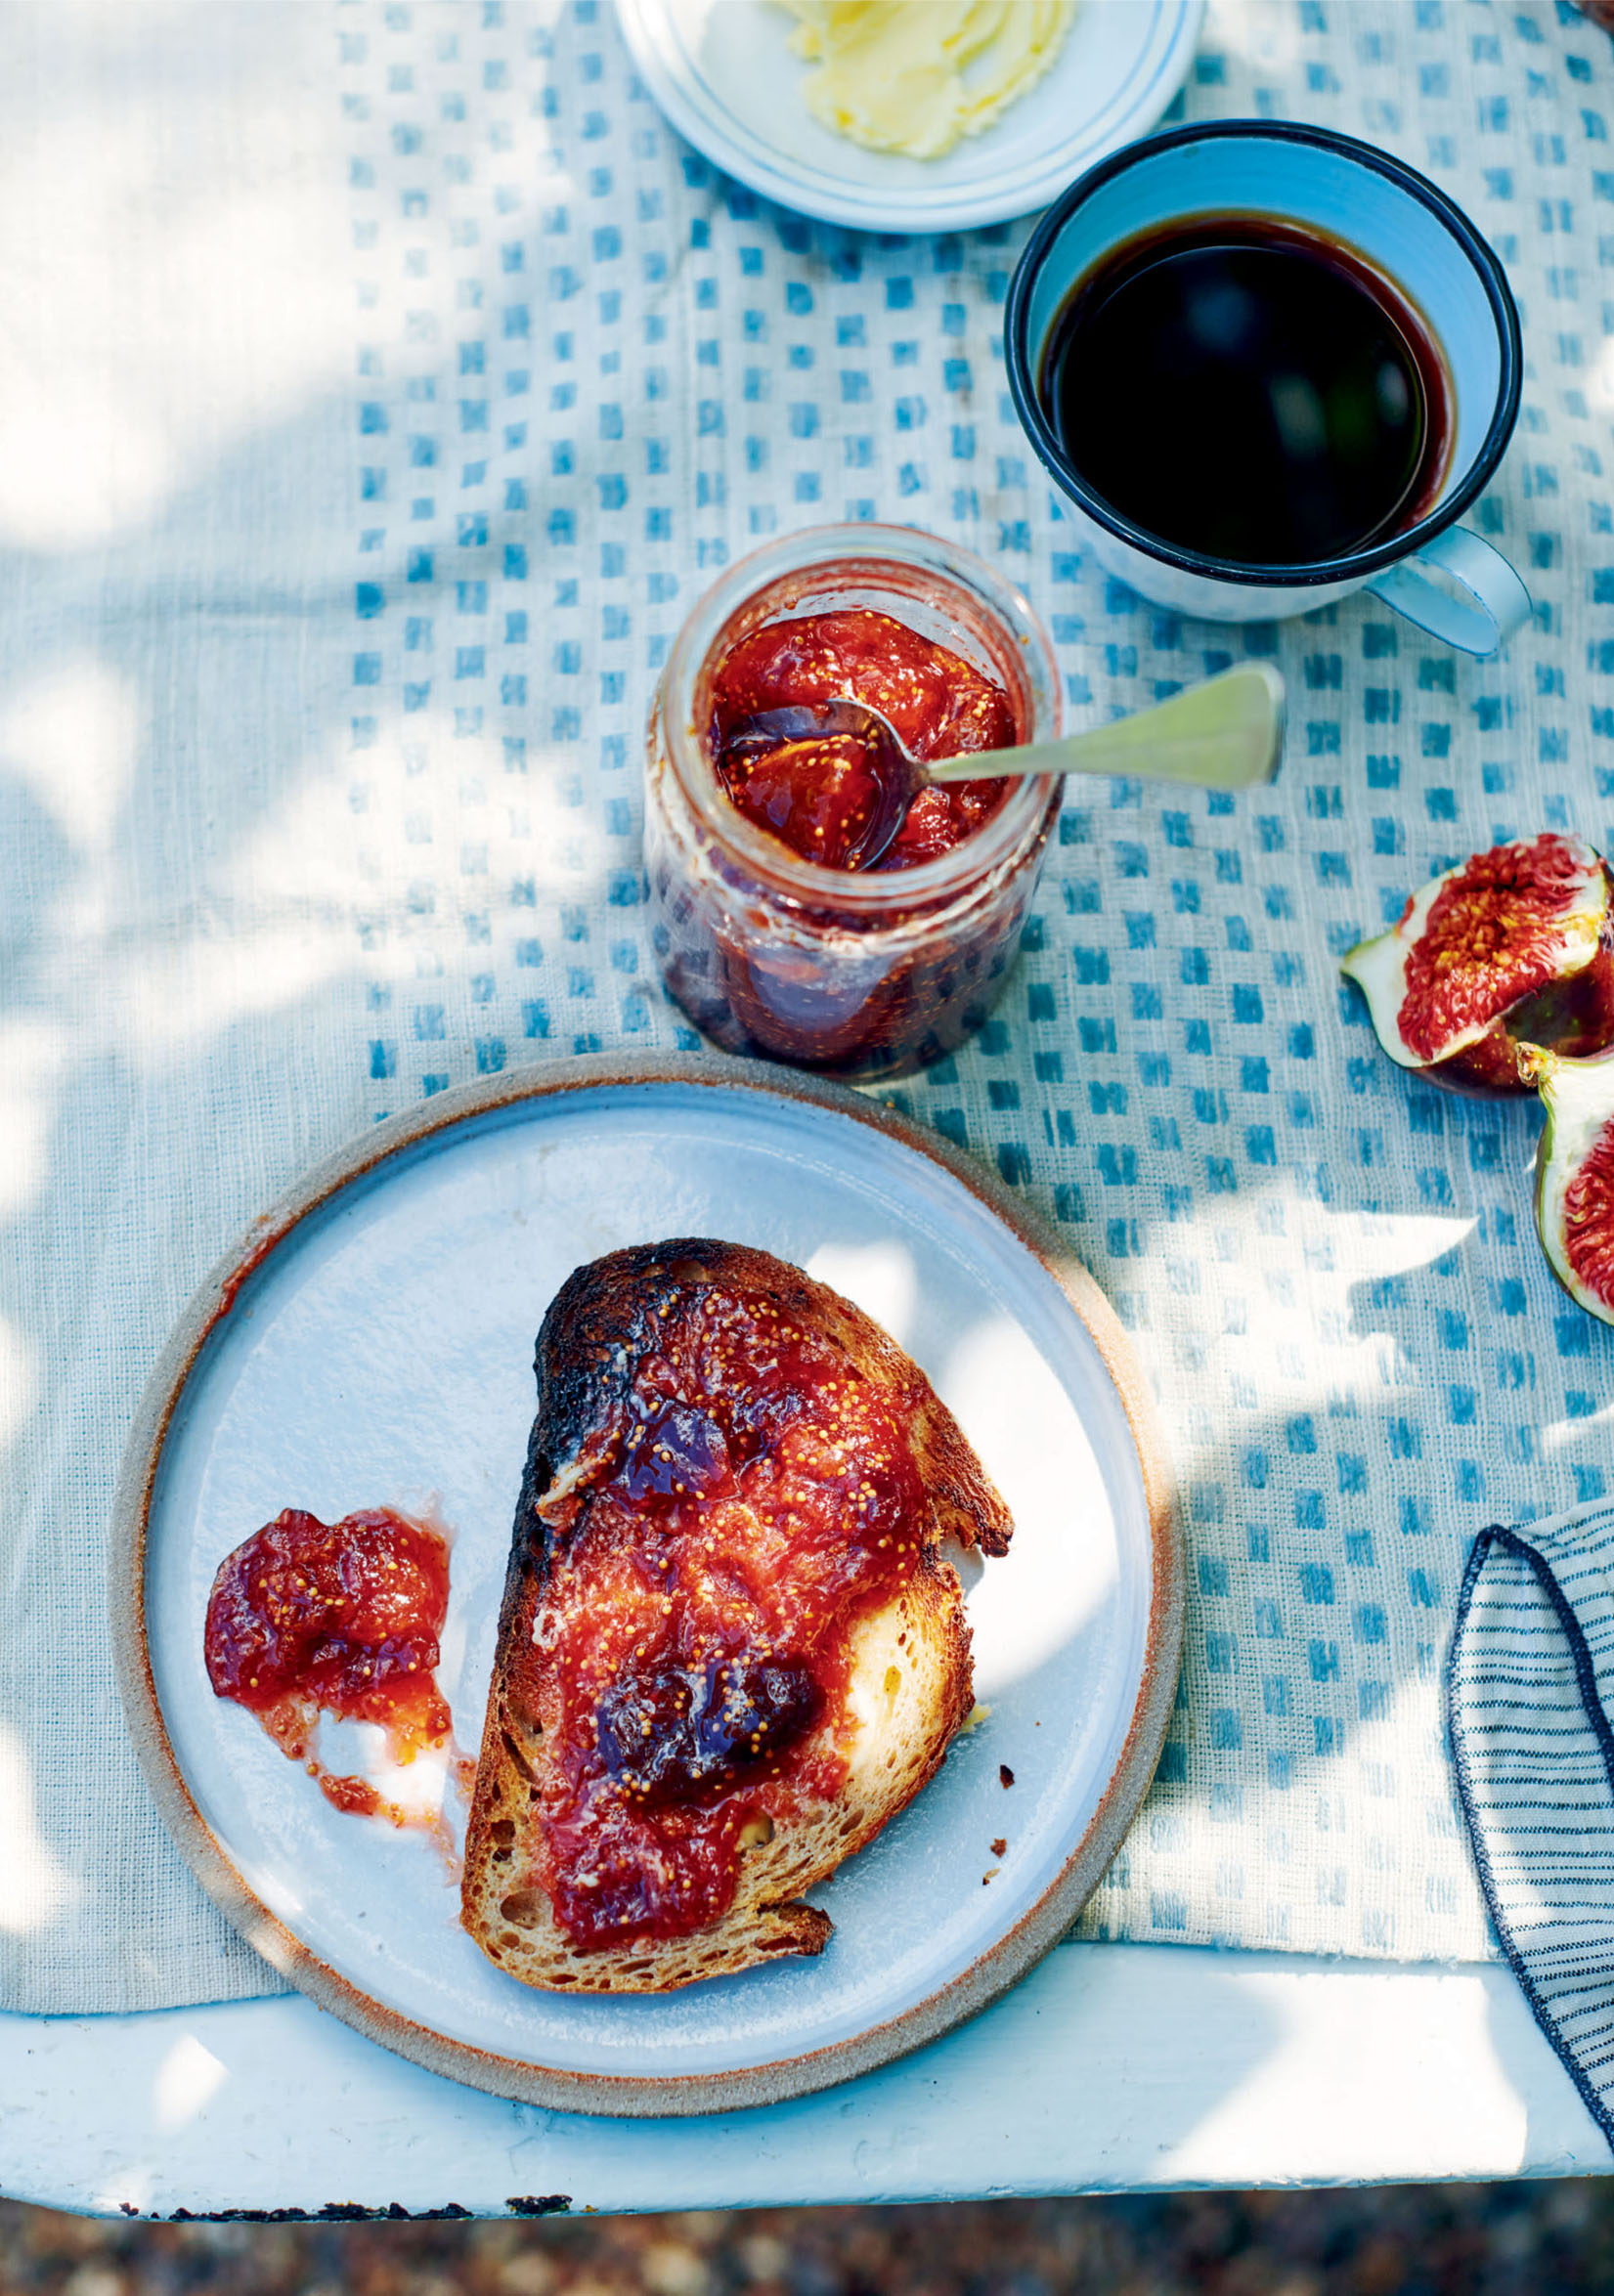
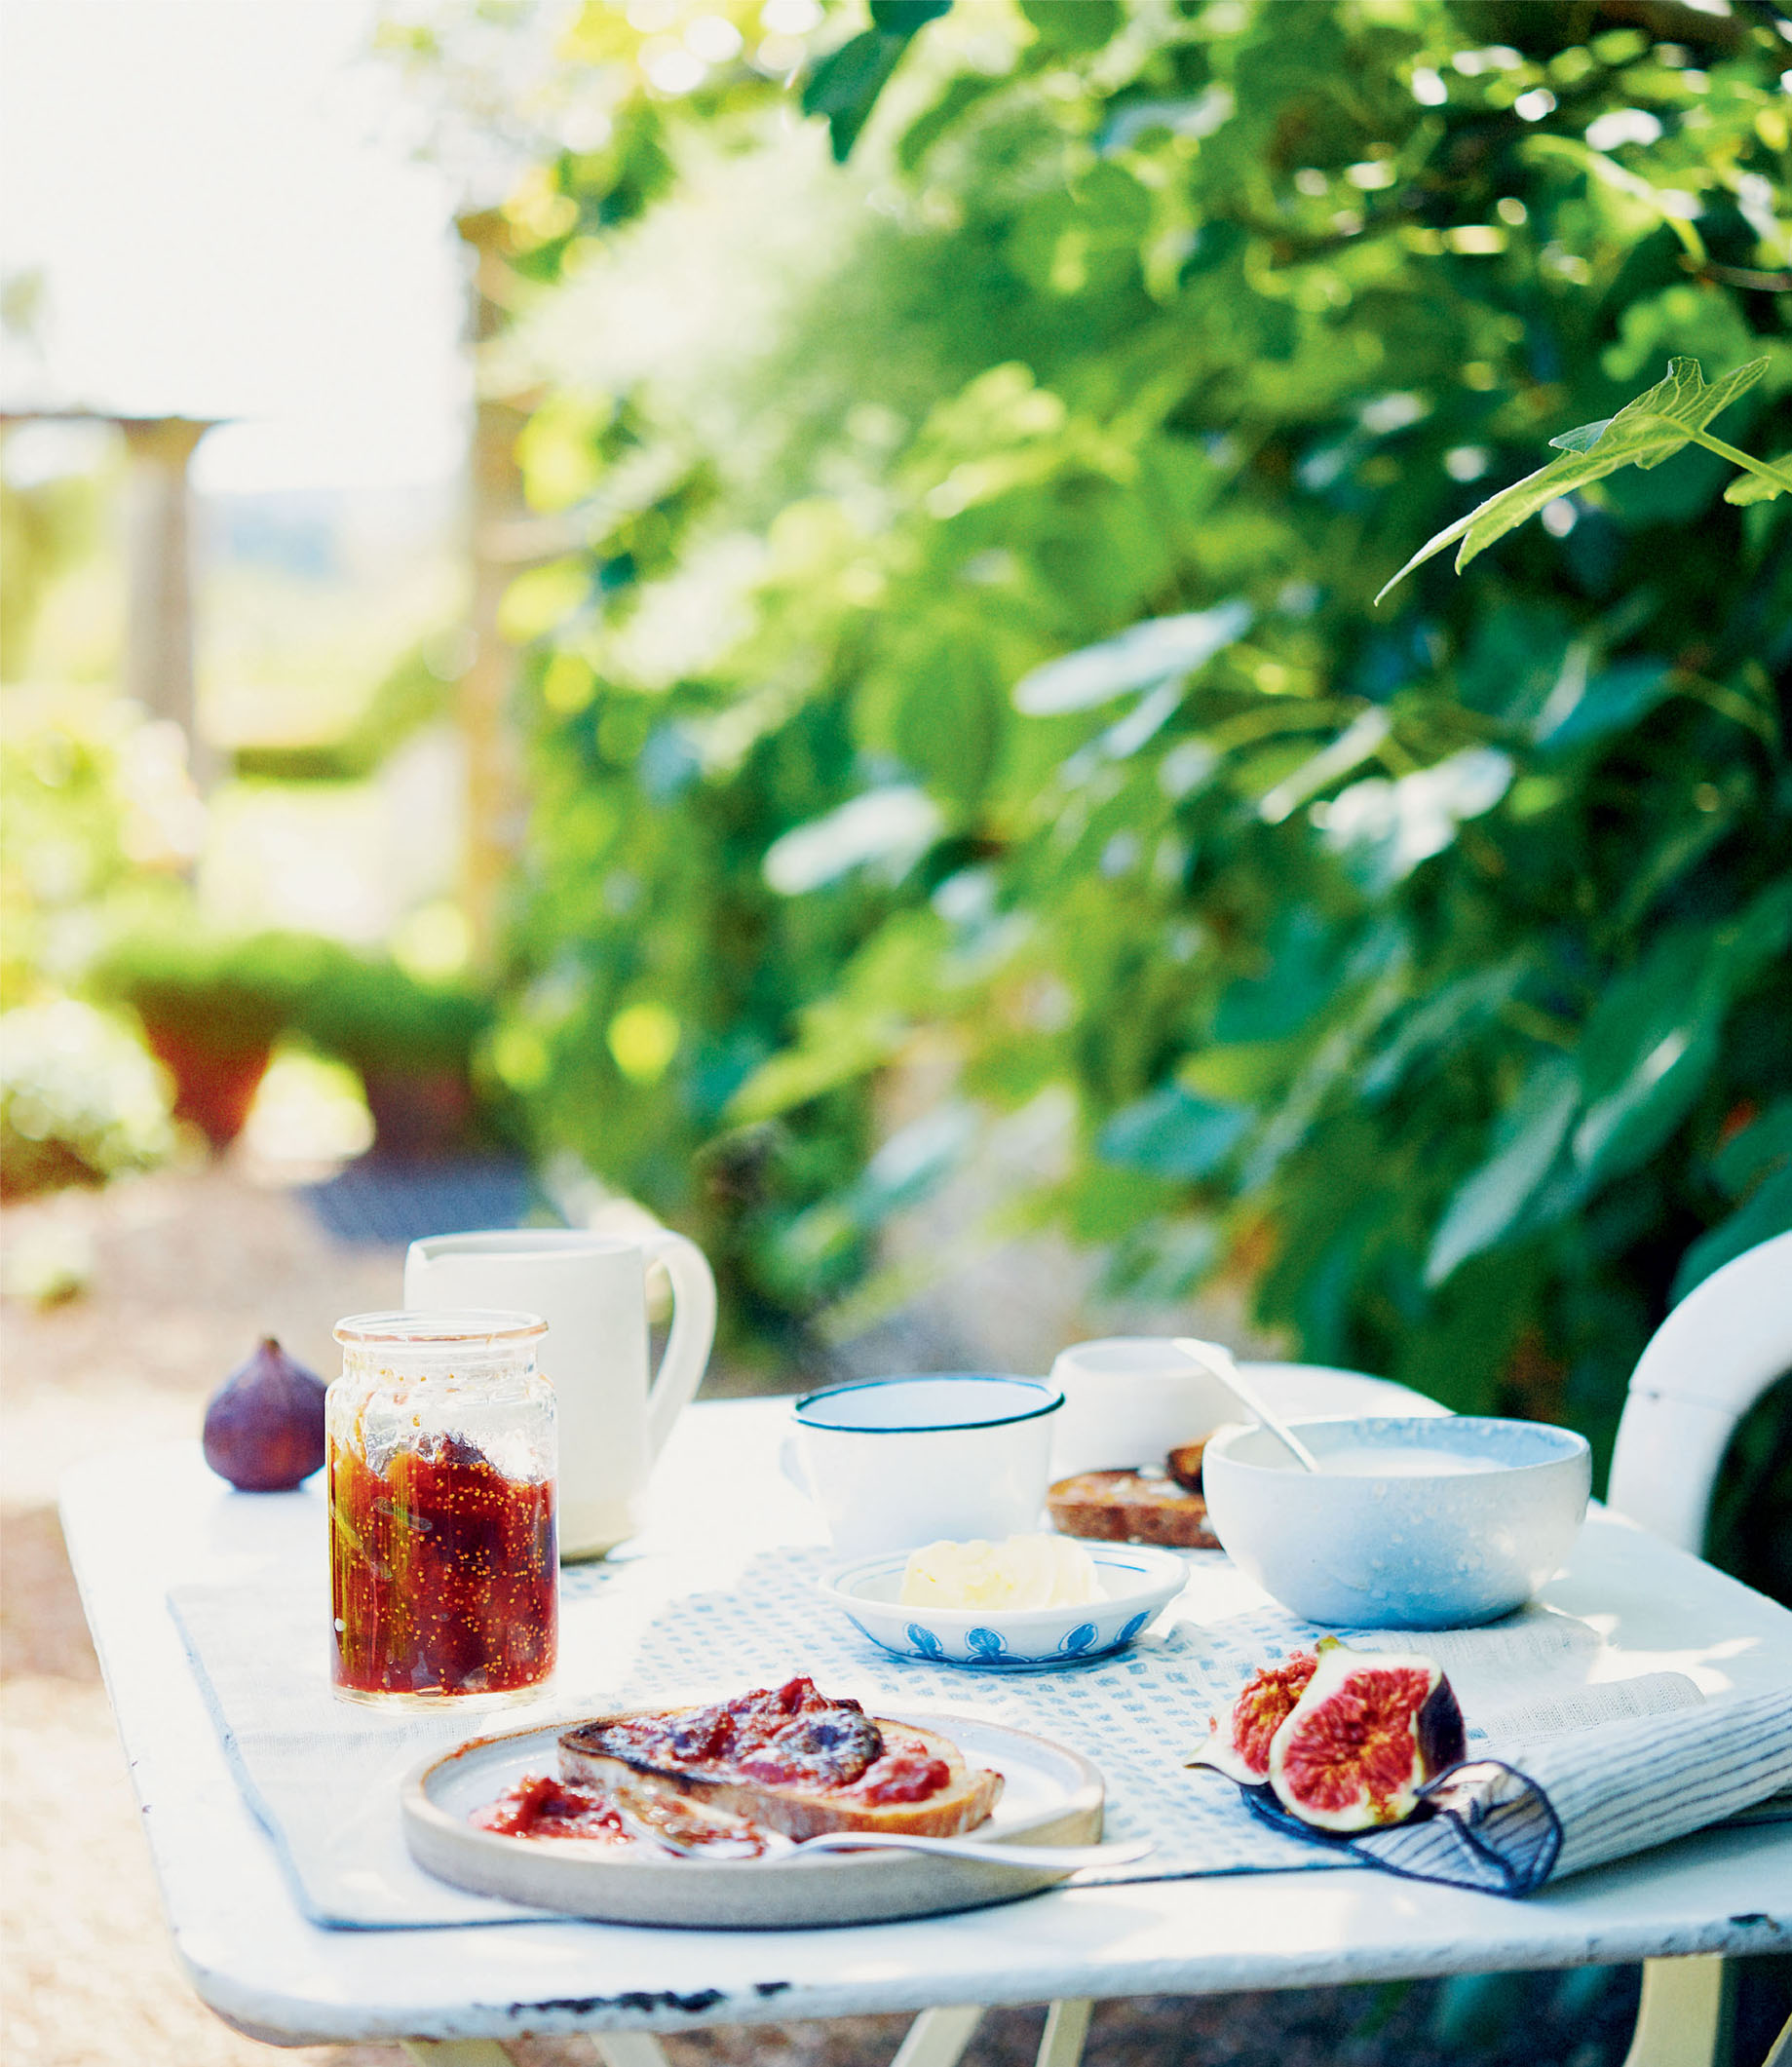
Fig Jam
MAKES: 1.3KG | PREPARATION TIME: 15 MINUTES | COOKING TIME: ABOUT 30 MINUTES
1kg figs, tops of stalks removed, roughly chopped
2 fig leaves, cleaned
500g jam sugar (containing pectin)
1 Put all the ingredients in a large saucepan and stir well to combine. Place over low heat and allow the sugar to dissolve, then increase the heat slightly and bring to a gentle simmer.
2 Once the liquid begins to come out of the figs, turn the heat up a little and stir regularly to prevent the jam catching on the bottom of the pan. Simmer rapidly until the jam reaches 105º. If you don’t have a thermometer, use the saucer test: put a saucer in the freezer, then once it’s cold put half a teaspoon of the jam on the saucer. If it does not run, it’s ready.
3 Remove the fig leaves, scraping the jam off them and back into the pan, and pour the jam into sterilised jars. Cover with the lids immediately. The unopened jars will keep for up to 12 months, and up to 1 month in the fridge once opened.
CHUTNEY MAKING
We always have chutney in my house, whether it’s homemade or shop-bought. It is a staple on cheese sandwiches and a go-to condiment when a little extra flavour is needed.
Best for chutney
Tomatoes, Onions, Stone fruit, Apples, Pears, Rhubarb, Figs
Apple, Rhubarb and Rosemary Chutney
MAKES: 475G | PREPARATION TIME: 15 MINUTES | COOKING TIME: 40 MINUTES
1 onion, cut into 1cm dice
2 apples, peeled, cored and cut into 2cm dice (about 400g)
4 rhubarb stalks, cut into 2cm pieces (about 250g)
4 sprigs of rosemary, tied together with string
150ml white wine vinegar
100g dried, pitted dates, finely chopped
1 Put all the ingredients in a medium saucepan over medium heat. Bring to a simmer and cook gently for 30–40 minutes until sticky and shiny.
2 Remove the rosemary sprigs, pour into sterilised jars and seal. The unopened jars will keep for up to 12 months, and up to 1 month in the fridge once opened.


Weekday meals are some of the toughest to get inspired for. They’re the ones we don’t think about until we get home or call for a takeout. Or we eat something quick and rubbish because we just don’t have time to prep a meal. We’re all working incredibly hard, and we also have to fit in travel, family and down time, so making food can quickly become a chore. These simplified dishes are really easy to make, and they offer great nutritional value, too. Don’t overthink it and don’t worry about it.

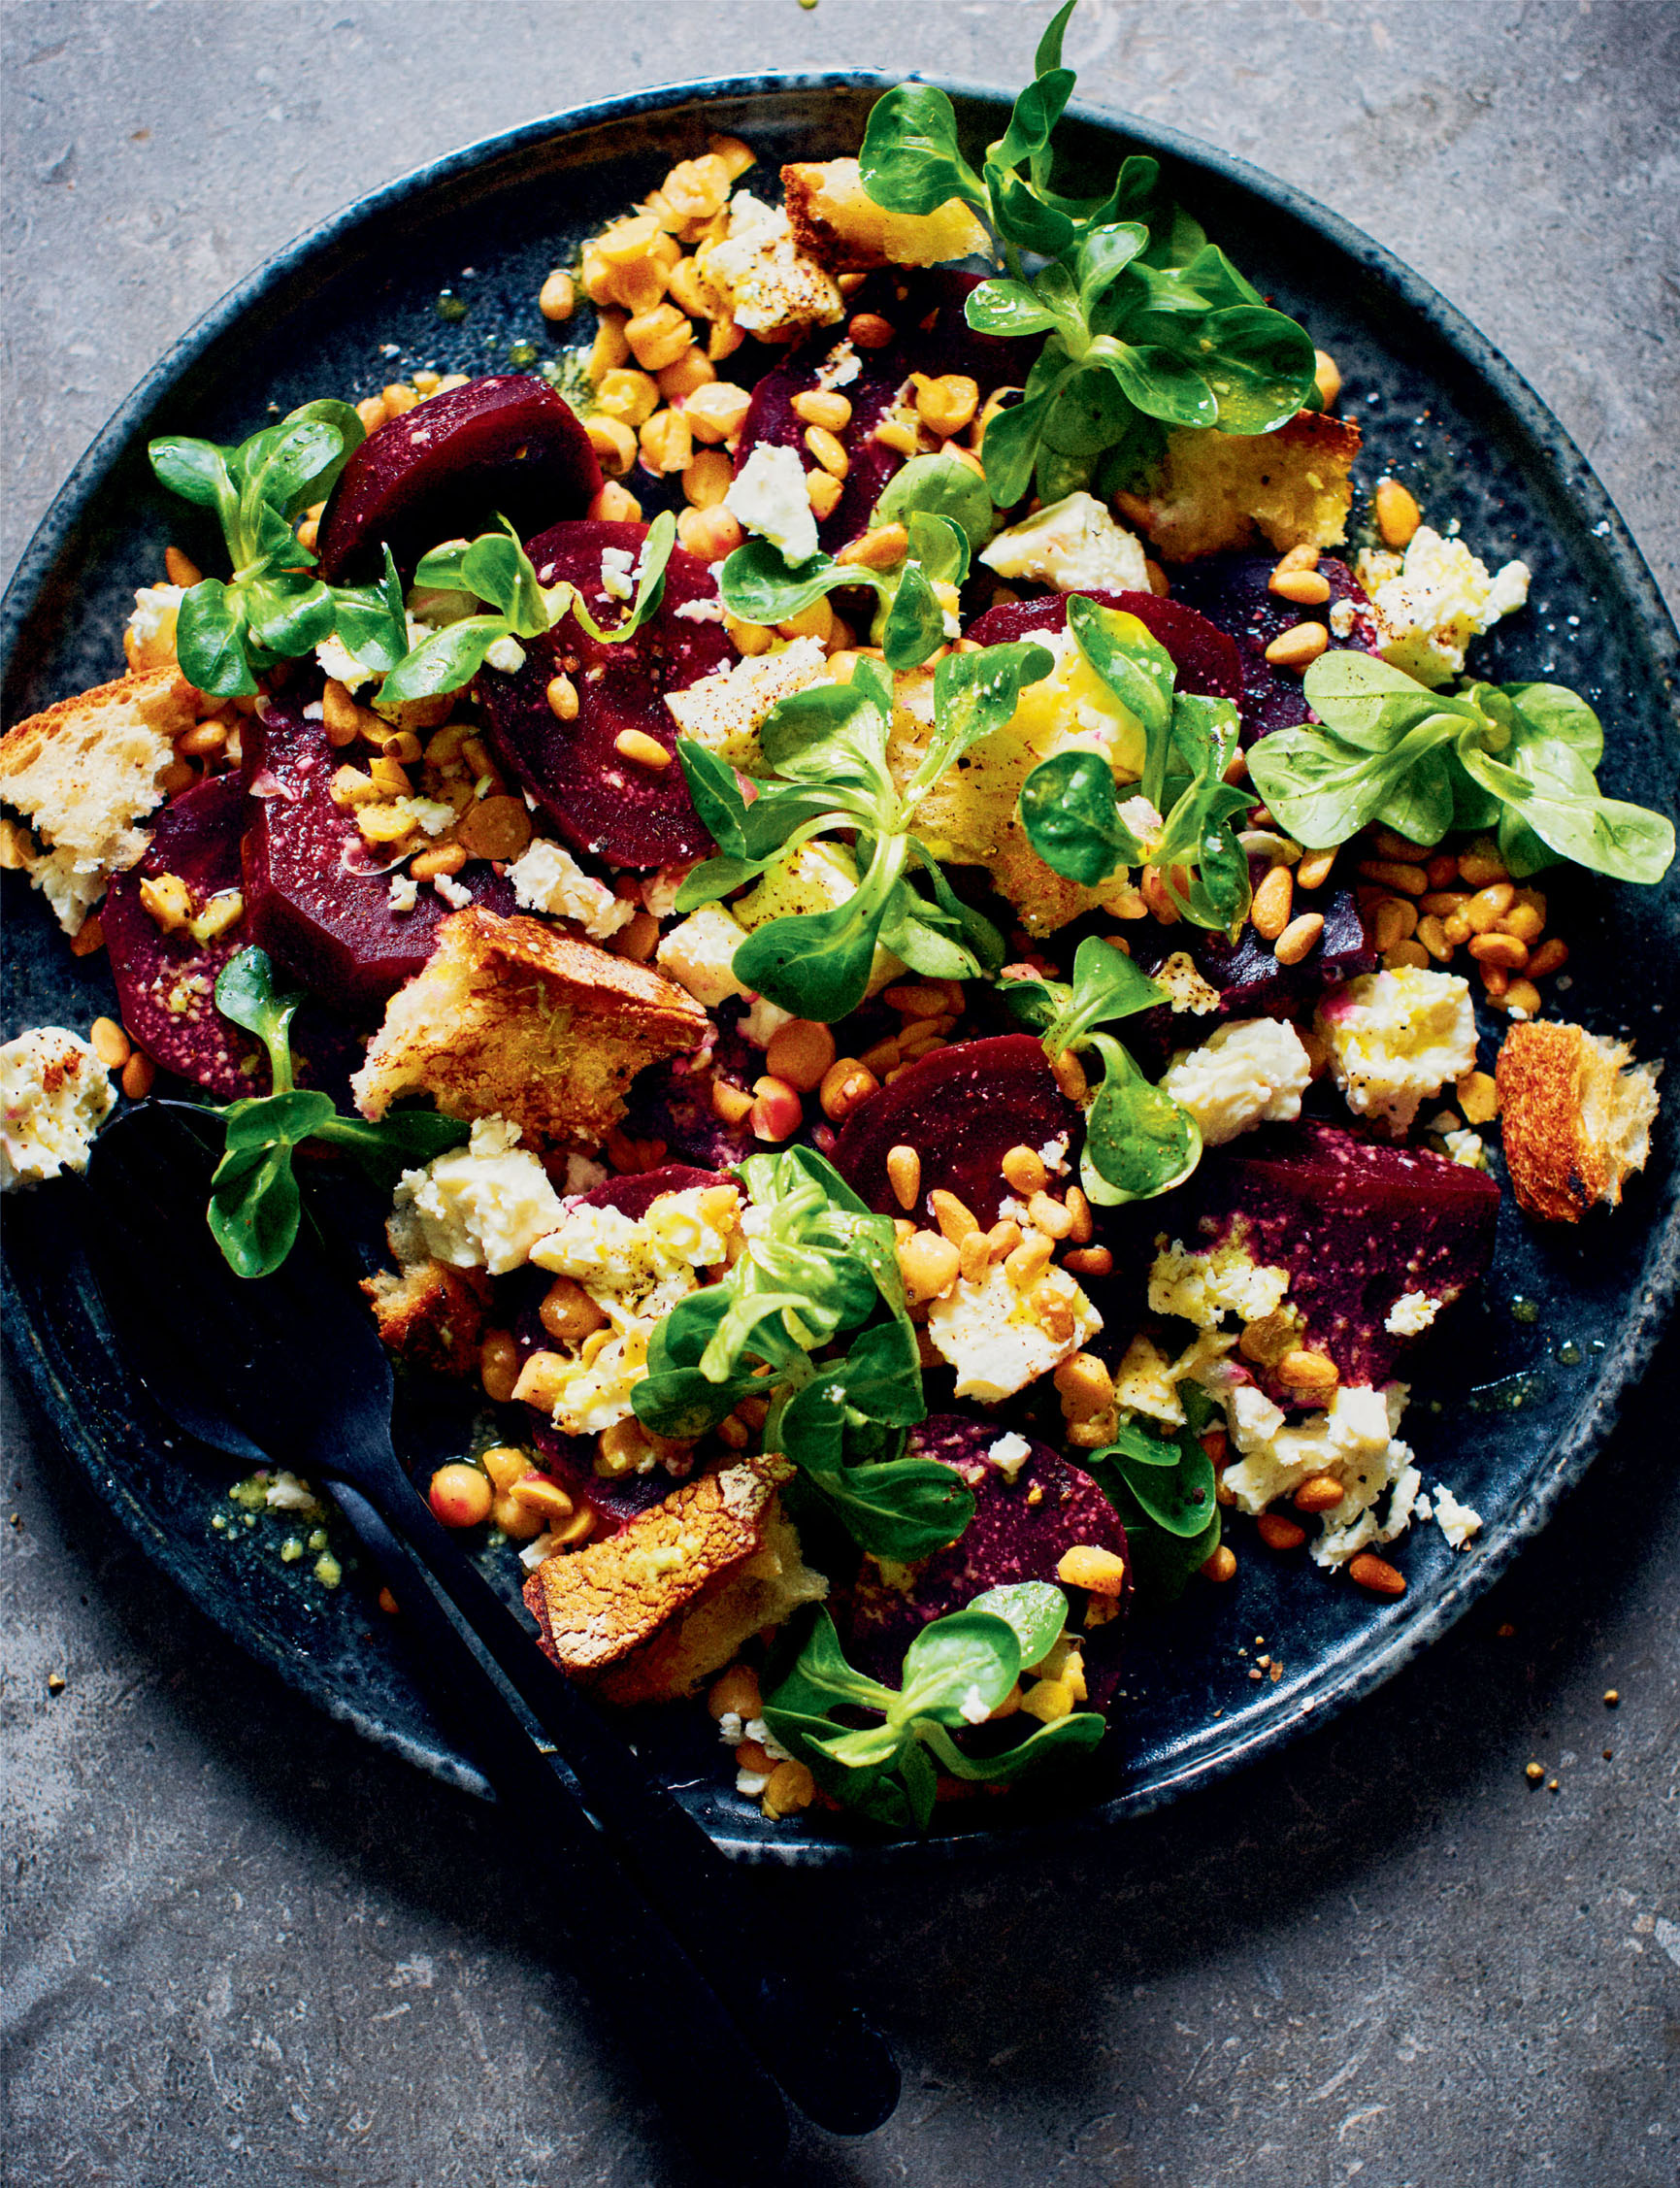
Beetroot, Wasabi, Feta and Pine Nut Salad
This dish makes a great summer, or early autumn, meal. It is delicious and also surprisingly filling, with the chickpeas, feta and pine nuts all playing a part. The wasabi is there to season the dish, not to overpower it. So even if you are not a fan, do try it!
SERVES 4 | PREP TIME: 25 MINUTES | COOKING TIME: 1 HOUR
100g pine nuts
500g cooked beetroot
100g tinned chickpeas, drained, rinsed and roughly chopped
100g lamb’s lettuce
200g feta
2 slices of sourdough (about 100g), gently toasted then torn
sea salt and freshly ground black pepper
FOR THE DRESSING
½ tsp wasabi paste
50ml olive oil
1 tbsp rice wine vinegar
1 Preheat the oven to 210°C/190°C fan/gas 7.
2 Place the pine nuts on a baking tray and toast in the oven for 8–10 minutes, shaking halfway through, until a deep golden colour.
3 Slice the beetroot into large chunks and lay them on a platter. Scatter the chopped chickpeas on top, followed by the lamb’s lettuce. Crumble the feta on top, then add the pine nuts and a generous grind of black pepper. Finish with the torn sourdough pieces.
4 For the dressing, whisk everything together in a bowl, season with salt, then drizzle over the top of the salad. Serve immediately.
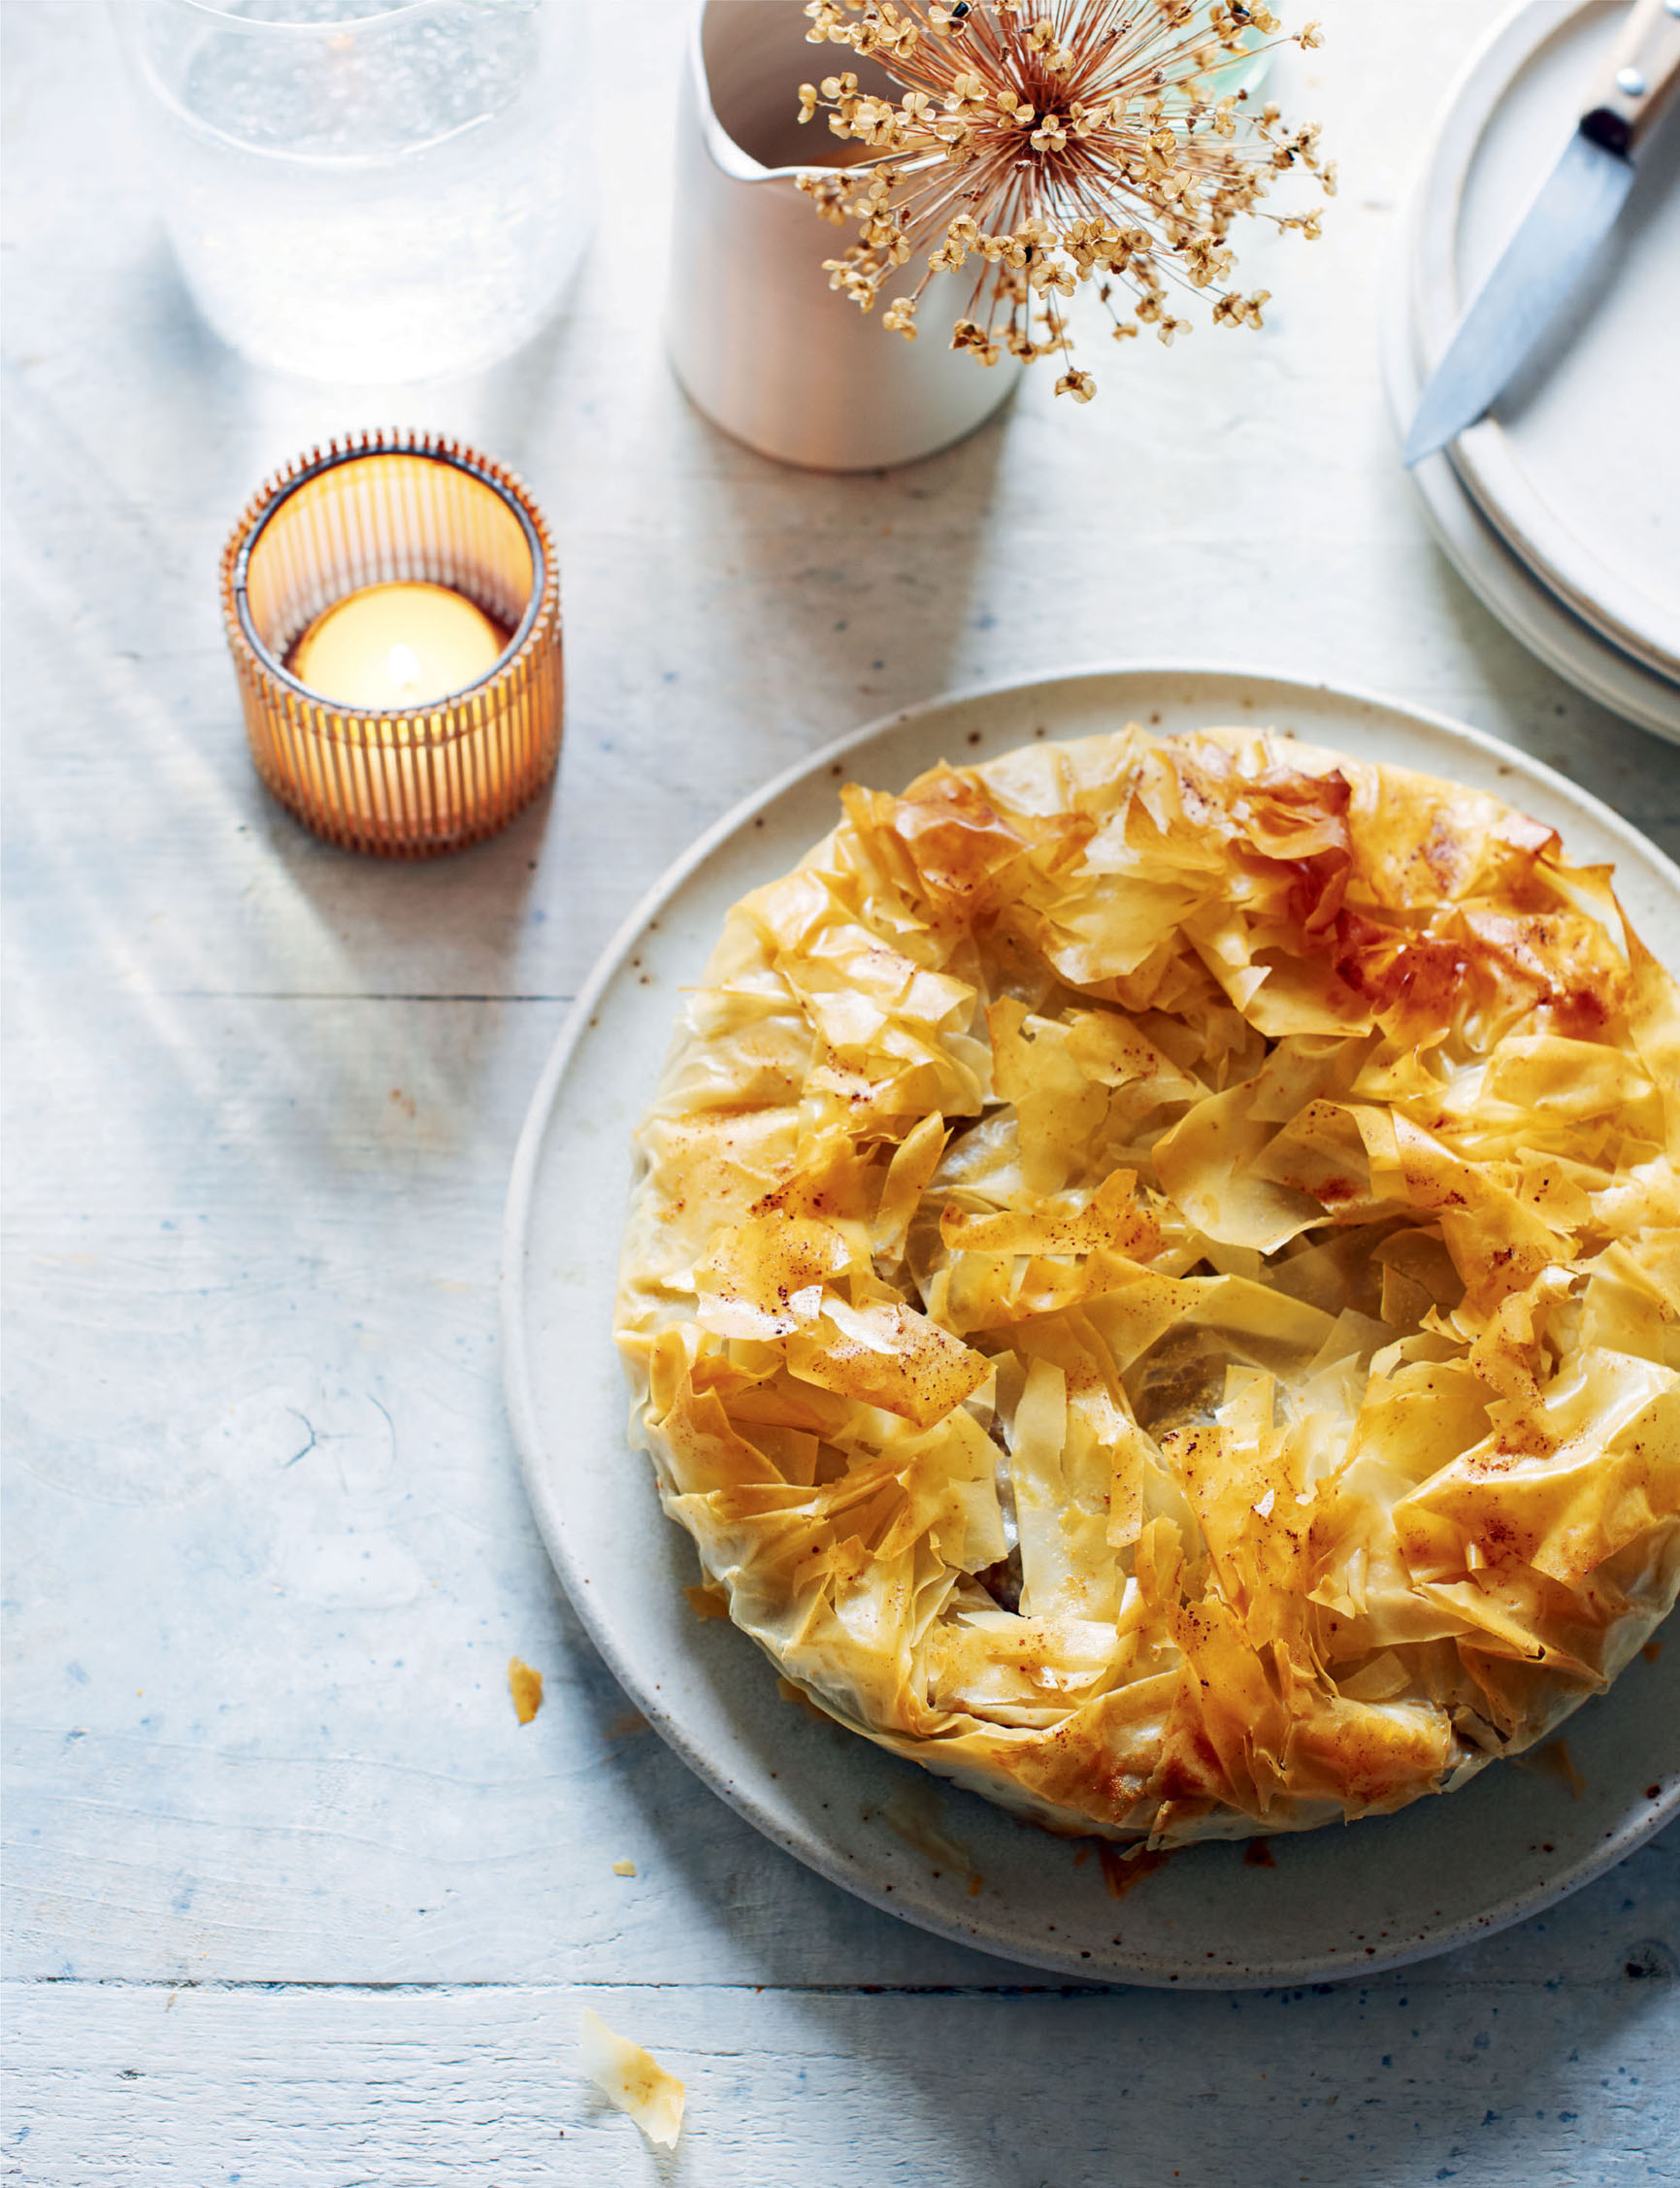
Field Mushroom, Walnut and Thyme Filo Pie
I’m from the North and two things I really love are pies and mushrooms. This is rich, satisfying and a total winner, providing a delicious weekday supper or weekend lunch. It’s technically a little challenging, but once you’ve got the hang of it, it’s simple to put together. In summer, a side of chargrilled broccoli makes a great accompaniment, and in winter I like it with kale sautéed in a little butter and soy sauce.
SERVES: 4–6 | PREP TIME: 25 MINUTES | COOKING TIME: 55 MINUTES
100g puy lentils
70g butter
2 onions, thinly sliced
1 garlic clove, finely grated
½ bunch of thyme, ⅔ of it tied together with string, the remaining third’s leaves picked
8 large field (or flat) mushrooms, thinly sliced
100g walnuts
1 tbsp vegetable oil
100g cream cheese
2 tbsp milk
50g Cheddar cheese, grated
7 large sheets of filo pastry
sea salt and freshly ground black pepper
1 Cook the lentils according to the packet instructions.
2 Melt 15g of the butter in a large frying pan over medium heat, add the onions, garlic, tied thyme and season well with salt and pepper. Cook for about 15 minutes until lightly browned, then transfer to a large bowl. Heat another 15g of the butter in the same frying pan, with the bunch of tied thyme, and when the butter has melted, add the mushrooms and season well with salt. Cook for about 15 minutes, until all of the liquid has evaporated. Transfer the cooked mushrooms to the bowl containing the onions. Squeeze any liquid out of the bunch of thyme into the bowl then discard.
3 Preheat the oven to 220°C/200°C fan/gas 7.
4 Put the walnut pieces in a roasting dish with the vegetable oil. Season well with salt, toss to coat in the oil and toast in the oven for 5–7 minutes until a deep golden colour. Remove from the oven, leave to cool then roughly chop.
5 Add the walnuts, lentils and thyme leaves to the large bowl. Mix well. In a separate bowl, whisk the cream cheese and milk together until smooth. Add to the large bowl, along with the grated Cheddar, and mix well.
6 Melt the remaining 40g of butter in a pan. Brush a 23cm pie dish with a little butter. Lay one sheet of pastry on your work surface, brush liberally with melted butter and place in the dish. Brush a second piece of filo with butter then add in an overlapping criss-cross pattern. Continue with 2 more buttered sheets to create a star shape. Add the mushroom mixture and smooth the surface. Brush the remaining 3 filo sheets with butter, then scrunch up and place on top of the pie. Bake in the oven for 20–25 minutes, until the pastry is golden and the mushroom mix is lightly bubbling.
7 Remove from the oven and serve warm with your chosen side dish.
Roasted Cauliflower and Walnut Tagliatelle
Well-roasted cauliflower has the most delicious, nutty flavour. I always find that home cooks do not roast it for long enough, thus missing out on the best flavour from it. This recipe combines a roasted cauliflower purée to create the sauce, with roasted florets and crunchy, toasted walnuts.
SERVES: 4 | PREP TIME: 15 MINUTES | COOKING TIME: ABOUT 50 MINUTES
1 large cauliflower, leaves removed, broken into florets
50g butter, cubed
100g walnut pieces
1 tbsp vegetable oil
150ml milk
150ml good-quality vegetable stock
350g tagliatelle
200g cavolo nero, roughly chopped
¼ bunch of flat-leaf parsley, leaves chopped
sea salt and freshly ground black pepper
1 Preheat the oven to 230°C/210°C fan/gas 8.
2 Place the cauliflower florets in a roasting dish with the cubed butter. Season well with salt and pepper and bake in the oven for 6 minutes. Stir well, to coat the cauliflower in the butter, and cook for a further 20 minutes, stirring again after 10 minutes. The cauliflower should be a dark golden brown by this point. If it’s not, return it to the oven for a further 5 minutes.


