

Полная версия
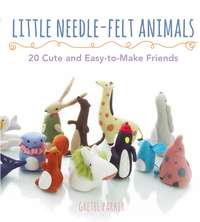
Little Needle-felt Animals

‘This book is dedicated to the life and dear memory of Andy Macauley, 1971–2013. My forever love.’
CONTENTS
Cover
Title Page
Dedication
Introduction
FINISHED MAKES
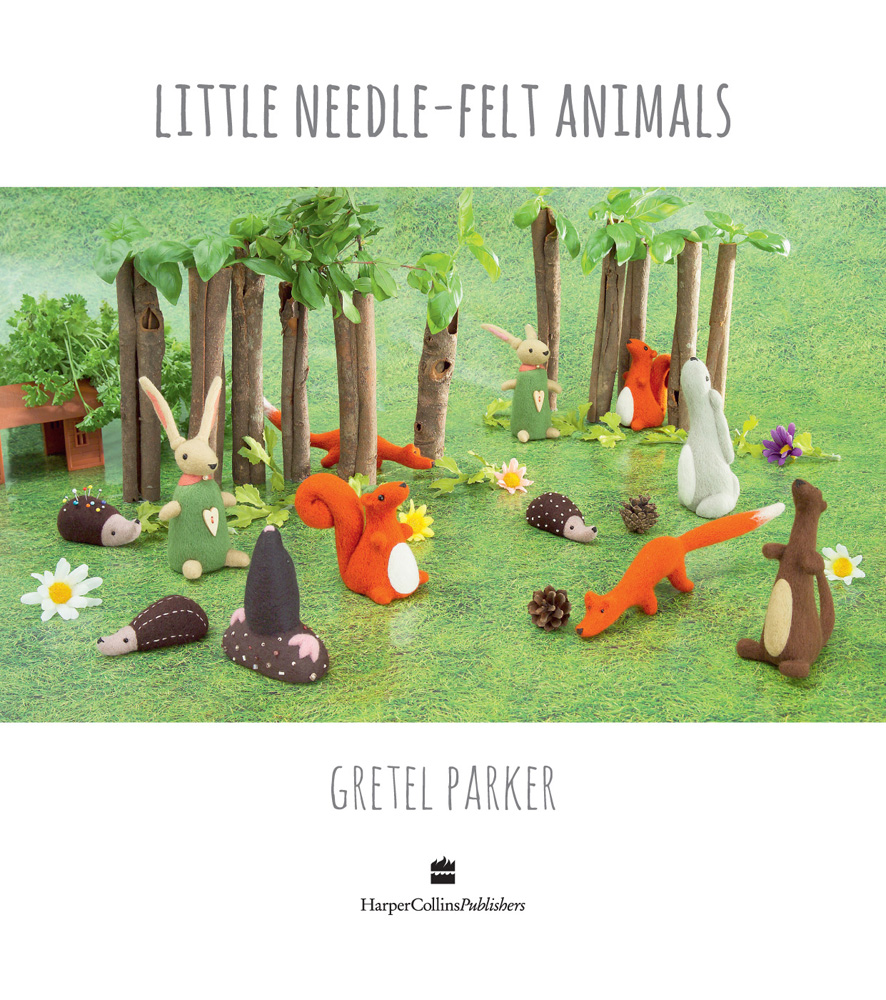
Woodland
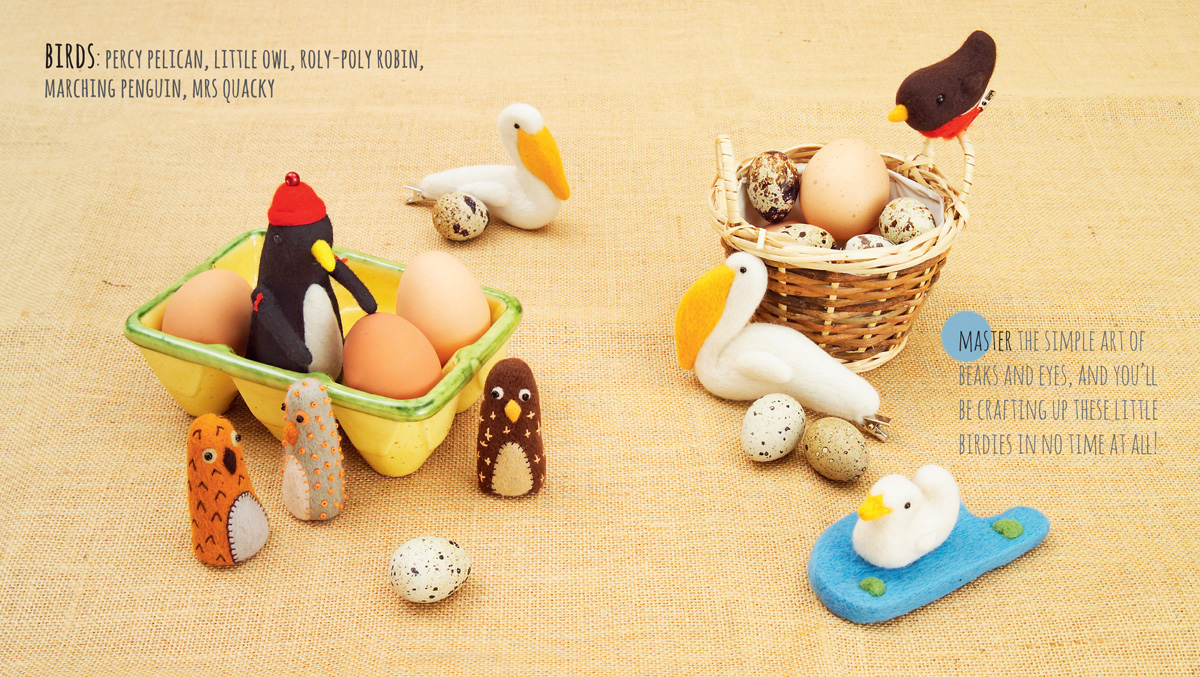
Birds
Sea Life
Pets
Wild Animals
Small Creatures
Barnyard
GETTING STARTED
Needle-Felting Tools
Sketch Before you Stab
Repeated Elements
PATTERNS
Moon-Gazing Hare
Olly Otter
Suzie Squirrel
Freddie the Fox
Happy Hedgehog
Milly Mole
Country Bun
Percy Pelican
Little Owl
Roly-Poly Robin
Marching Penguin
Mrs Quacky
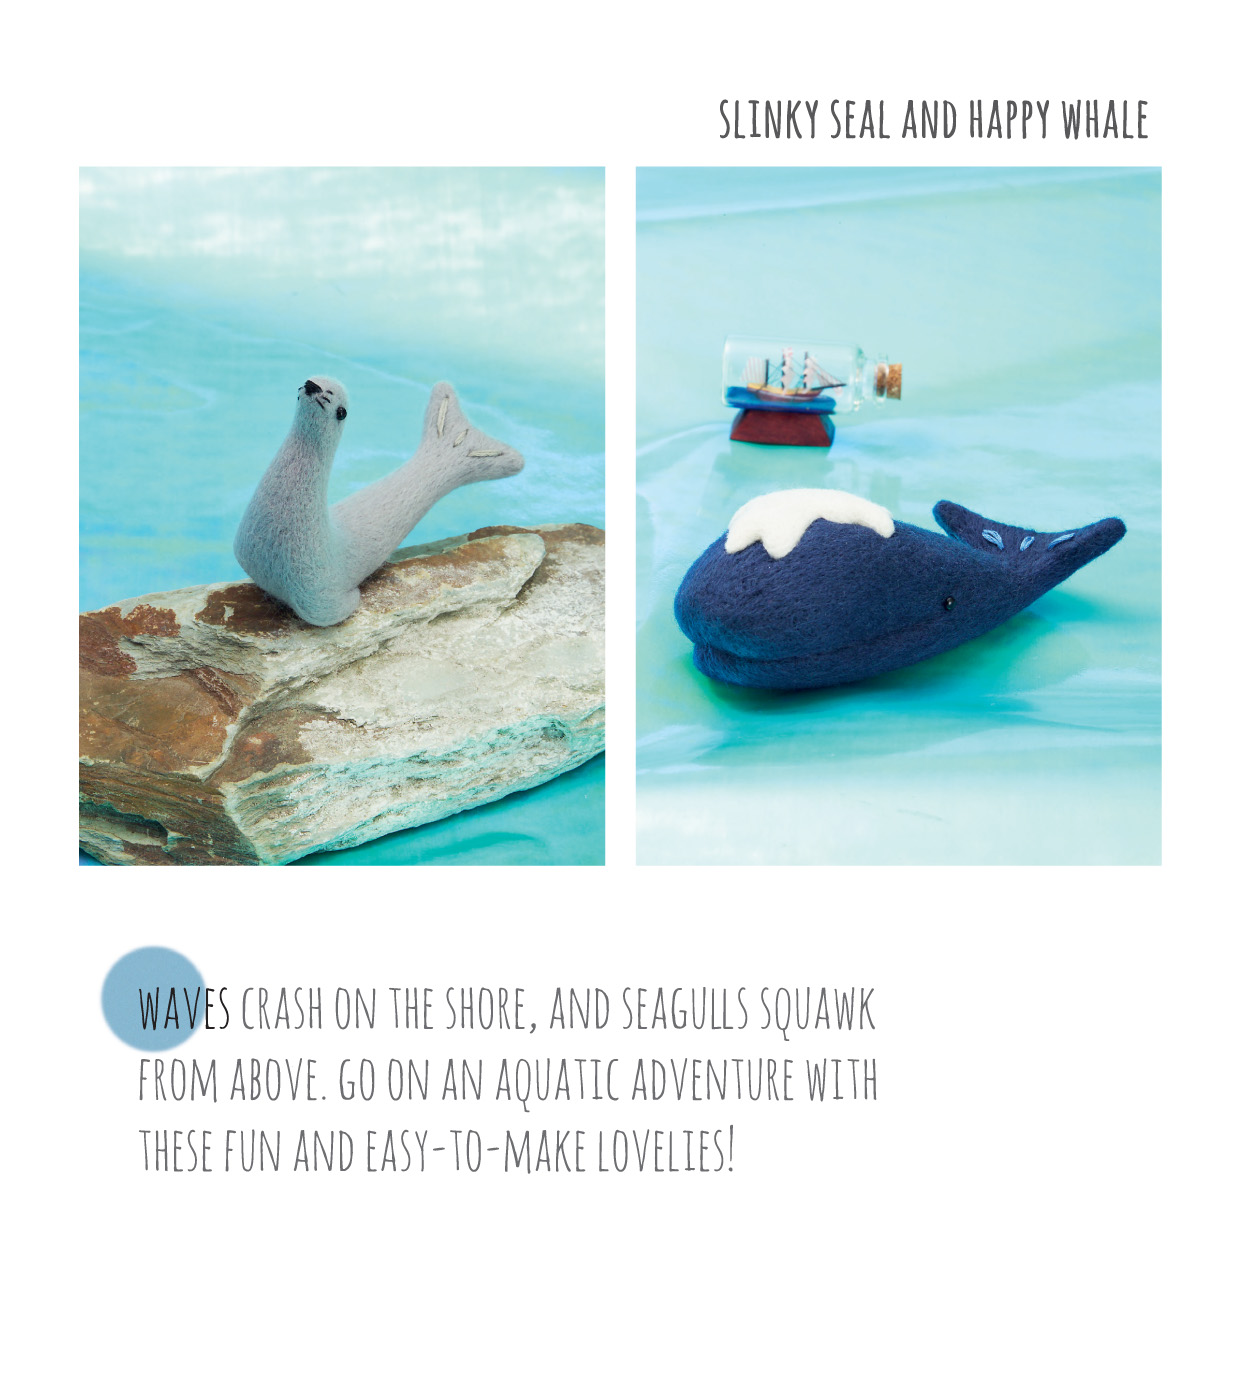
Slinky Seal
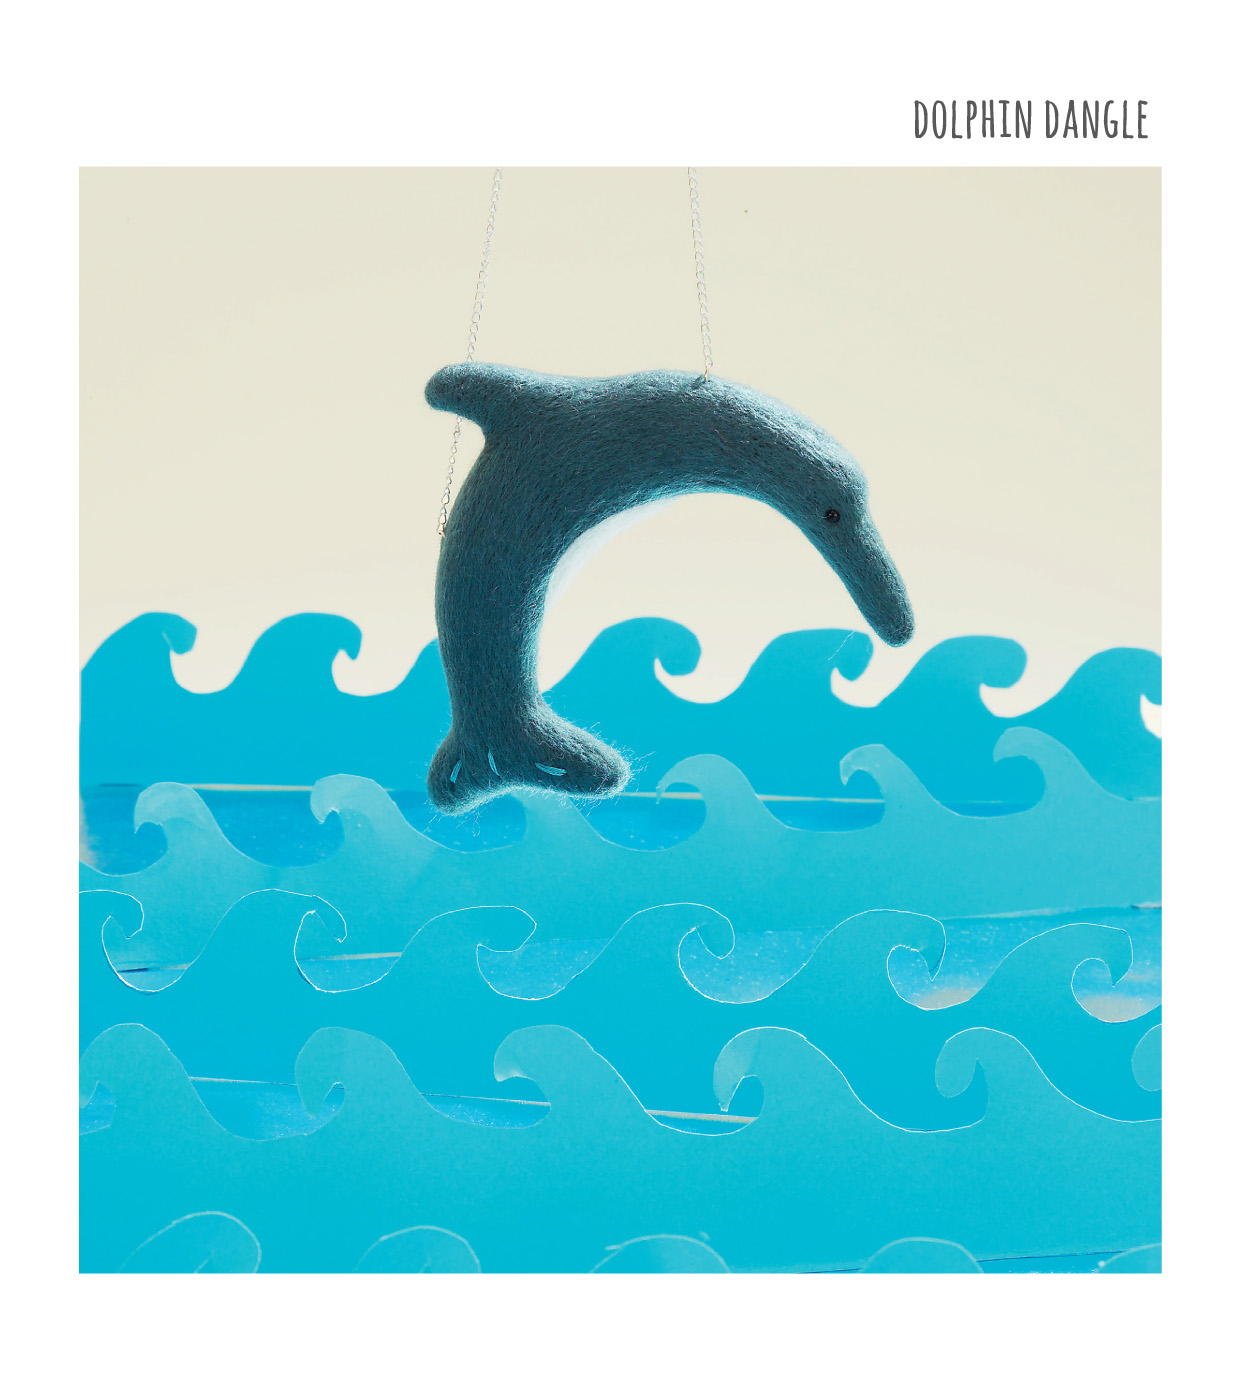
Dolphin Dangle
Happy Whale
Little Fish
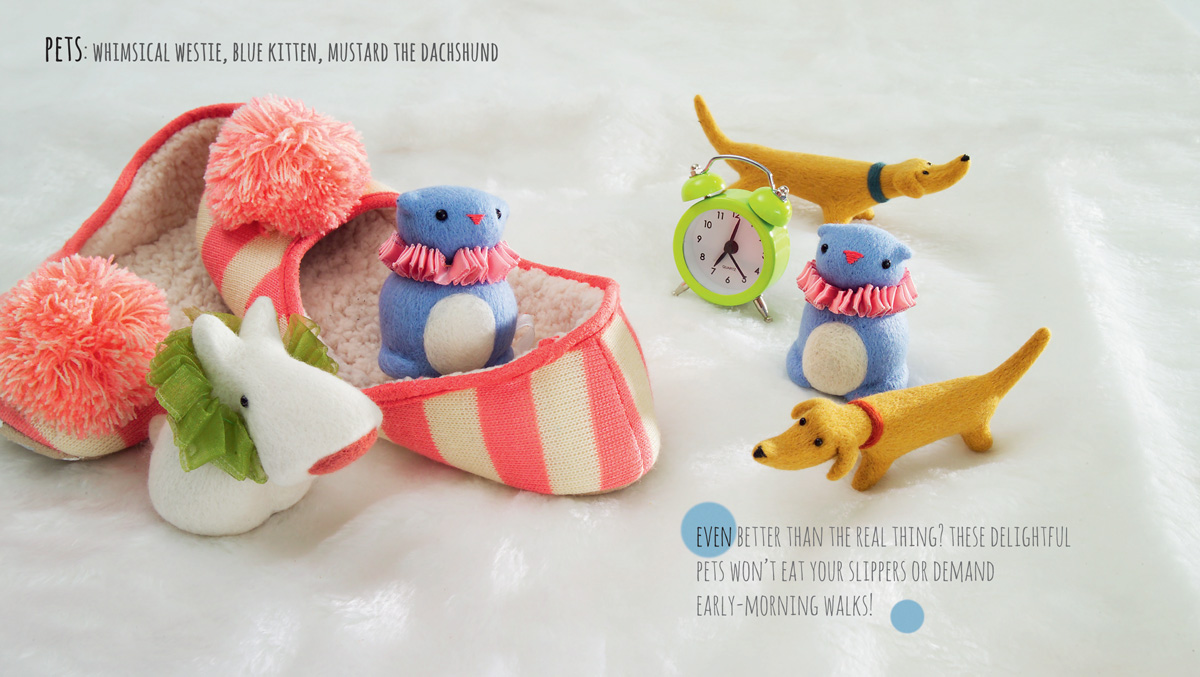
Whimsical Westie
Blue Kitten
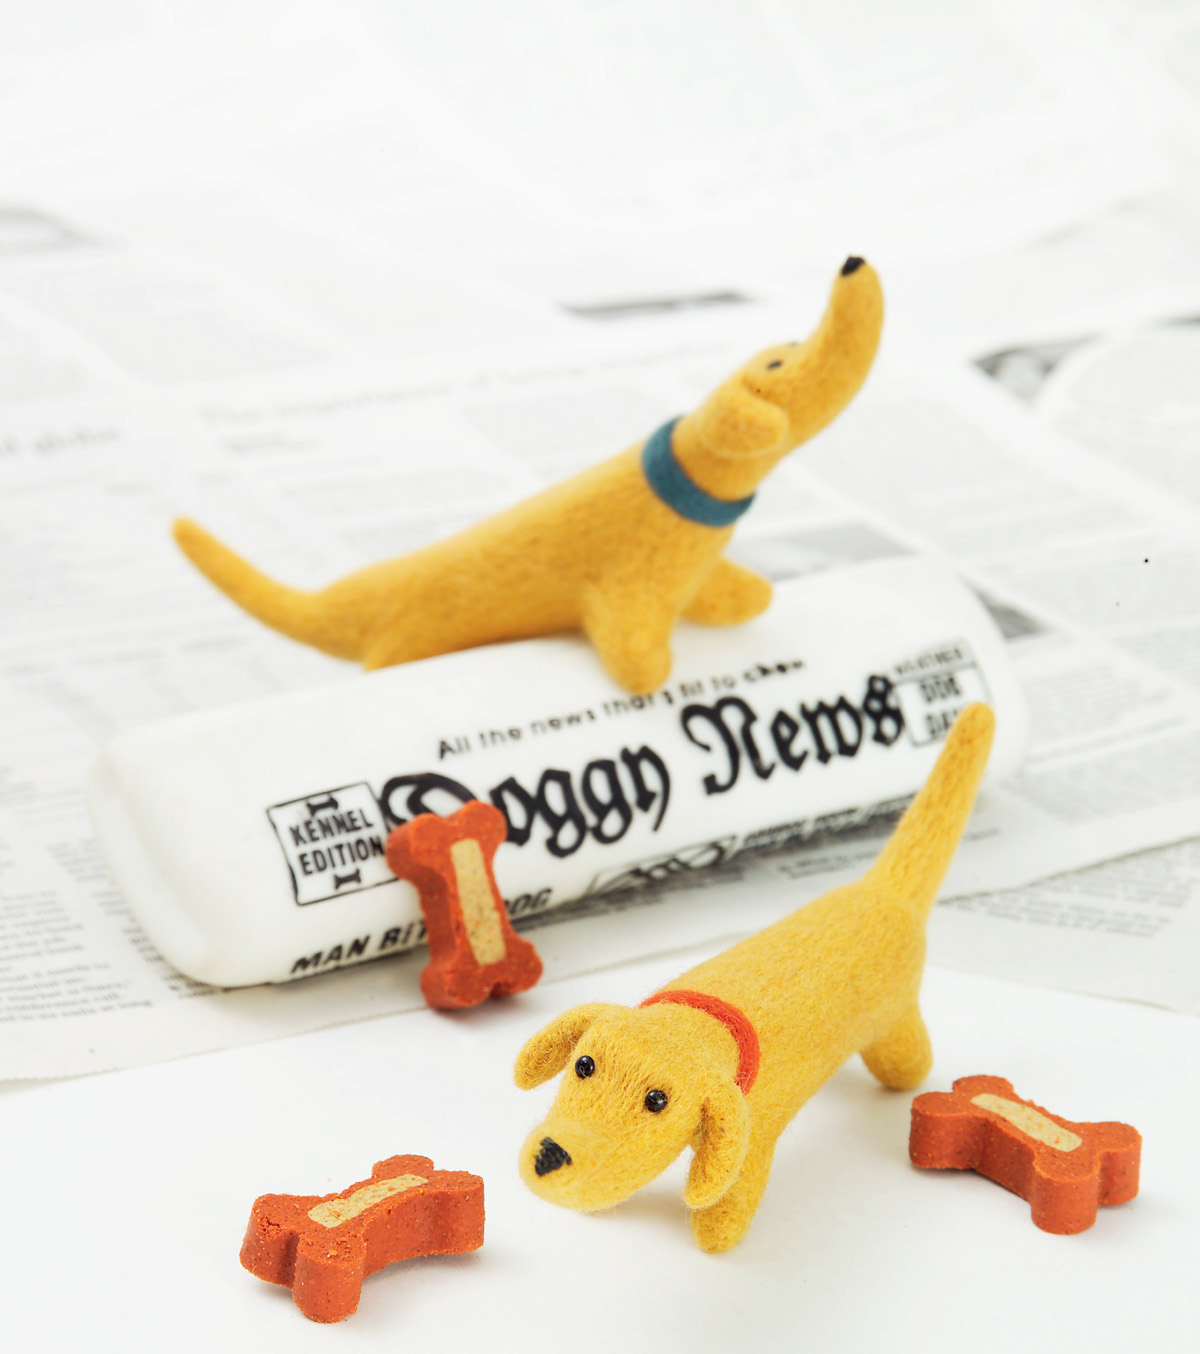
Mustard the Dachshund
Baby Ella
Jolly Giraffe
Victor the Lion
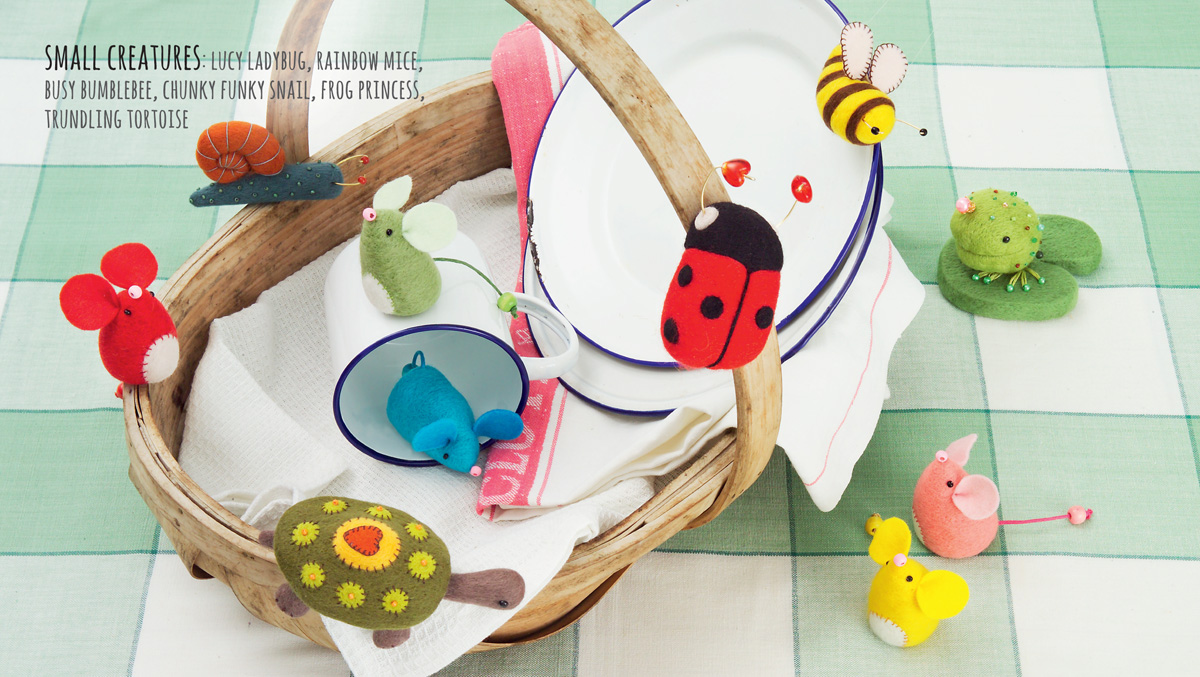
Lucy Ladybug
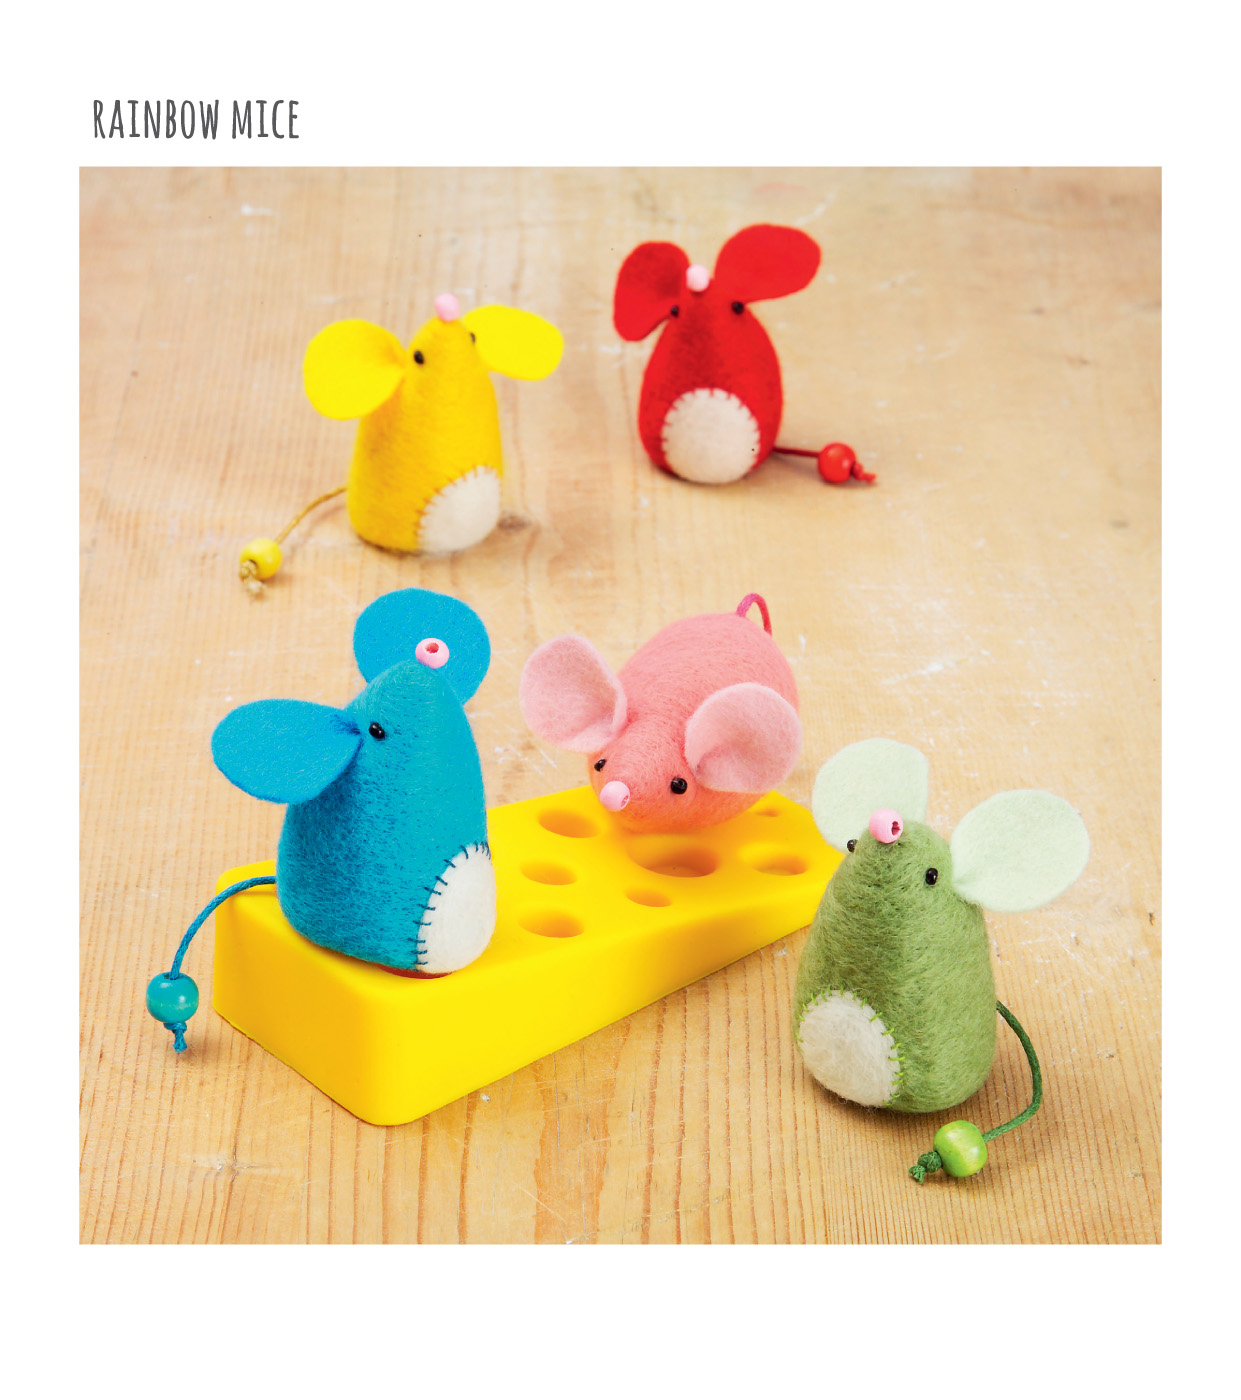
Rainbow Mice
Busy Bumblebee
Chunky Funky Snail
Frog Princess
Trundling Tortoise
Penelope Pig
Sally the Sheep
List of Searchable Terms
Suppliers and Links
About the Author
Copyright
About the Publisher

INTRODUCTION
I discovered needle-felting five years ago, when someone sent me a kit as a present. At first I was confused; what was it? How did it work? But from the moment I began stabbing and shaping the wool, I knew that here was my craft. My first piece was a toy rabbit based on one of my own paintings. The delight of making a small creature that could sit in the palm of my hand was captivating, and needle-felting soon became my day job. There is something magical about taking a simple length of wool roving and sculpting it into a three-dimensional form. It’s a craft that doesn’t require you to memorise stitches or use expensive tools. You just pick up a couple of felting needles and begin. It is lap friendly, and the kit is easily carried around.
When I started out, needle-felting was still fairly unknown in the UK, but word has spread and more people are discovering it every day. The patterns in this book range from the very easy to the more challenging, and I hope there is something for everyone to try. I am thrilled to be given this opportunity to share my designs and techniques with a wider audience and hope that it encourages many more people to enjoy this unique and versatile craft.

Finished Makes


Getting Started

Getting Started
Needle-felting is so simple – simply grab some wool, your felting mat and a couple of needles (see here) and get stabbing! A few basic techniques are useful to know about before you begin, though, so read on.
How Does Needle-Felting Work?
Wool fibres are covered in small scales and natural oil. The action of continually pushing sharp, barbed needles into it makes it matt together – or ‘felt’. The more the wool is worked, the firmer it becomes. As the air is punched out and the fibres stick together, the volume of the wool decreases dramatically. So although it seems as if you’re starting out with a large amount of material, the finished piece will be about a third of the size of the original mass.
Don’t worry if you make mistakes; they are easily fixed. You can even cut bits off and patch it over as if nothing had happened. Wool is a wonderful, versatile material.
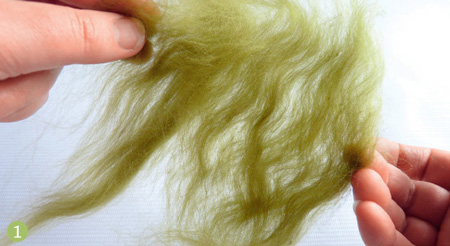
Tear, Don’t Cut
Try to tear your wool apart, rather than cutting. Rough ends meld together far better than cut ones.

Measuring and Sizes
Follow the pattern measurements and finished project sizes as closely as possible. However, the measurements are approximations only, so don’t panic if something comes out a centimetre shorter or taller.
Stabbing
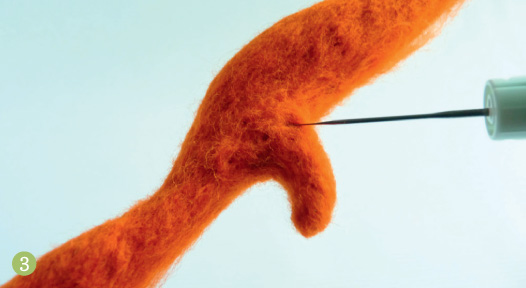
There is really only one technique to needle-felting – gently stabbing the wool with one or two needles until it firms up. At first it feels as if you are jabbing at thin air, but after a few minutes you begin to feel some bite. A while later you will hear a quiet scrunching sound, as if you were walking through snow. When you hear this, you know that the wool is getting to the malleable stage, when you can start to shape and sculpt it.
Folding Over
Many of the patterns in this book start in the same way: folding wool over and inserting various sizes of filling. This bulks out the bottom of the animal or bird, making a basic bulb or teardrop shape, which is then developed as the pattern progresses.
Shaping

Your fingers are the other tool you need for successful shaping. To make thin forms, pinch together the roving as you carefully work with one needle, to fix and solidify the wool. It takes time, but even the skinniest of tails can eventually be made firm.
Flat Bottoms

Several of the designs need a nice flat bottom to sit on. If you hold the body vertically on the felting mat, so that it is already ‘sitting’, you will get a preliminary flat base, which you can then pick up and work on. Using your thumb and index finger as a circular template helps define a neatly curved edge.
Turning Work
Unless you actually want a flat design, turn your project as you work so that you are treating all sides equally. It’s quite tempting sometimes to get so involved with one area that the rest is forgotten, which results in overworked areas. A project is never entirely finished until the final stage, when the fine-tuning takes place. For me, this is the part that takes the most time.
Patching and Tidying
There will be times (such as when you have added elements) when there is a visible join. This is where wool shines as a medium. Simply use tiny tufts of wool to fill in any gaps and then cover over the filled join with a thin layer of wool. Work carefully and neatly, and the added wool will blend in, making your work appear seamless.
Layering and Finishing Off
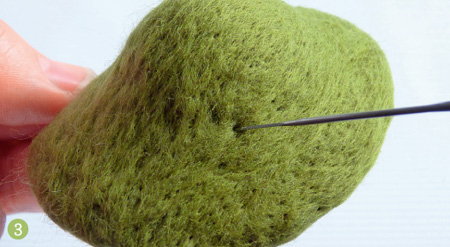
1 The final finish of any piece of work is so important. If, like me, you want as neat and smooth a surface as possible, then be prepared to put the time in. Use very thin veils of wool, teased out so finely that you can see through them.
2 Carefully cover your work with this thin veil of wool, using two 40 or 42 needles. Work closely and with regular movements, not jabbing too hard. The wool fibres should follow the length of the body and lie in the same direction as much as possible.

3 Look carefully at the surface; it will look like orange peel. Using one needle, poke the tiny dimples down. When you’ve done this all over, go back and do it again and again, until you are satisfied.
Fuzzies
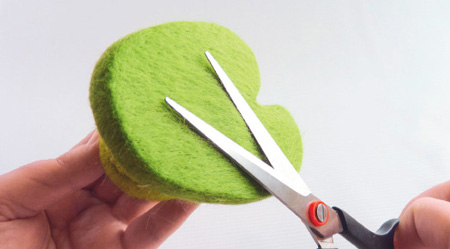
Fuzzies are inevitable. Merino wool is especially hairy. Layering and careful needling means that you will get a finer finish, but there is no shame in trimming your work. I shear mine by holding scissor blades flat across the surface, but do be careful that you don’t damage your work when you do this.
Use Your Judgement
No matter how closely you follow a pattern, needle-felting is mostly a matter of judgement. How does the felted wool feel in your hands? Is it too loose, too hard, or just right? If it’s too hard, it will be difficult to add extra parts. If it’s too soft, it is not so easy to sculpt. As you do more and more needle-felting, however, judging the wool will become second nature – rather like sensing the right tension in knitting.
Take Your Time
Getting a fine finish can take some time, so if you want to make something quick, start with a small pattern, such as the Happy Hedgehog or Chunky Funky Snail. Needle-felting is not a craft to be hurried, and many people find the gentle pace very therapeutic.
And Finally...
Don’t worry if your animal doesn’t turn out exactly as the one in the photograph. The wonderful thing about needle-felting is that it is such an expressive craft; that each person brings their own touch, and no two styles are the same. There are no strict rules. Follow the patterns, try the techniques, but most important, have fun!
Needle-Felting Tools
Make sure you have all the tools and materials you need before you get started with needle-felting. With each pattern I recommend how many needles and what size to use for the best finish, but work with whatever you feel comfortable with.
Wool

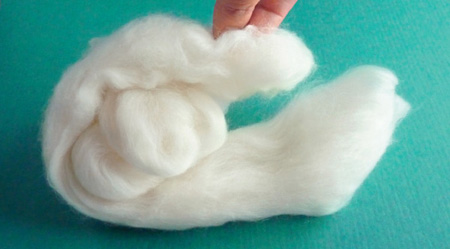
You can use any wool to needle-felt – coarser wools stick together more quickly, but I always use merino as it gives me the fine, tight finish I prefer. Roving (or tops, as it is also known) comes in long lengths that are usually about 4cm wide.
The measurements of wool that I give in the patterns are fairly precise, but don’t worry if you are a bit over or under; things usually turn out fine, I’ve found.
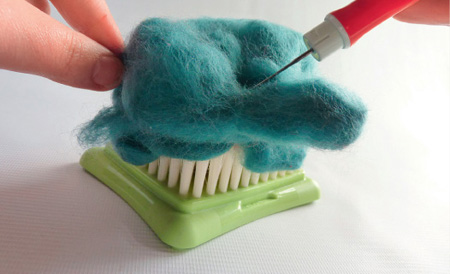
Felting Sponges and Mats
Always work on a protective sponge or brush mat, especially when beginning a piece of work. If you try needle-felting on your lap without a mat, you will stab yourself as well as your work, which is very painful! Felting sponges should be firm and tight-grained. If you are unsure whether needle-felting is for you, buy sponge for cheapness. For longevity, though, invest in a felting brush mat, which will last for years. I recommend covering the bristles with a thin, smooth textile covering, otherwise the wool sticks directly to the brush.

Needle Holders
There are all kinds of holders for needles. The one I use all the time is the pen holder because it holds the needles very close together, making it more efficient in matting the wool and better for small projects. Other kinds work well, too, and are preferable to simply holding a needle in your hand, which can cause cramps. The fitting end of all needles is the same (see the needles on the right in the photograph) and fits any holder.

Needles
Needles come in a variety of sizes and shapes: the larger the needle size, the finer it is. They range in size from very thick (size 32) to ultra fine (size 43). The needle stems can be cross-shaped, star-shaped, spiral or triangular (the most popular).
I don’t use many types of needle. The majority of my work is made with one or two size 40 triangular needles, though I also use sizes 42 and even 43 for surface finishing. While it’s tempting to try larger gauge needles for quickness, they are not as effective with fine wools such as merino. The really important thing to remember about any size of felting needle is that they are very sharp, so be careful when you are working! They are also very thin, so if you stab too hard or bend them too far, they will snap.
Extra Tools

I use all kinds of extra bits and pieces when working:
• Pliers for bending wire.
• Wire cutters.
• An awl, for so many things; I could not do without mine. Before adding ears to a head, I drill holes so that the ear sits more deeply in the wool. I also make little eye sockets before sewing in the eyes, so that they sit within the head instead of resting on the surface.
• A variety of needles for stitching.
• Long doll needles for thread jointing.
• Beading needles for sewing on seed beads.
• A pair of fine-tipped tweezers, mostly for picking out rogue-coloured fibres from whatever I’m working on.
• Scissors, small and large: I often use the large ones for shearing the fuzzy haze from my work in the final stages (see here).
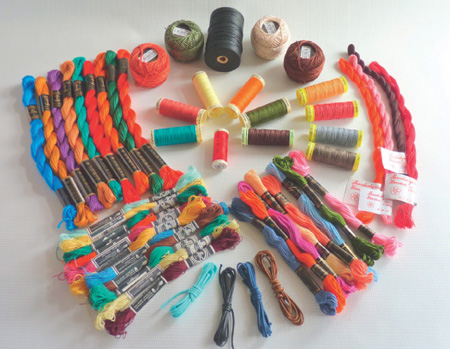
Threads
I can never have enough threads, as they are all so useful in their own particular ways. Look out for:
• Gutermann polyester threads, which are strong and useful for tying in eyes.
• Thick waxed cord in various colours for tails.
• Thick black cotton thread for noses.
• Sturdy cottons, which are good for thread jointing.
• Coarser linen threads, which are nice for simple rustic pattern stitching.
• Standard embroidery floss, pure silk threads and the vibrant cotton ‘Flower’ threads are all also great for a variety of decorative stitching.
• And my favourite, Anchor Pearl Cotton, has so many gorgeous colours for stylish embroidery and for making beautiful cords for dangles.
Beads and Findings
I like to have as wide a variety of beads as possible. On my larger pieces I usually use the traditional looped black ‘English’ glass eyes. They range in size from the very tiny (2mm) upwards, but black glass seed beads also make good eyes and I often use them on smaller projects. Jewellery findings, such as clips, dangles, brooches, or hat pins, are useful for adding different ways to use your creations.
Sketch Before you Stab
Before my workshop students begin needle-felting, I encourage them to do a little pre-sketch of what they want to make. This usually produces groans of ‘I can’t draw!’ But it only has to be the roughest of doodles. Drawing an idea not only gives a visual guide to the finished size, but also helps fix the image in your head as you work, making it easier to create the design you have imagined. I very rarely start a design in my hands – it usually starts on my sketchbook page. My stock of drawings is invaluable for storing ideas – every crafter should have one.


Repeated Elements
Needle-felting is really a form of free sculpture, but here are some tried and tested methods I’ve perfected over the years. These will help you achieve good results, whether follow the patterns or work on your own designs.
Joining Parts
Wool sticks to itself as you work, so joining is easy – no thread, no glue, just the wool itself and your needle. Here’s how to do it:
1 Loosely shape the arm or leg, leaving the fibres loose where it is to join the body.
2 Splay the loose fibres apart so that they spread evenly over the join area. You can use a spare needle to hold the limb to the body while you are working, then remove it once it is attached safely.
3 Finish shaping the wool so that it becomes a natural part of the body. You may have to add small amounts of extra wool to fill in awkward-looking gaps, but that is fine.

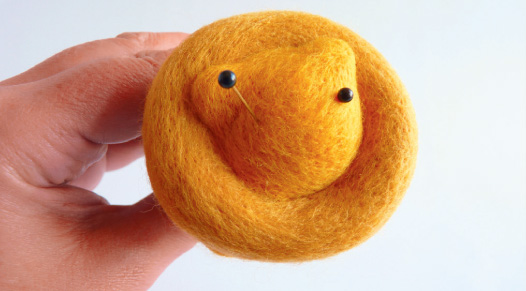
Attaching Eyes
I use a traditional toy maker’s method of sewing in eyes, which can be used with specialist looped glass eyes (commonly used for miniature teddy bears) or seed beads. A strong thread, such as that made by Gutermann, is best. Where possible, use a thread that matches the colour of the piece you are working on. Eyes are a vital part of your animal or bird and will instantly give it life. The size of the eye can change its character, so experiment with different sizes. The position of the eyes is also important, so before you actually sew them in, use a pair of black-headed pins to judge where the eyes are going to go and play around with them. Large, wide apart eyes give an innocent expression. Front-facing eyes are a sign of a hunting type of animal, whereas bird eyes are often small and on the sides of the head. Look at real creatures to see what a variety of eyes there are in the natural world.
Front-Facing Method
1 Using an awl, drill a hole where each eye is to go; this makes a little socket for it to sit in.
2 Thread each eye singly with a good length of strong cotton. Thread a long needle with the first eye, take the needle into a socket and bring it out behind the head, around the back of the neck. Draw it through, pulling the eye snug into the face.